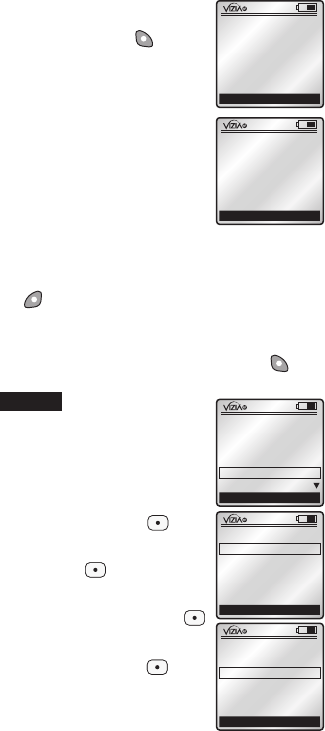
The RZCPG will prompt you to
stand within 3 feet of that controller.
Press the right soft key (YES)
to update your controller. NOTE:
It is important that you remain
within 3 ft. of the controller
you've selected from the list.
If you are unsure about which
controller you are updating
you can use the "Who Is"
command (see pg. 13).
Leviton controllers will blink
during the update process,
confirming you are updating
the correct controller. Update
only one controller at a time.
Once the RZCPG confirms UPDATE it will display
the updated node information. Press left soft
key (Return). Continue this process until all of
your controllers have been updated. Each time
you successfully update your controller it will be
removed from the list. Once all of your controllers
have been updated, press the right soft key to
continue to the NEXT STEP.
Create Areas
NOTE: The INSTALL
CHECKLIST screen will appear
with the selection box around
STEP 4 - Create Areas when
NEXT STEP is chosen from
STEP 2.
Press the center button to
bring up the AREA screen. With
<<
NEW
>>
selected press the
center button to bring up the
CREATE AREA screen. You
can now name your new area
by pressing the center button
(refer to TEXT EDITOR pg. 6).
Once you name your new area,
press the center button to
save the information and return
to the CREATE AREA screen.
x1
NO YES
UPDATE
Please stand within
3 ft from controller
and press YES
to continue
x1
Return
UPDATE
Node Updated!
Node ID #4
Room controller
STEP 4
x1
Cancel
CREATE AREA
Name: Area #1
Add Devices...
Save
8
x1
Back Next Step
AREA
<<
NEW
>>
x1
Back
INSTALL CHECKLIST
1. Include Dim/Swch
2. Include Controller
3. Update Controller
4. Create Areas
5. Set Associations
Next Step


