15
SETTING THE MENU (CONTINUED)
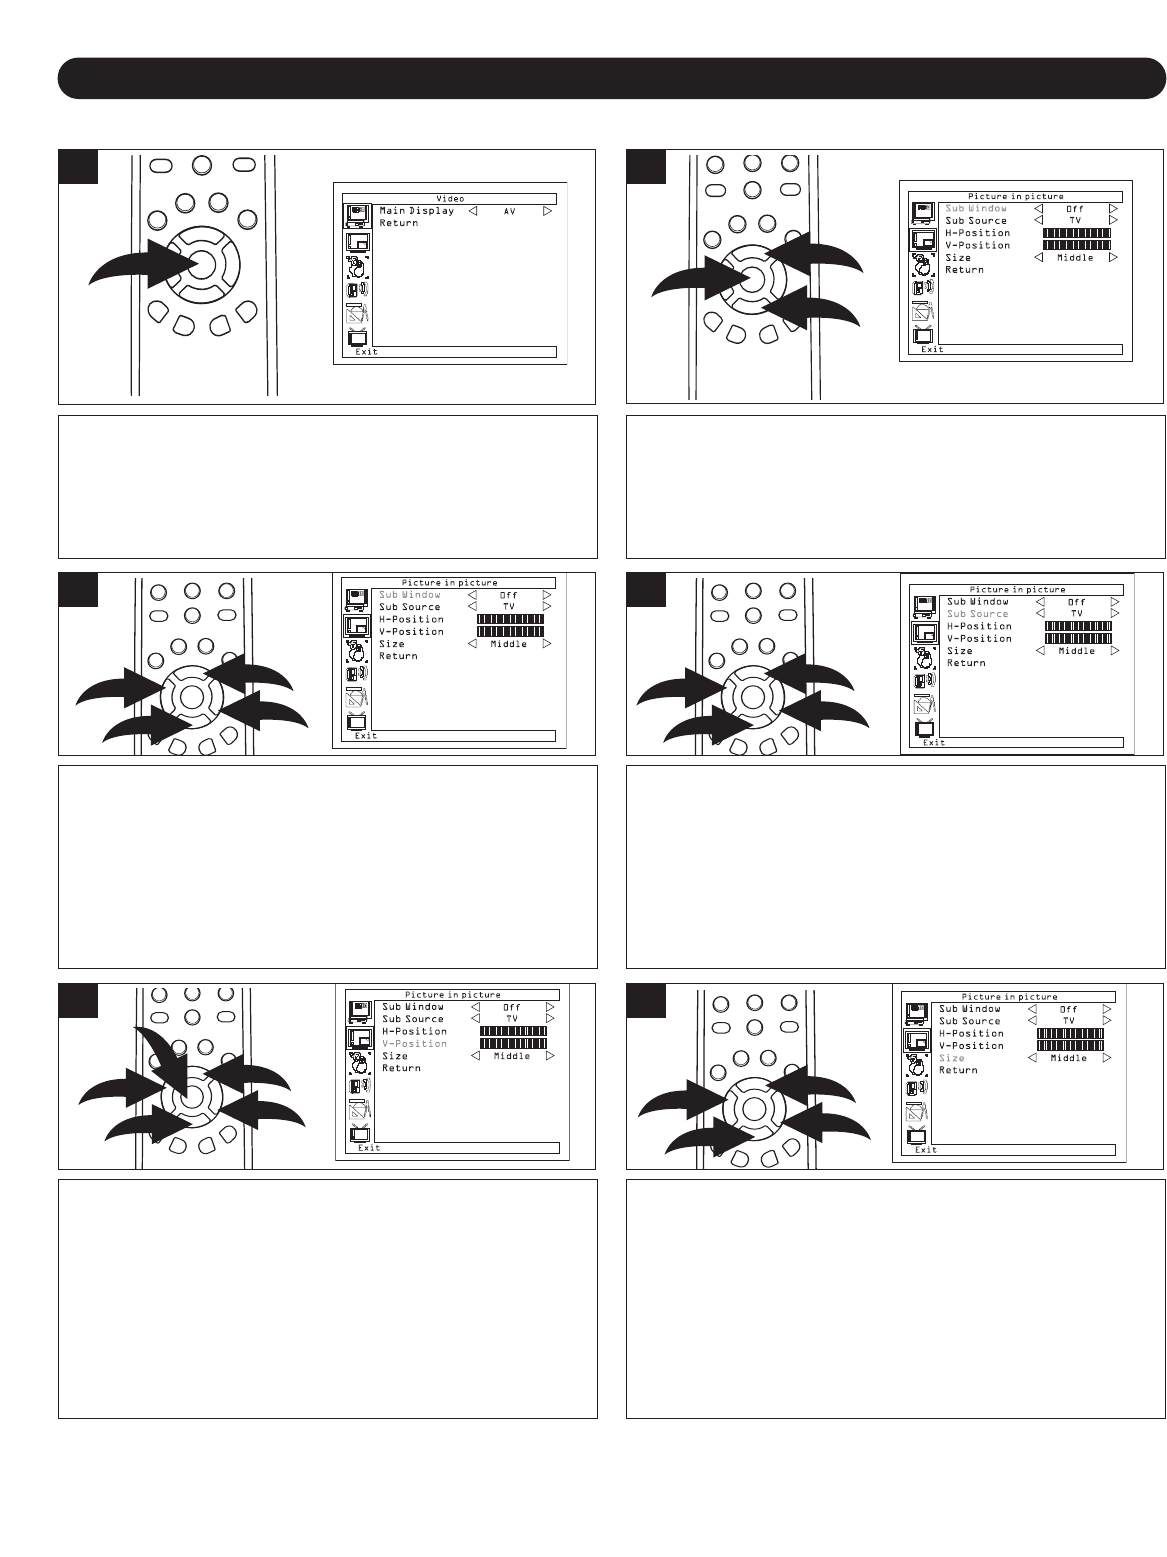
PICTURE IN PICTURE (You must have a VGA and another source connected)
Set the Video to PC as shown on previous page.
NOTE: You must select the Video mode to PC, otherwise,
the picture in picture function will not be able to operate.
Press the ENTER/MENU button; the Video Menu screen
will appear.
1
Press the CHANNEL/Navigation UP 1 or DOWN 2 button
to select PICTURE IN PICTURE, then press the
ENTER/MENU button 3 to select it.
2
Press the CHANNEL/Navigation UP 1 or DOWN 2 button
until SUBWINDOW is selected. Set the Sub Window to ON or
OFF using the VOLUME UP/Navigation Right
3 or VOLUME
DOWN/Navigation Left
4 button. Once you set On for the
subwindow, then you can set the other options in this menu.
Press the CHANNEL/Navigation UP 1 or DOWN 2 button
until SUB SOURCE is selected. Set the Source TV, AV or
SV(S-Video) using the VOLUME UP/Navigation Right
3 or
VOLUME DOWN/ Navigation Left 4 button.
NOTE: You can not select Component (YPbPr/YCbCr) for
the SUB SOURCE of picture-in-picture function.
4
Press the CHANNEL/Navigation UP 1 or DOWN 2 button until H-
POSITION is selected. Set the subwindow's Horizontal Position
using the VOLUME UP/Navigation Right
3 or VOLUME
DOWN/Navigation Left
4 button. When done, press the
ENTER/MENU button
5. Press the CHANNEL/Navigation UP 1
or DOWN 2 button until V-POSITION is selected. Set the
subwindow's V
ertical Position using the VOLUME UP/Navigation
Right
3 or VOLUME DOWN/Navigation Left 4 button. When
done, press the ENTER/MENU button
5.
5
Press the CHANNEL/Navigation UP 1 or DOWN 2 button
until SIZE is selected. Set the subwindow's size (Small or
Large) using the VOLUME UP/Navigation Right 3 or
VOLUME DOWN/Navigation Left 4 button.
6
3
TO EXIT THE MENU, press the CHANNEL UP or DOWN button until RETURN is selected, then press the ENTER/MENU
button to select another menu option. You can also press the FREEZE/EXIT MENU button to exit the menus completely at
any time.
