12 2. TV Setup
2. TV Setup 13
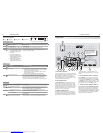
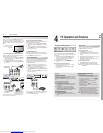
To lock the control-panel buttons, use the -
Lock > Control Panel menu, page 50.
To restrict TV use by channel, see - Setup >
Edit > Lock, page 43.
• Video Settings. Change video adjustments to
get the best picture for your viewing conditions.
See “AV Menu,” page 36.
Note: You may wish to change the Picture Mode from
the default Brilliant to either Bright or Natural,
which are suitable for most home viewing.
To program the remote control to operate A/V 2.
devices not under NetCommand control, see
Appendix C, “Programming the Remote Control.”
TV Care
• Lamp Cartridge. When the lamp cartridge
needs replacement, replace the lamp yourself
and save the cost of a service call. See
Appendix E for instructions.
• General Cleaning. See “Cleaning Recommen-
dations,” page 4.
Assistance
• Fortroubleshooting,service,andproduct
support, see Appendix D.
• Forwarrantyinformation,seetheTVwarranty
on page 84.
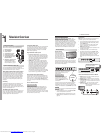
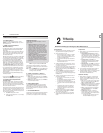
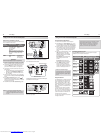
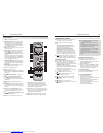
Installing the Remote Control Batteries
Remove the remote control’s back cover by gently
1.
pressing in the tab and lifting off the cover.
Load the batteries, making sure the polarities (+)
2.
and (-) are correct. For best results, insert the
negative (-) end first.
Snap the cover back in place.
3.
2
1
The remote
control requires
two AA alkaline
batteries.
Turning the TV On or Off
To turn the TV on or off, point the remote control
at the front of the TV and press the
POWER
button.
Alternatively, press the
POWER
button on the control
panel of the TV.
If You Turn Off the TV by Mistake
Press 1.
POWER
again within about 60 seconds,
while the lamp is still hot, to have the TV come
back on immediately.
If the 2.
LAMP
indicator starts blinking (about 60
seconds after you shut off power), wait a few
moments for the
LAMP
indicator to stop blinking
and press
POWER
to turn the TV on again.
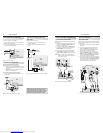
When You First Power On the TV
Choosing a Language for Menus
Power on the TV for the first time.
1.
Press
2.
to select either English or Spanish
for all menus. You can later change the language
selection through the Setup > Language menu
described on this page.
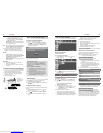
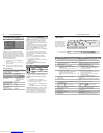
When you first power on the TV, the Welcome screen lets
you change the menu language.
Select a menu language in the Setup menu.
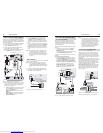
Memorizing Channels
For ANT 1 and ANT 2
To start channel memorization
With the
1.
Setup menu displayed, press to high-
light the Scan icon.
Start channel memorization from the Setup menu.
Press
2.
to highlight an input selection based on
your connections:
Input Condition
Ant 1 Air
Ant 2 Air
When connected to an indoor or
outdoor antenna
Ant 1 Cable
Ant 2 Cable
When connected to direct cable (no
cable box)
Press
3.
to highlight the on-screen START button.
Press
4.
ENTER
to start automatic channel memoriza-
tion.
To stop channel memorization before
completion, press
CANCEL
.
When memorization is complete you can:
5.
• Press
MENU
once to return to the top row of icons.
• Press
MENU
again to return to the Main menu.
• Press
EXIT
to watch TV.
After channels have been memorized:
• To tune to memorized channels, press
CH
/
while watching TV on the
ANT 1
or
ANT 2
inputs.
• UsetheSetup > Edit menu (page 43) for additional
channel options, such as adding or deleting chan-
Initial TV Setup, continued
nels from memory, naming channels, and saving
favorite channels in custom memory banks.
See chapter 5, “TV Menu Settings,” to:
• SettheTVclock(page44)
• SettheTVTimer(page45)
• SelectanEnergyModetomanagepowerusewhile
the TV is off (page 46)
• Selectalampbrightnessmode(page46)
• Enable3Dvideo(pages34and46)
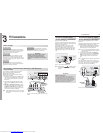
Setting Up TV Inputs
When You First Connect a Device
The TV’s Easy Connect™ Auto Input Sensing feature
detects most connections automatically.
Note: For connection and setup of a personal com-
puter, see the information on page 16.
Auto Input Sensing for Most Devices
When you first connect a device, the TV will:
a. Detect the connected device and automatically
switch to it
b. Prompt you to identify the device type
c. Prompt you to perform NetCommand set-up for
the device, if available (736 and 835 series only)
d. Repeat these steps for any additional newly
detected devices
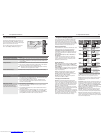
See below for connections which trigger Auto Input Sensing.
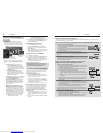
Auto Input Sensing Available
VIDEO
(detected as
composite video)
Y
plus
Pb
(detected as component video)
S-VIDEO
HDMI
*
USB
(USB photo port on front)
Auto Output Sensing
Available
DIGITAL AUDIO OUTPUT
AVR AUDIO OUTPUT
red jack
No Auto Sensing
ANT 1
and
ANT 2
*
If the device is powered off when connected, detec-
tion occurs when the device is next powered on.
Auto Input Sensing for CEC Devices
Most devices with CEC capabilities enabled are recog-
nized and identified automatically by the TV. This TV’s
NetCommand for HDMI feature (available on all models)
may allow you to control some or all functions of a CEC-
enabled device without further setup. See “NetCommand
for HDMI Devices,” page 28 and check the device’s
owner’s manual for instruction on enabling CEC.
Initial TV Setup
Use the Setup menu for basic TV setup options.
Press
1.
MENU
to open the Main menu.
Press
2.
to highlight the Setup icon and display the
Setup menu.
Changing the Menu Language
Choose to display on-screen menus in either English or
Spanish.
With the
1.
Setup menu displayed, press to high-
light the Language icon.
Press
2.
to highlight either English or Spanish.
Press
3.
MENU
to return the highlight to the top row of
icons.
Downloaded from www.Manualslib.com manuals search engine


