RQT8950
7
Control reference guide
Instructions for operations are generally described using the remote control.
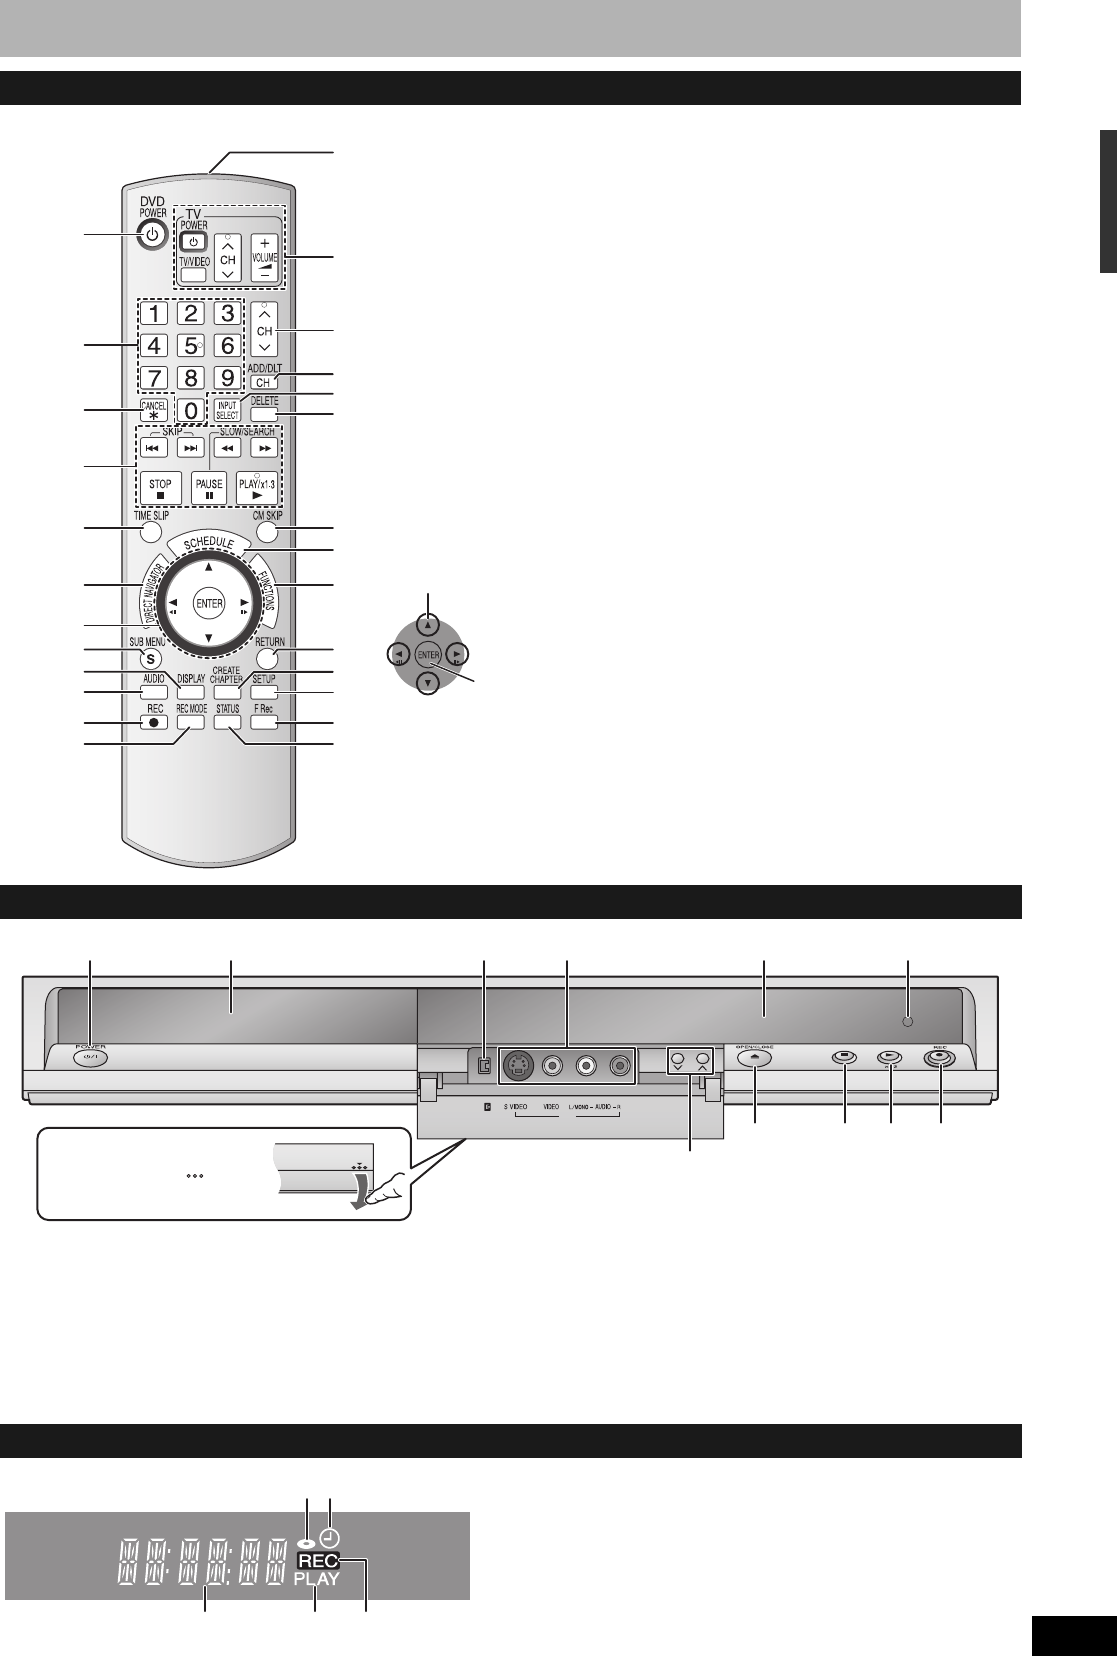
Remote control
1
bn
bo
bt
cm
cl
bq
bp
bs
br
3
5
8
bk
bl
9
ck
6
7
4
2
bm
cq
co
cp
cn
1 Turn the unit on (Ô page 12)
2 Select channels and title numbers, etc./
Enter numbers
3 Cancel
4 Basic operations for recording and play
5 Skip the specified time (Ô page 23)
6 Show Direct Navigator/Top menu
(Ô page 22, 24, 30)
7 Selection/Enter, Frame-by-frame
(Ô page 12, 23)
8 Show sub menu (Ô page 25, 30, 33)
9 Show on-screen menu (Ô page 27)
bk Select audio (Ô page 19, 23)
bl Start recording (Ô page 18)
bm Change recording mode (Ô page 18)
bn Remote control signal output
bo Television operations (Ô page 15)
bp Channel select (Ô page 18)
bq Add/delete channel (Ô page 13)
br Input select (IN1 or IN2 or DV)
bs Delete items (Ô page 29)
bt Skip a minute forward (Ô page 23)
ck Show scheduled recording list
(Ô page 20)
cl Show FUNCTIONS window
(Ô page 28)
cm Return to previous screen
cn Create chapters (Ô page 23)
co Show Setup menu (Ô page 14, 37)
cp Start Flexible Recording (Ô page 19)
cq Show status messages (Ô page 28)
n Using the cursor
• Select items on menu screens and set items.
This operation is also possible...
• Frame-by-frame (backward/forward):
While paused, press [wh] or [hq] (left/right)
Press up, down, left or right to select an item.
Press [ENTER] to confirm.
Main unit
The unit’s display
CH
IN2
DV IN
13
5
42 7
6 8 9
bk
bl
Opening the front panel
Press down on the part
with your finger.
1 POWER button (POWER 8) (Ô page 12)
Press to switch the unit from on to standby mode or vice versa. In
standby mode, the unit is still consuming a small amount of power.
2 Disc tray (Ô page 18)
3 Connector for a digital video (DV) camcorder (Ô page 34)
4 Connectors for external equipment (Ô page 34)
5 Channel select (Ô page 18)
6 Open/close disc tray (Ô page 18)
7 Display (Ô below)
8 Stop (Ô page 18, 23)
9 Start play (Ô page 22)
bk Remote control signal sensor
bl Start recording (Ô page 18)/
Specify the time to stop recording (Ô page 19)
1
354
2
1 Disc indicator
• This indicator lights up when a disc that is supported by this
unit is inserted.
2 Scheduled recording indicator
3 Main display section
4 Playing indicator
5 Recording indicator
The remote control information/Disc handling/Unit care/Control reference guide


