17
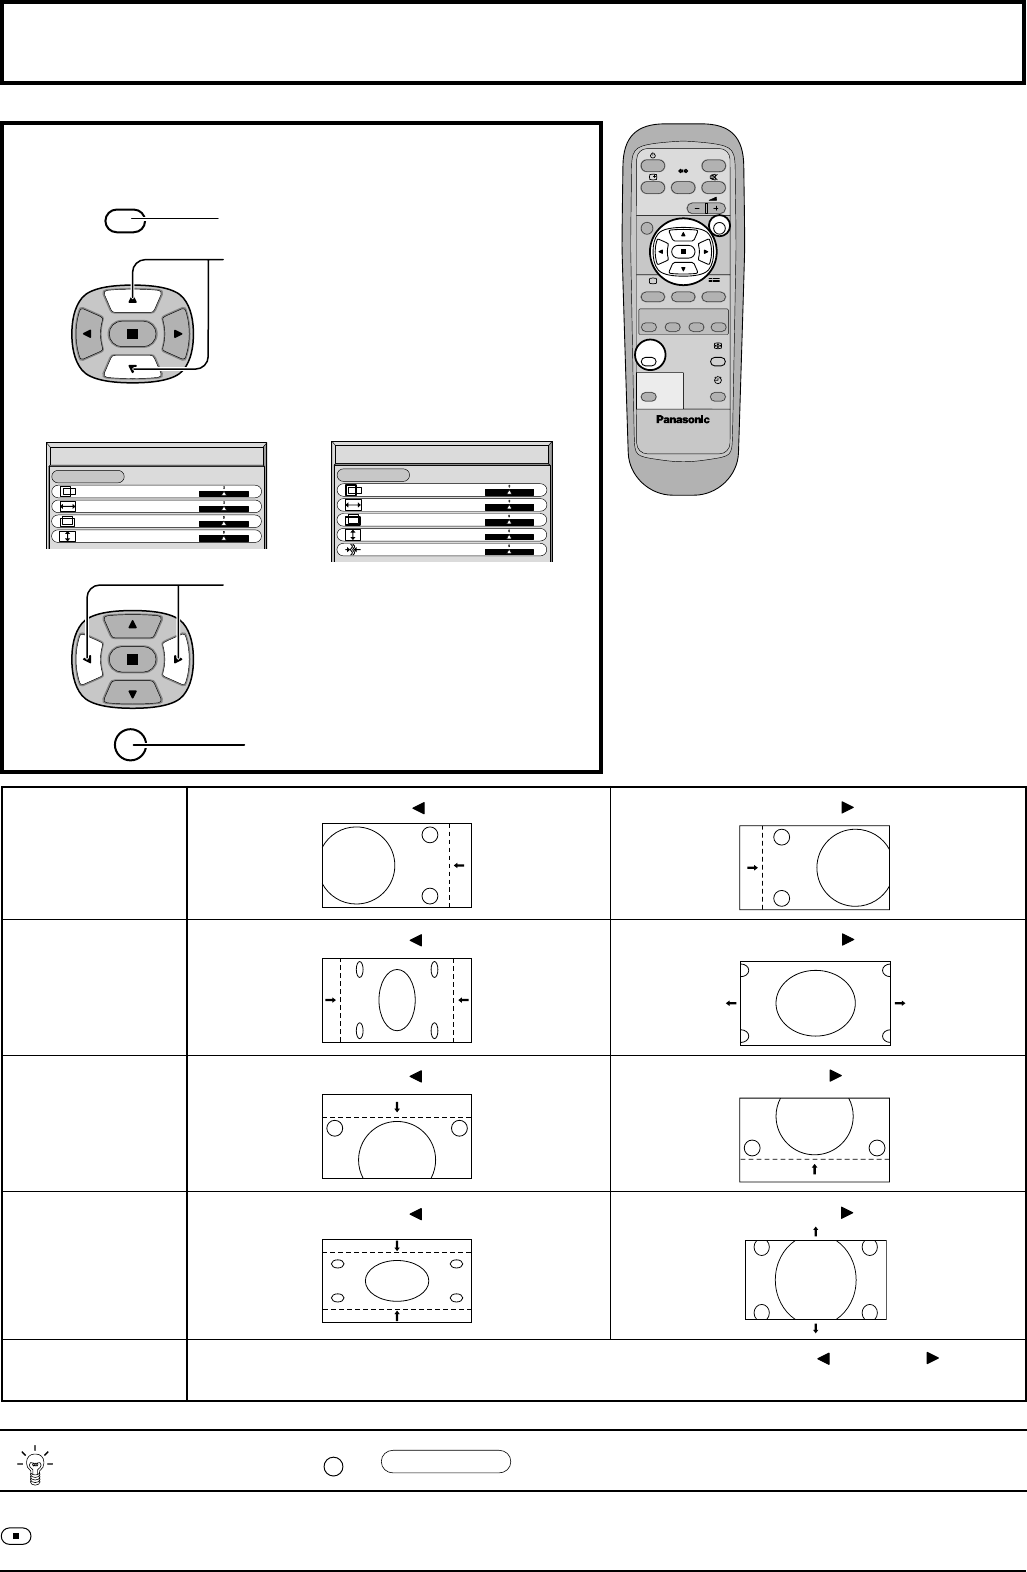
Adjusting Picture Pos./Size
Adjusting screen
1
Press to display the Picture Pos./Size menu.
Press to adjust Pos./Size.
Press to exit from adjust mode.
Press to select H-Pos/H-Size/V-Pos/V-
Size/Clock Phase.
During “AV(S Video)” and
“Component” input signal.
During “RGB/PC” and
“DVI” input signal.
3
2
Normal
Picture Pos./Size
Normalise
H-Pos
H-Size
V-Pos
V-Size
Normal
Picture Pos./Size
Normalise
H-Pos
H-Size
V-Pos
V-Size
Clock Phase
R
PICTURE
POS. /SIZE
H-Pos
H-Size
V-Pos
V-Size
Flickering and distortion can be eliminated by using the Position Left
“ ”
or Right
“ ”
button
to carry out adjustment.
Helpful Hint ( /
Normalise
Normalisation)
While the Picture Pos./Size display is active, if either the N button on the remote control is pressed at any time or the
(ACTION button) is pressed during “Normalise”, then all adjustment values are returned to the factory settings.
N
Clock Phase
(RGB/PC in Mode)
When the Position Left
“ ”
button is pressed.
When the Position Left
“ ”
button is pressed
When the Position Left
“ ”
button is pressed.
When the Position Left
“ ”
button is pressed.
When the Position Right
“ ”
button is pressed
When the Position Right
“ ”
button is pressed.
When the Position Right
“ ”
button is pressed.
When the Position Right
“ ”
button is pressed.
Notes:
(1) Adjustment details are
memorized separately for
different input signal
formats (Adjustments for component
signals are memorized for 525 (480) / 60i
· 60p, 625 (575) / 50i · 50p, 1125 (1080) /
60i · 50i · 24p· 24sF, 1250 (1080) / 50i,
750 (720) / 60p · 50p each, and RGB/PC/
DVI signals are memorized for each
frequency.)
(2) If a “Cue” or “Rew” signal from a VCR or
DVD player is received, the picture
position will shift up or down. This picture
position movement cannot be controlled
by the Picture Pos./Size function.
PLASMA DISPLAY
N R
INPUT
SURROUND
VOL
PICTURE
SOUND
SET UP
ASPECT
PICTURE
POS. /SIZE
OFF TIMER
PC
MULTI
PIP
SWAP SELECT MOVE


