


Pelco Manual C680M-G (7/01) 11
ALARM OUTPUT MENU
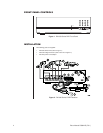
The ALARM output on the rear panel is a single-pole, normally open, latching, dry contact.
This output can be used to notify you if there has been an alarm event that might require
review. The alarm output can be enabled or disabled (armed/disarmed) manually, or it can
be programmed to enable (arm) or disable (disarm) at the same time automatically every
day.
If the output is enabled and an alarm input is activated, the output relay will latch closed af-
ter a 20-second delay and will remain closed until it is manually disabled. The 20-second
delay allows you to enter your premises and disable the alarm output before it is activated.
The alarm output menu is used to set up automatic arming and disarming of the relay at
specified times each day. (For manual operation, refer to
Alarm Relay Output Operation
in
the
Operation
section.) This feature may be used in conjunction with the event recording
capabilities of the DX1000 to notify you that an alarm event was recorded.
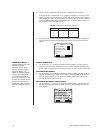
Application example:
A company has a rear door that is not to be opened for any reason between 5 p.m. and 7
a.m. During the day, the area around this door is recorded continuously, but to conserve
disk space, the area is only recorded at night if the door is opened. The owner does not
want to review the video unless the door was opened after hours.
In this case, the alarm output would be programmed to enable at 5 p.m. and disable at 7 a.m.
The DX1000 would also be programmed for automatic (continuous) recording from 7 a.m. to
5 p.m. and event recording from 5 p.m. to 7 a.m. (refer to
Camera Menu
in the
Programming
section).
At 5 p.m. continuous recording would cease. If an alarm input is activated, the DVR would
immediately begin recording the associated camera. The relay would latch closed after the
20-second delay. When the owner returned in the morning, a light attached to the relay
output would be on, indicating that there was an alarm during the night. A search for re-
corded video starting at 5 p.m. would immediately take you to the first alarm event. All
other events could be reviewed in sequence.
To program the relay for automatic arming/disarming:
Skip steps 1 and 2 if you are already in the Setup Menu.
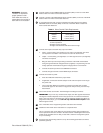
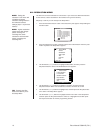
1. Press and hold the Function button. The Function Key List appears. Keep holding the
Function button.
NOTE:
The alarm output
programming does not
affect recording. It only
affects the operation of the
alarm output relay. For
event (alarm) recording,
refer to
Recording
in the
Operation
section.
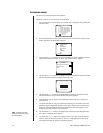
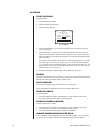
FUNCTION KEY LIST
0 : Setup
1 : Camera 1 recording/stop
2 : Camera 2 recording/stop
3 : Camera 3 recording/stop
4 : Camera 4 recording/stop
5 : All the cameras recording
6 : All the cameras stop
: Alarm On
: Alarm Off
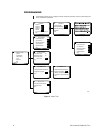
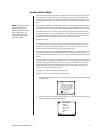
SETUP MENU
Camera
All Resolution
Alarm Output
Time
Password
Exit
Help: ON
2. Press and release the 0 button, and then release the Function button. Enter the pass-
word if requested. The Setup Menu appears.