Pelco Manual C682M-E (11/01) 25
REGISTERED SITE SETUP
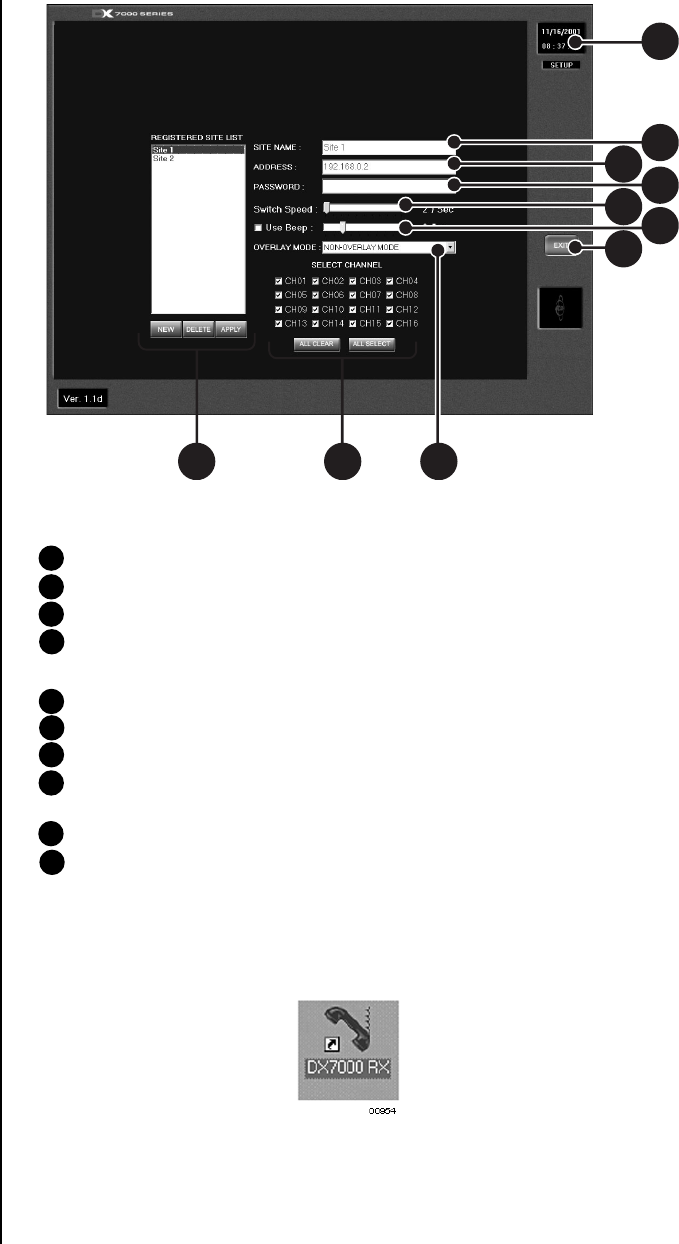
Figure 18. Setup Screen
1 Date and Time Indicator – Displays current date and time.
2 SITE NAME – Enters the name of the site.
3 ADDRESS – Inputs the IP address or phone number of site.
4 PASSWORD – Use only if the DX7000 registered site is CLIENT USER password
protected. The password must be the same as the registered site password for
CLIENT USER.
5 SWITCH SPEED (Sequencing speed) – Set the sequencing time between cameras.
6 USE BEEP – Beeps when Motion is detected.
7 EXIT – Exits setup screen.
8 OVERLAY MODE – Select NON-OVERLAY MODE if your PC video card does not
support multi-layering.
9 SELECT CHANNEL – Selects cameras to view.
10 REGISTERED SITE LIST – Creates a new registered site or deletes a registered
site from the list.
To setup a registered site:
1. Start Windows 98 or Windows 2000.
2. Click on the icon for the DX7000 Remote Client Software.
3. Click the SETUP button.
4. At the bottom of the REGISTERED SITE LIST, press NEW.
5. Input the site name, IP address or phone number, and client password.
6. Check the desired cameras to be displayed.
7. Click the APPLY button.
8. Click the EXIT button to finish setup.
1
9
5
6
2
3
4
7
10 8
