


5
TSU9400 Starter’s Guide
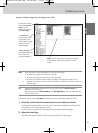
Preparing for Configuration
Charging the Control Panel
It is advised to charge the Control Panel to its maximum before you start configuring it. This can
take up to 3 or 4 hours.
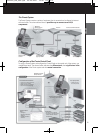
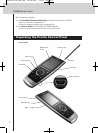
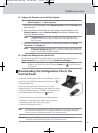
1 Activate the Control Panel by switching the Power switch
on the left side of the Control Panel to ‘1’.
2 Place the Control Panel in the docking station.
The docking station glows when it is powered.
A red Charging LED on the front of the docking station
lights up while the Control Panel is charging.
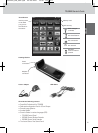
Installing ProntoEdit Professional
In the box you find a CD with which you install ProntoEdit Professional for TSU9400. You can also
check for updates on http://www.pronto.philips.com in the Downloads section (PC Software).
Insert the CD in the PC and follow the on screen instructions to install the editor.
Notes You can install ProntoEdit Professional for TSU9400 together with other Philips Pronto
editors. The files of ProntoEdit Professional are automatically placed in a separate directory.
If you want to update ProntoEdit Professional and you have inserted personal images in the
Gallery, you can make a back up of the gallery. You will be noted to do so in the installation
wizard.
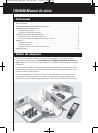
Configuring the Pronto Control Panel
Customizing the Configuration File
By default, a demonstration configuration file is installed on your Control Panel (demo.xcf).
During the installation of the editor, two versions of this demonstration configuration file
were also saved on your PC: a European version that is customized with European A/V equipment
and a US version with equipment for US.
You can use this configuration file for demonstration or you can start from this file to adjust it to
every customer’s needs and create a custom configuration file.
• The files contain the 11 most used activities and their related A/V components.
• They are ready to use. The configuration files contain different activity macros, which comprise
a sequence of actions to start an activity.
• All links and jumps are already installed.
TSU9400_INS_ESF.qxd 05-06-2007 14:23 Pagina 8