


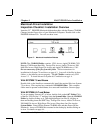
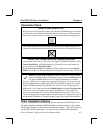


Macintosh Driver Installation
Inspection Checklist / Installation Overview
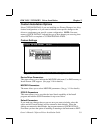
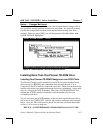
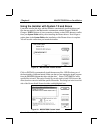
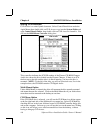
Insert the 3.5” PIONEER Macintosh diskette that ships with the Pioneer CD-ROM
Changer into the floppy drive of your Macintosh Computer. Double click on the
PIONEER diskette icon. You will see these icons:
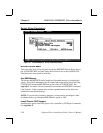
NOTE: The CD-ROM Folder contains: CLD Access, Apple CD-ROM, CLD
Remote, CLD Remote Read Me, Foreign File Access, Audio CD Access, ISO
9660 File Access, High Sierra File Access and Apple CD-ROM driver v 5.0.1.
Do not remove any of the files from this folder. Follow instructions for
installation for System 7.0 and above on page 4-3. Leave all of the files in these
folders, so the installer can run properly. The 6.0.7 Folder contains only CLD
Access 1.2. To install drivers for System 6.0.7 and below see pg 4-4.
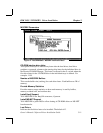
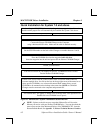
With SYSTEM 7.0 and Above
Double click on the Installer to automatically install the required files into System
7.0 or above. Files required are contained in CD-ROM Folder. This complete
folder must be present on the diskette, for a successful installation. See next page.
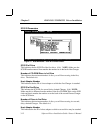
With SYSTEM 6.0.7 and Below
If you are running System 6.0.7 or below, double click on the 6.0.7 Folder. Click
on the file “CLD Access 1.2” and drag it into the System Folder. Open the CD-ROM
Folder by double clicking on it. Then highlight these four files by clicking on
them and holding down the SHIFT key: Foreign File Access, Audio CD Access,
ISO 9660 File Access, High Sierra File Access. Drag these four files into the
System Folder. Power-ON the Pioneer CD-ROM drive and then Power-ON the
Macintosh. Access a CD-ROM disc mounted on the desktop by double clicking on
its icon. For details see page 4-4.
Chapter 4 MACINTOSH Driver Installation
Owner’s Manual / Software Driver Installation Guide 4-1
Figure 17 - Macintosh Installation Diskette