


27
PRO-1000HDI / PRO-800HDI
Display Panel Adjustments
Display Panel Adjustments
Adjusting the Picture Quality
Note
Make these adjustments for each input (INPUT1 to INPUT5) and
signals.
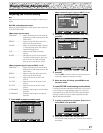
PICTURE mode adjustment items
Below are brief descriptions of the options that can be set
in the PICTURE mode.
[When video signal is input]
CONTRAST ············· Adjust according to the surrounding
brightness so that the picture can be
seen clearly.
BRIGHT. ·················· Adjust so that the dark parts of the
picture can be seen clearly.
COLOR···················· Adjust to the desired depth. (Setting
to a slightly deep color will create a
natural looking picture.)
TINT························· Adjust so that flesh tones look
normal.
SHARP ···················· Normally set to the center position.
To create a softer picture, set to the
left of center. To create a sharper
picture, set to the right of center.
[When computer signal is input to INPUT 1 or 2]
CONTRAST ············· Adjust according to the surrounding
brightness so that the picture can be
seen clearly.
BRIGHT. ·················· Adjust so that the dark parts of the
picture can be seen clearly.
R. LEVEL ················· Adjust the amount of red in the
picture.
G. LEVEL ················· Adjust the amount of green in the
picture.
B. LEVEL ················· Adjust the amount of blue in the
picture.
H. ENHANCE··········· Sharpens the image in the horizontal
direction.
V. ENHANCE ··········· Sharpens the image in the vertical
direction.
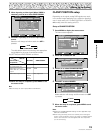
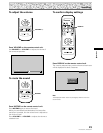
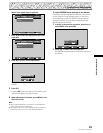
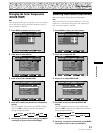
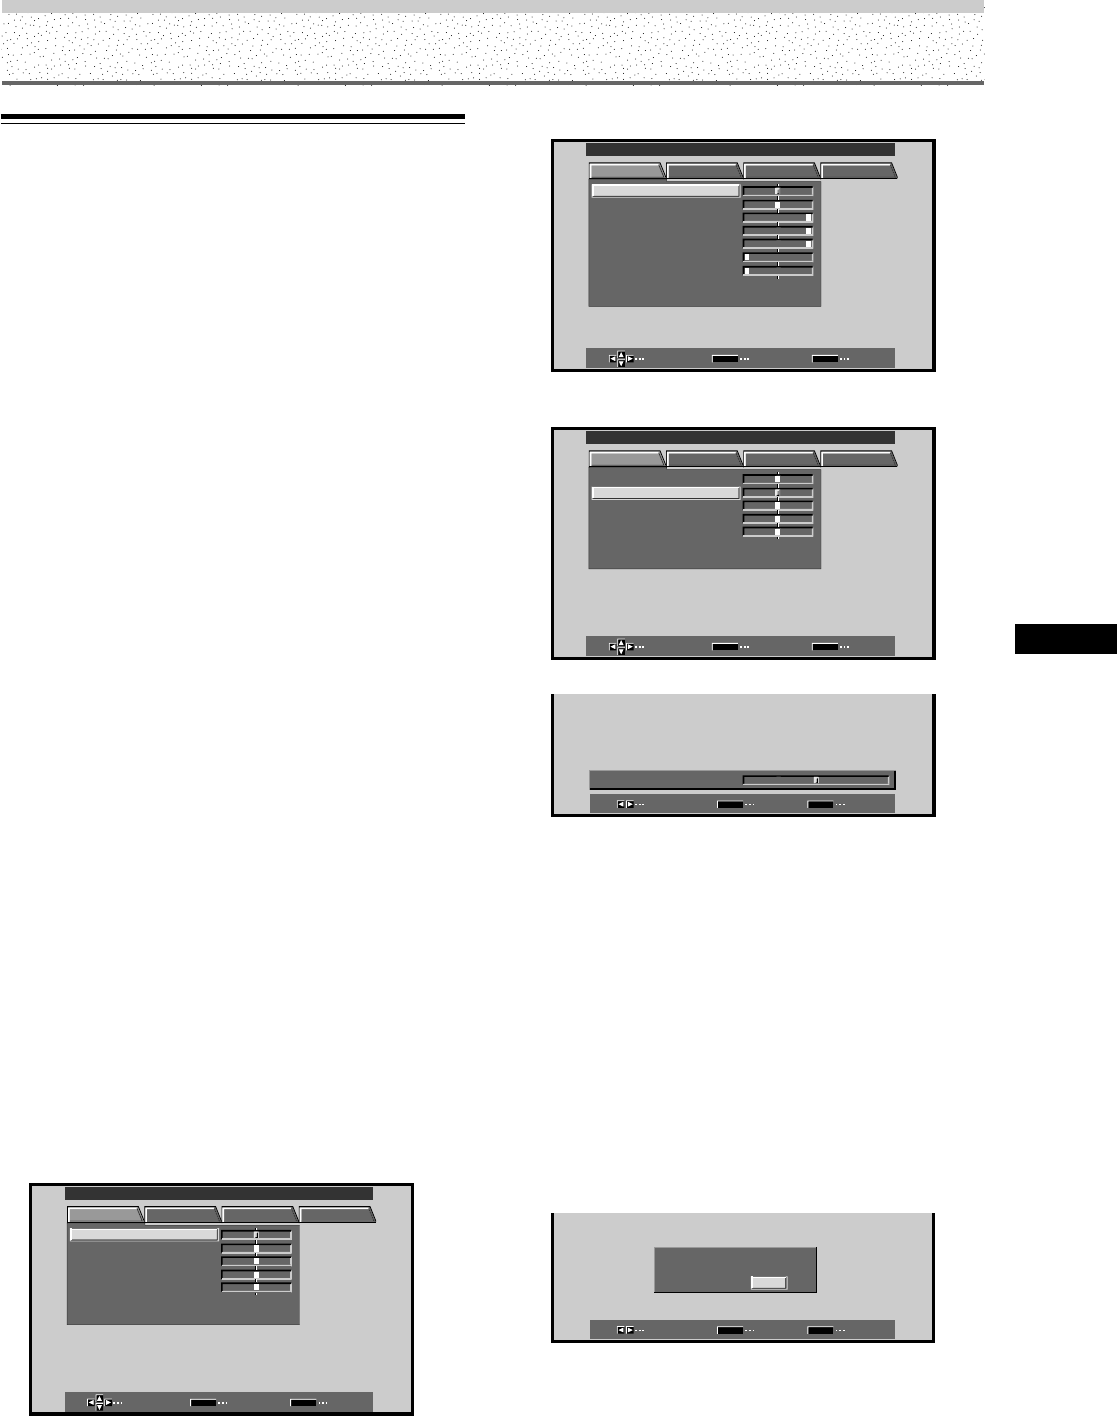
1 Press MENU to display the menu screen.
RSETE
SELECT ENTER EXIT
SET
MENU
:
0
CONTRAST
:
0
BR IGHT.
:
0
COLOR
:
0
TINT
:
0
SHARP
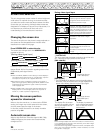
MAIN MENU INPUT1
PICTURE SCREEN SET UP OPTION
[When computer signal is input to INPUT 1 or 2]
MAIN MENU INPUT1
SELECT ENTER EXIT
SET
MENU
PICTURE SCREEN SET UP OPTION
:
0
:
6
+
+
+
0
:
60
:
60
:
0
:
0
CONTRAST
:
0
BR
RLEVEL
IGHT.
.
GLEVEL.
BLEVEL.
H ENHANCE.
V ENHANCE.
RSETE
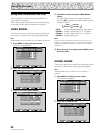
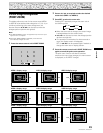
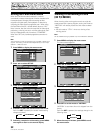
2 Press 5/∞ to select the adjustment item, then
press SET.
RSETE
SELECT ENTER EXIT
SET
MENU
BRIGHT.
COLOR
TINT
SHARP
:
0
:
0
:
0
:
0
CONTRAST
:
0
MAIN MENU INPUT1
PICTURE SCREEN SET UP OPTION
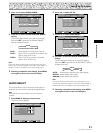
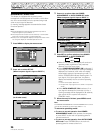
3 Press 2/3 to adjust the picture quality as desired.
ADJUST SET EXIT
SET
MENU
:
0
BRIGHT.
4 Press SET.
Pressing SET writes the value into the memory and
returns the display to the step 2 screen.
5 When the setup is finished, press MENU to exit
the menu screen.
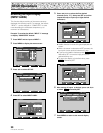
To reset PICTURE mode settings to the default
If settings have been adjusted excessively or the picture
on the screen no longer appears natural, it may prove
more beneficial to reset the PICTURE mode to default
settings instead of trying to make adjustments under
already adjusted conditions.
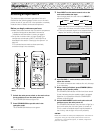
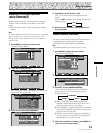
1 In step 2 in the previous procedure, press 5/∞ to
select RESET, then press SET.
SELECT SET EXIT
SET
MENU
PICTURE RESE
YE
S
T?
NO
2 Press 2/3 to select YES, and press SET.
All PICTURE mode settings are returned to the factory
set default.