chapter 1 11
Connections and Setup
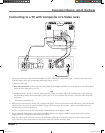
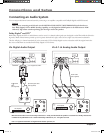
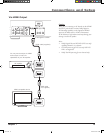
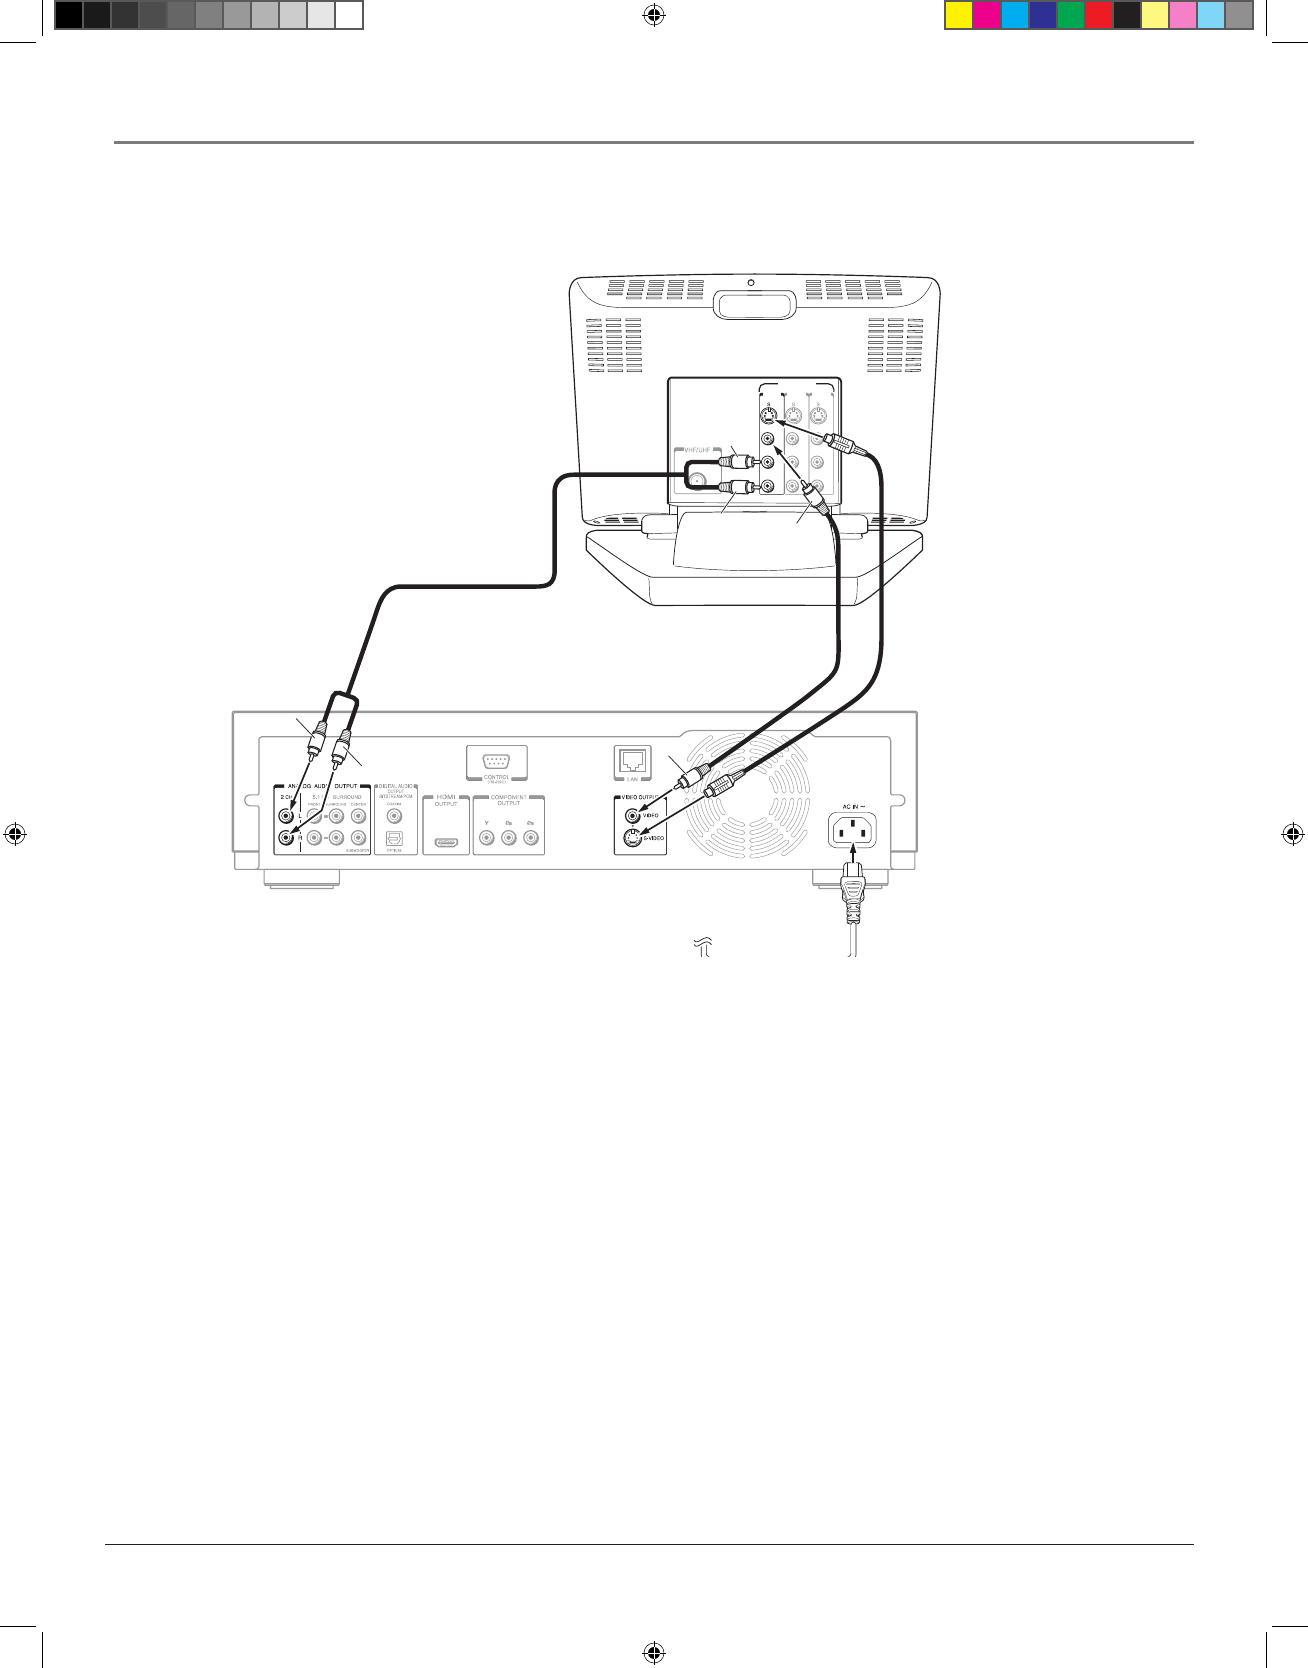
1. Connect the audio cables to the ANALOG AUDIO OUTPUT 2CH L (left – white) and R (right – red) jacks on the back of your
HD DVD Player, and to the corresponding Audio Input jacks on your TV.
2. Connect the video cable.
• Basic video connection – Connect the video cable (yellow) to the VIDEO OUTPUT jack on the back of your HD DVD Player,
and to the Video Input jack on your TV.
OR
• S-Video (optional) – If your TV has an S-Video Input jack, connect an S-Video cable to the S-VIDEO jack on the back of your
HD DVD Player and to the S-Video INPUT jack on your TV. If your TV doesn’t have S-Video, use the basic video connection
listed above.
3. Turn on the unit and Your TV.
4. When you turn the unit on for the first time, a setting menu appears. Use the arrow buttons and the OK button to select the General
option, and then the Clock Set option (for details, see page 32). Set the proper time and date. When you are finished, press the
SETUP button to exit the menu system.
5. Press the V. OUPUT button on the remote until the HDMI indicator on the display is OFF.
6. Press the RESOLUTION button on the remote until 480i is shown on the display. If 1080i or 720p is selected, video can’t be
displayed from the S-VIDEO jack and VIDEO jack (yellow).
Note: Your cable or off-air connection to the television should not be affected by this connection. Connect your cable or off-air antenna
to your television as you normally would. You may need to consult your television manual for details.
INPUT
INPUT
(FROM ANTENNA)
INPUT
VIDEO INPUT
INPUT
White
Yellow
Red
White
Red
Yellow
VIDEO VIDEO VIDEO
L L L
AUDIO AUDIO AUDIO
R R R
S-video cable
(not supplied)
Video cable
(supplied)
Audio cable (supplied)
Connecting to a TV with Composite or S-Video Jacks
s&c1.indd 11 3/15/06 10:17:24 AM


