


7
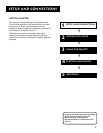
Setup and Connections
Sample Connections
The following are sample connection scenarios which you may encounter
when connecting components to your TV.
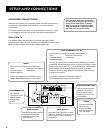
Cables
You will use the following cable to make your connection:
Coaxial Cables: Carries the signal from the
antenna or cable directly to the television or
through a cable box, as needed by your cable
system.
Audio/Video Cables: Carries sound and video
from the component to the TV.
S-Video Cable: Carries video from an S-Video
capable component which provides best
picture quality.
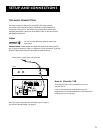
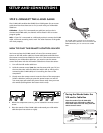
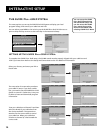
TV and Stereo VCR
VCR
TV
VIDEO
OUT
IN FROM ANT
OUT TO TV
CH3
CH4
R
AUDIO
L
IN
RL
G-LINK
P
R
P
B
Y
CABLE, CABLE BOX, OR ANTENNA
Once you have completed this connection go to “Step 3:
Connect the G-LINK Cable” on page 9.
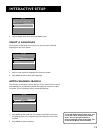
Cautions:
Position cables to Avoid Audio Hum
or Interference
• Insert all cables firmly into jacks.
• Place the audio/video cables to the
sides of the TV’s back panel instead of
straight down the middle.
• Try not to coil any twin-lead cables and
keep them away from the audio/video
cables.
Protect your components from
Overheating
• Do not block ventilation holes in any of
the components. Arrange the
components so that air can circulate
freely.
• Do not stack components.
• Allow adequate ventilation when
placing your components in a stand.
• Place an amplifier on the top shelf of
the stand so heated air rising from it
will not flow around other
components.
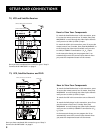
How to View Your VCR
To watch the VCR in this connection, press TV to put the
remote control into TV mode, then press WHO•INPUT to
scroll through the video input channels until you tune to
VID1 input.
In the Interactive Setup section you can program the TV to
automatically tune to the VID1 input channel when you
press VCR1 on the remote.
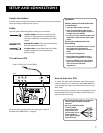
Most Audio/Video cables are combined
into one cable with three heads on
each end.
We show individual cables
in these sample
connections. Either
may be used, but
you must be sure to
connect Video to
Video, Right to Right
and Left to Left.
Video (yellow)
Right Audio (red)
Left Audio (white)