9
English
Using the SCART Connector
If you have the European version of the
RDV-1050 and your TV has a SCART connec-
tor you can use a SCART cable for stereo audio
and video connections. See the following sec-
tion for information on setting the Video Sig-
nal Selector Switches.
NOTE: The SCART connector cannot out-
put a progressive scan signal.
Video Signal
Selector Switches
US Version
NTSC/PAL Output Signal
Selector Switch
Set to NTSC for television sets in North
America. Set to PAL for television sets in Eu-
rope.
Remote/PSCN/INTL Output
Signal Selector Switch
Set this switch to "INTL" (Interlace Scan mode)
for normal TV. Set it to "PSCN" (Progressive
Scan mode) for HDTV. The Progressive Scan
mode produces a picture with less flicker than
the Interlaced Scan mode. If you want to se-
lect the scanning mode with the RR-DV96 re-
mote control, set the switch to REMOTE.
NOTES: The setting of this switch should be
changed only when the RDV-1050 is in Stop
mode or when no disc is loaded.
Some progressive scan TV sets and HDTV
sets are not fully compatible with the
RDV-1050.
To change the Interlace/Progressive scanning
setting with the RR-DV96 the RDV-1050 must
be turned on. Then press and hold PROG/VFP
button
26
for a few seconds.
NOTE: The Progressive setting can be
used with NTSC (North American) and
PAL (European) TV sets, but only when
connected via the Component Video out-
puts.
European Version
Remote/NTSC/PAL Output
Signal Selector Switch
Set this switch to PAL or NTSC to match the
other components of your system. If you want
select the scanning mode with the RR-DV96
remote control, set the switch to REMOTE.
NOTES: The setting of this switch should be
changed only when the RDV-1050 is in Stop
mode or when no disc is loaded.
When the NTSC mode is selected the NTSC
indicator shows in the display window.
To select the PAL/NTSC setting with the
RR-DV96 the RDV-1050 must be turned on.
Then press and hold PAL/NTSC button
36
for
a few seconds.
RGB/COMP – Y/C Selector
Switch
This switch is used to select the video output
signal when you use the SCART connector to
connect the RDV-1050 to the TV. If your TV has
an RGB or Composite input, set the switch to
the RGB/COMP position. If your TV has S-Video
inputs, set the switch to the Y/C position.
NOTES: When the SCART connector is
used set the Video Output Selector switch
to the PAL position
When you want a Progressive Scan out-
put signal set the Video Output Selector
switch to the Remote position and use the
Component Video outputs .
Connecting the Power Cord
AC Input
Your RDV-1050 is configured at the factory
for the proper AC line voltage in the country
where you purchased it (USA: 115 volts/60Hz
AC or CE: 230 volts/50Hz AC). The AC line
configuration is noted on a decal on the back
of your unit.
After all the audio/video connections have
been made, plug the supplied power cord into
the AC INPUT receptacle on the back of the
unit. Then insert the power plug into an AC
wall outlet. The STANDBY indicator lights and
setup is complete. Note that a small amount
of power (2 watts) is always used while the
power cord is connected to the wall outlet.
Observe the following precautions:
• Do not connect or disconnect the power cord
with wet hands.
• Disconnect the power cord if you are not
going to use the unit for a long time.
• When unplugging the player from the wall
outlet, always pull the plug, not the power
cord.
• Disconnect the power cord before clean-
ing the unit.
• Disconnect the power cord before moving
the unit.
• Do not damage, alter, twist or pull the power
cord. This may damage the cord and cause
fire, electric shock, or other accidents. Con-
tact your authorized Rotel dealer and get
a new power cord if the cord is damaged.
• Do not put anything heavy, on the unit, or
the power cord, as this may cause fire, elec-
tric shock, or other accidents.
RR-DV96 Remote Control
Installing the Batteries
The battery compartment is located on the back
of the remote control unit.
1 Press down on
the point shown
by the arrow at
the top of the
compartment
cover, and pull
up the cover.
2 Place two R6P (SUM-3)/
AA(15F) batteries in the
remote control according
to the polarity markings
(“+” and “–”) inside the
compartment and on the
batteries.
3 Place the cover
over the com-
partment,
and press
down lightly.
The batteries will last
about six months with normal use. If the func-
tions of the remote control become erratic, re-
place the batteries.
32
RDV-1050 DVD Player
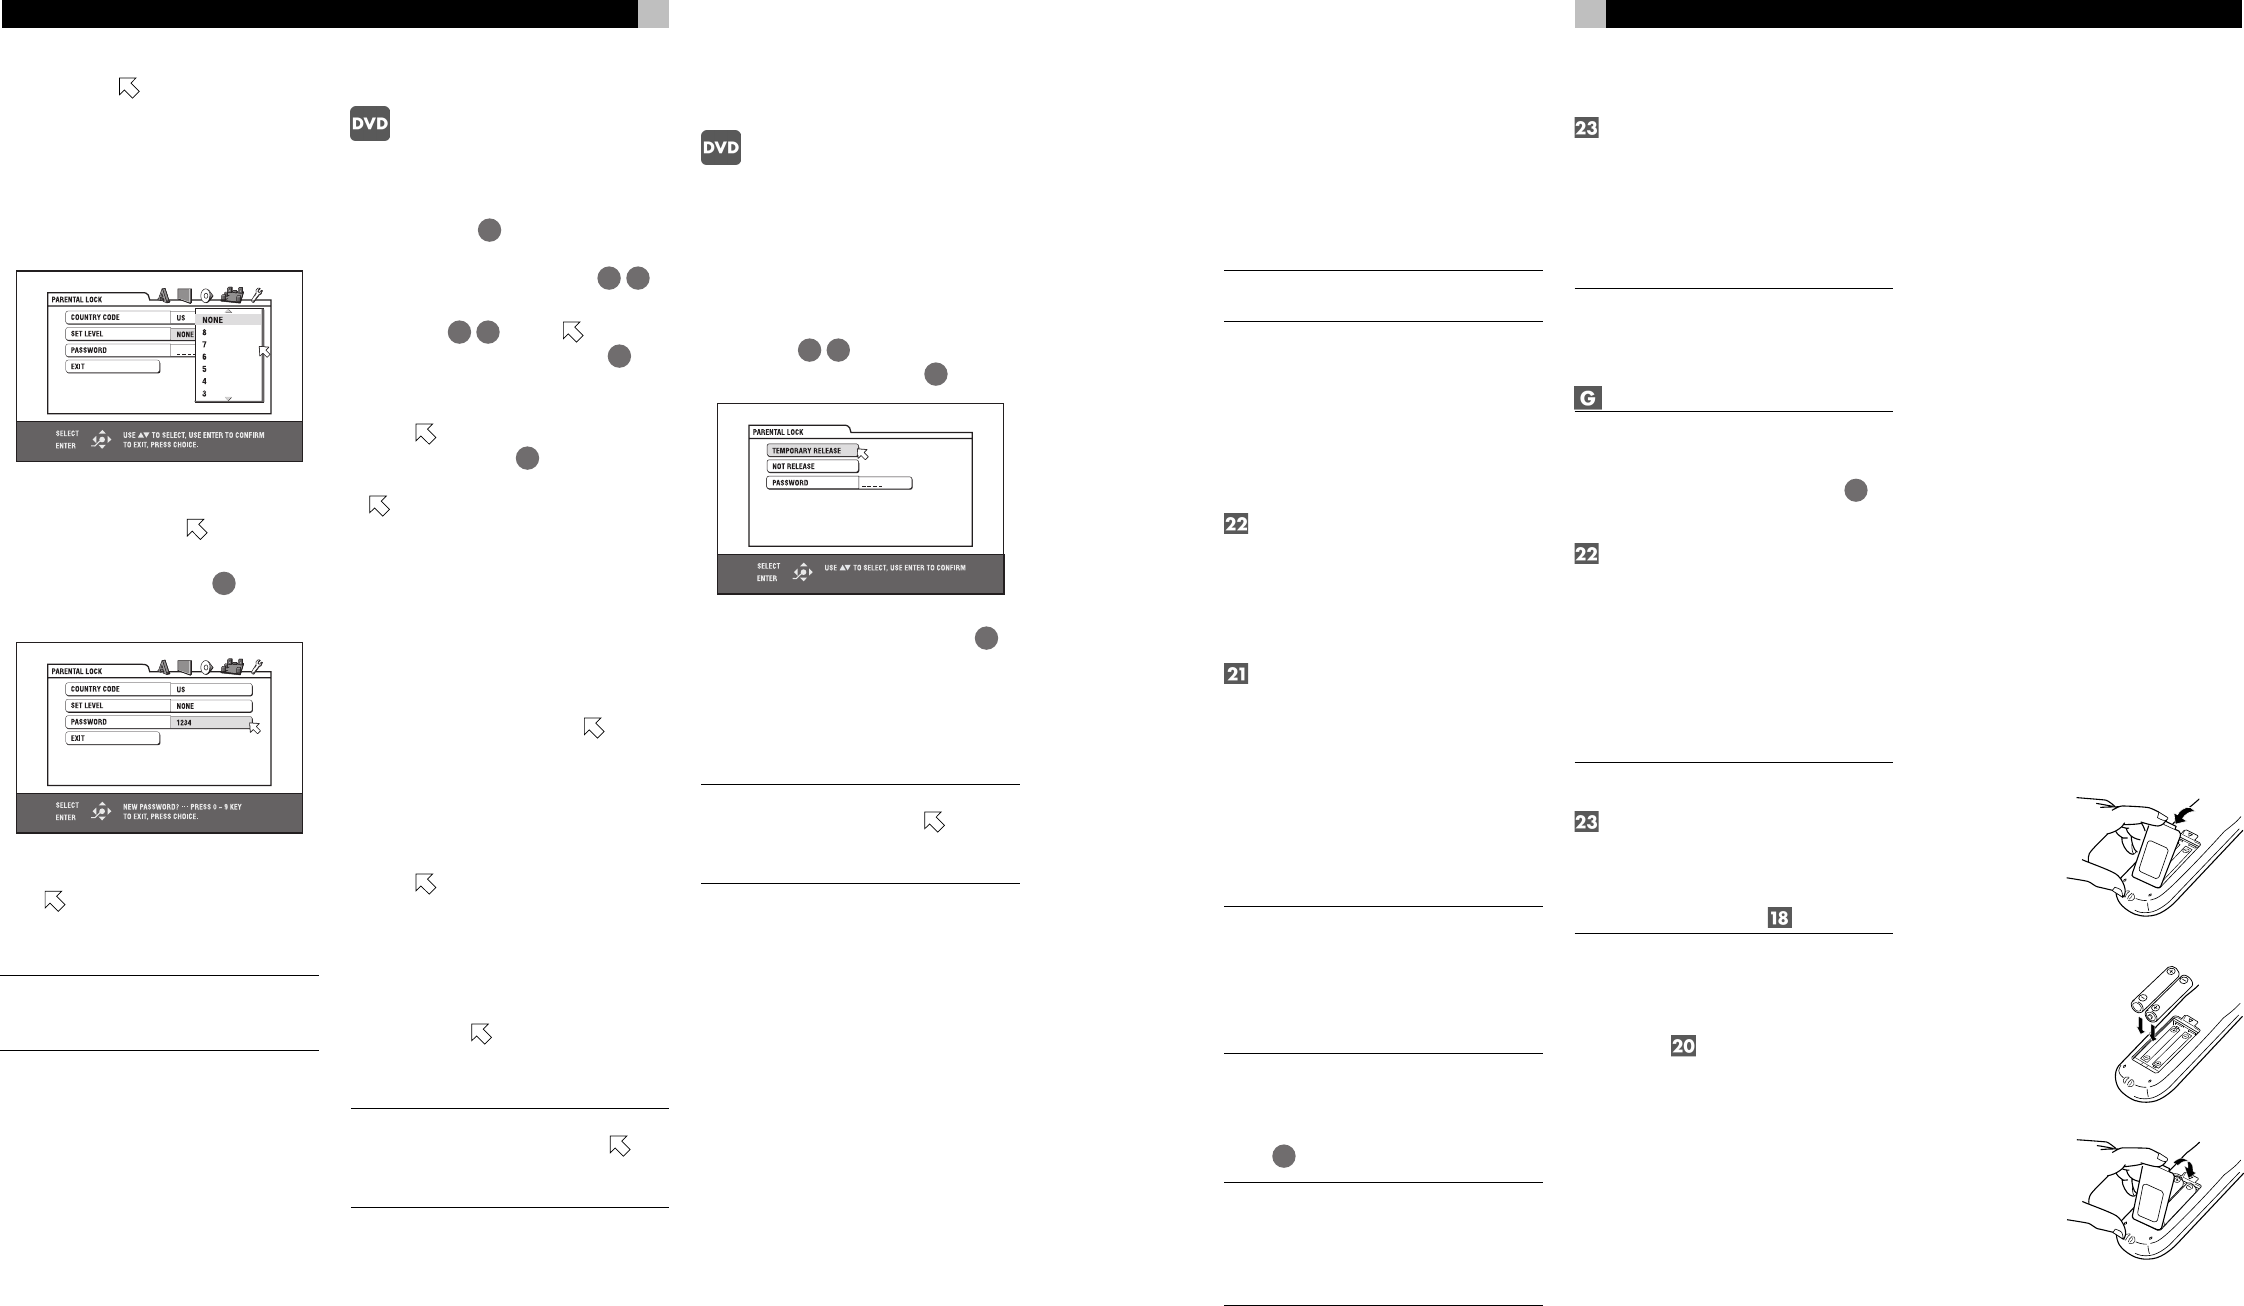
5 Press ENTER. moves to SET LEVEL.
6 Press ENTER to bring up the pull-down menu.
In the pull-down menu, NONE and levels
8 to 1 are available. NONE does not re-
strict playback. Level 1 is the strictest level.
Discs rated higher than the selected level
are restricted.
7 Press / to select a desired parental lock
level, then press ENTER.
moves to PASS-
WORD.
8 Press the numeric buttons
4
(0 to 9) to
enter a 4-digit password.
9 Press ENTER. The parental lock feature is
set.
moves to EXIT. Pressing ENTER again
returns to the OTHERS menu of the prefer-
ence display.
NOTE: If you want to change the pass-
word at step 8, do it before pressing EN-
TER.
To Change the Settings
You can change the parental lock settings at
any time.
1 Press CHOICE
15
. One of the preference
on-screen displays appears on the TV
screen. If necessary press /
13 33
to
bring up the OTHERS menu.
2 Press /
32 14
to move to select PA-
RENTAL LOCK and press ENTER
35
. The
parental lock on-screen display appears on
the TV screen.
3 While
is pointing to PASSWORD, press
the numeric buttons
4
to enter your cur-
rent 4- digit password then press ENTER.
moves to COUNTRY CODE if you en-
ter the correct password. If you enter a
wrong password, “WRONG! RETRY...”
appears on the TV screen, and you cannot
go to the next step. If you forget your pass-
word, enter “8888.” The current password
is deleted and you can set a new password.
4 To change the COUNTRY CODE or SET
LEVEL, press ENTER to bring up the asso-
ciated pull-down menu when
is point-
ing to the desired item.
5 Press / to select the desired option then
press ENTER. If you change the country
code, you must reselect the parental lock
level.
6 While
is pointing to PASSWORD, press
the numeric buttons to enter a 4-digit pass-
word. The password entered in this step be-
comes the new password. If you want to keep
the same password as before, enter the same
password.
7 Press ENTER.
moves to EXIT. Pressing
ENTER again returns to the OTHERS menu
of the preference display.
NOTE: If you enter the wrong password
more than 3 times in step 3 above,
moves to EXIT automatically and
/
do
not work.
To Temporarily Release the
Parental Lock
If the parental level is set to a strict value, some
discs may not play at all. When you insert such
a disc and try to play it, the following paren-
tal lock on-screen display appears on the TV
screen, asking you whether you want the pa-
rental lock to be temporarily released or not.
1 Press /
32 14
to move to TEMPORARY
RELEASE, then press ENTER
35
.
2 Press the numeric buttons (0 to 9)
4
to
enter your 4-digit password. The parental
lock is released, and the RDV-1050 starts
playback. If you enter a wrong password,
“WRONG! RETRY...” appears on the TV
screen. Enter the correct password.
NOTE: When you enter the wrong pass-
word 3 times at step 2 above,
moves to
NOT RELEASE automatically and
/
do
not work.


