11
Your New Wide TV
10
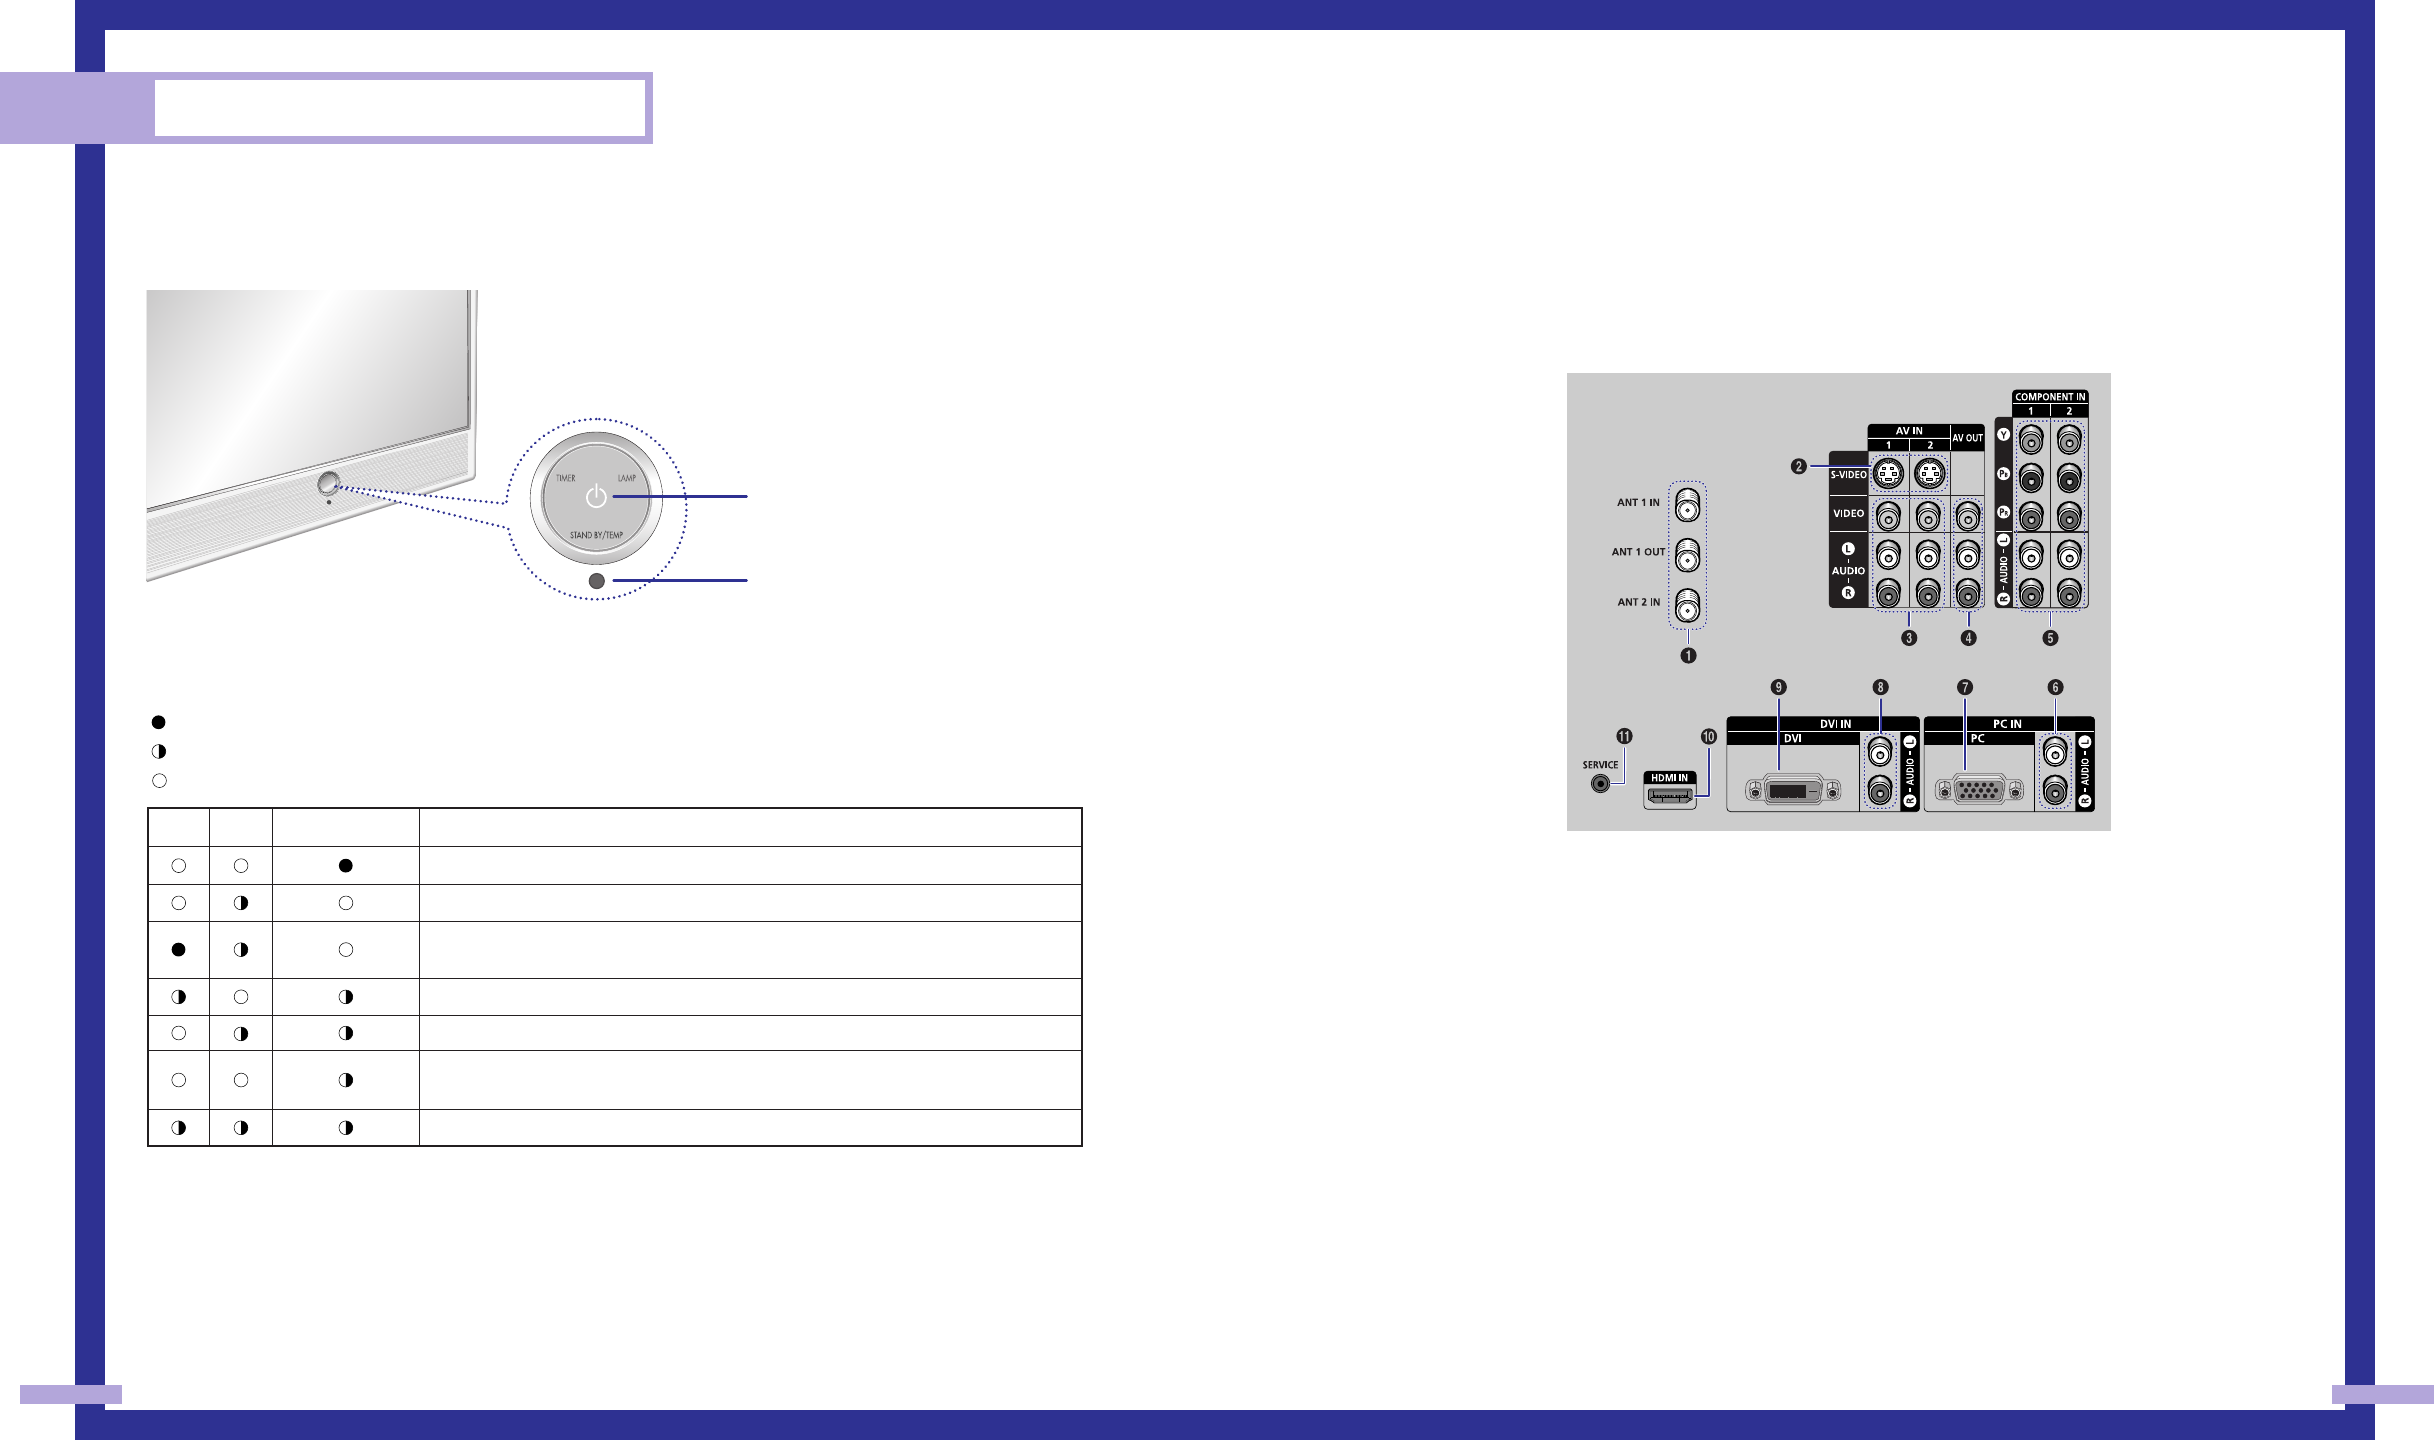
Front Panel LED Indicators
The three lights on the front panel indicate the status of your TV.
: Light is On
: Light is Blinking
: Light is Off
• It takes about 30 seconds for the TV to warm up, so normal brightness may not appear immediately.
• The TV has a fan to keep the inside lamp from overheating. You’ll occasionally hear it working.
TIMER
Standby state.
The picture will automatically appear in about 15 seconds.
Auto Timer ON/OFF has been set and the set will automatically be
turned on in about 25 seconds.
A cooling fan inside the set is not operating normally.
Lamp cover on rear of the set is not properly shut.
Check if the ventilation hole on the rear of the set is blocked, because if
the inner temperature is too high, the power will shut off.
Lamp may be defective. Please contact a certified technician.
LAMP STAND BY/TEMP Indication
Rear Panel Jacks
Use the rear panel jacks to connect components such as a VCR. You can connect different components
such as VCRs, Set-Top Box and a DVD player etc., because there are two sets of video input jacks and
three set of component video input jacks on the rear panel of your TV. For more information, please see
“Connections”.
Œ
ANTENNA terminals
Two independent cables or antennas can be connected to these terminals.
Use “ANT 1 IN” and “ANT 2 IN” terminals to receive a signal from
VHF/UHF antennas or your cable system. Use the “ANT 1 OUT” terminal to
send the signal being received by the “ANT 1 IN” terminal out to another
component (such as a Cable Set-Top Box). The PIP channel can be received
only when a signal source is connected to “ANT 1 IN”.
´
S-VIDEO INPUT jacks
Connects an S-Video signal from an S-VHS VCR or DVD player.
ˇ
VIDEO/AUDIO INPUT jacks (VCR1, VCR2)
Connect video/audio signals from external sources, such as a VCR or DVD
players.
¨
VIDEO/AUDIO OUTPUT jacks
Sends a video signal from the TV to an external source, such as a VCR.
Note: It is available only in RF, Video and S-Video modes.
ˆ
Component1, 2 jacks (Y, PB, PR, L, R)
Use these jacks to connect the component video/audio signals from a DVD
player or a set top box when using the component video input jacks.
Ø
PC AUDIO INPUT jacks
Connect these to the audio output jacks on your PC.
∏
PC VIDEO INPUT jack
Connect these to the video output jack on your PC .
”
DVI (Digital Video Interface) AUDIO INPUT jacks
Connect to the digital audio output jacks for device with DVI output.
’
DVI (Digital Video Interface) VIDEO INPUT jack
Connect to the digital video output jack for device with DVI output.
˝
HDMI (High Definition Multimedia Interface)
VIDEO/AUDIO INPUT jack
Connect to the HDMI jack for device with HDMI output.
Ô
SERVICE
This jack is for repair and software upgrades.
Remote Control Sensor
Aim the remote control towards this spot on the TV.
POWER
Press to turn the TV on and off.
BP68-00283A-02(02~13) 5/6/04 11:31 AM Page 10


