32_ DVR setup
DVR setup
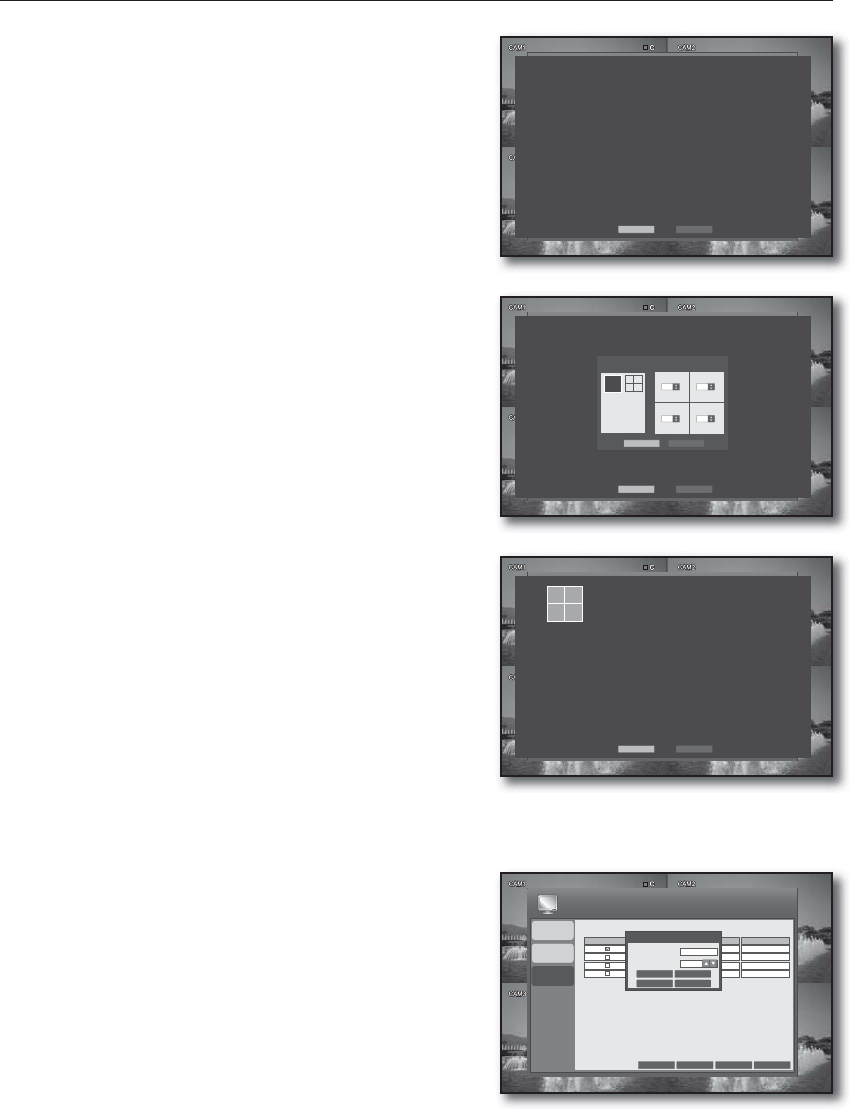
When the ADD SEQUENCE window appears, press the
<ADD> button.
When the SEQUENCE SETUP window appears, Use
direction buttons (▲▼◄►) to move to a desired item,
and press the [ENTER] button to set the value.
VIEW TYPE: Select a split mode to sequence.
CONFIGURE: Select a channel to display on each split
screen.
Press the <CONFIRM> button.
The set sequence mode will be confirmed and displayed
on the ADD window.
When completed, press the <ADD> button on the
bottom.
The set sequence type will be saved and you will move to
the previous screen.
EDITTING SEQUENCE
Select a list to edit.
The EDIT window appears.
Use direction buttons (▲▼◄►) to move to a desired
item, and press the [ENTER] button to set the value.
SEQUENCE TITLE : Select the TITLE input box.
ACTIVATION : Set to perform the sequence.
MODIFY : You can change the sequence mode setting.
For
setting the sequence mode, refer to “ADDING
SEQUENCE”. (Page 31)
DELETE : Deletes the selected sequence list.
CANCEL : Cancels your changes.
When your settings are completed, press the <APPLY> button on the bottom.
Your settings will be applied.
Press the <CLOSE> button to display the confirmation dialog and return to the previous menu.
5.
6.
•
•
7.
8.
1.
2.
•
•
•
•
•
3.
4.
1 2
3
4
ADD
CLOSE
OSD
MONITOR
SEQUENCE
ADD APPLY
CLOSE
DISPLAY
ACTIVATION
CANCEL
SAVE
EDIT
SEQUENCE TITLE
ACTIVATION
MODIFY
CANCEL
DELETE
ABC
OFF
CREATED BY
admin
admin
admin
admin
SEQUENCE SETUP
VIEW TYPE
CONFIGURE
1
2
34
CONFIRM
CANCEL
ADD
CLOSE
ADD
CLOSE


