1 LANGUAGE/CLOCK SET
English 27
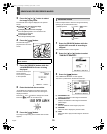
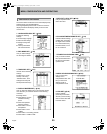
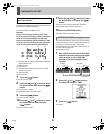
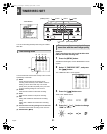
You can set the date/time at which the time is switched from
standard time to daylight savings time, and the date/time at
which the time is switched back again.
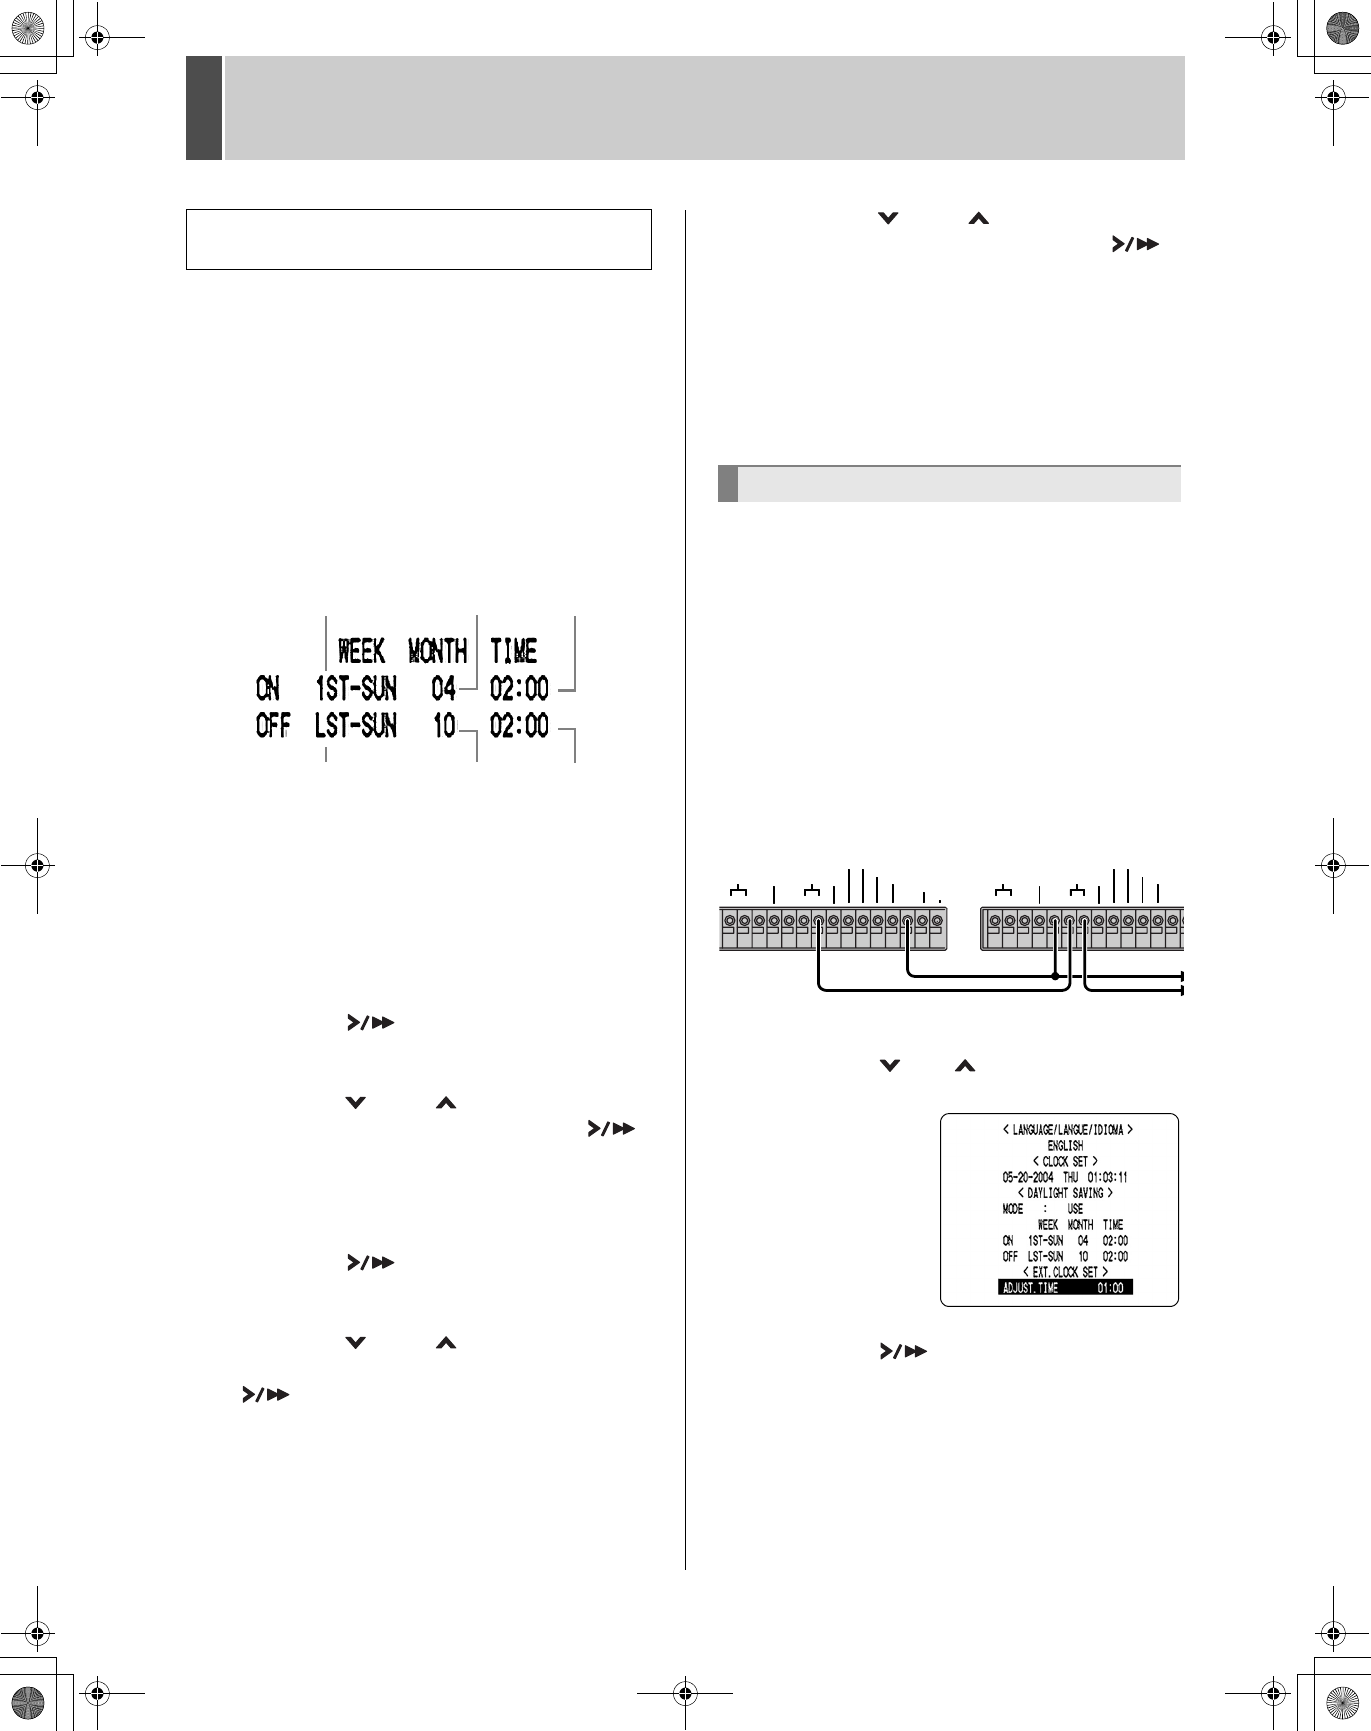
The example below is the default value.
Example:
After the clock display reaches April 4, 2004,
01:59, the next clock display is 03:00, putting the
clock an hour ahead (daylight savings time).
After the clock display reaches October 31, 2004,
01:59, the next clock display is 01:00, putting the
clock an hour behind (back to standard time).
(1) Sets the week and the day of the week for switching to
daylight savings time.
(2) Sets the month.
(3) Sets the time.
(4) Sets the week and the day of the week for ending
daylight savings time.
(5) Sets the month.
(6) Sets the time.
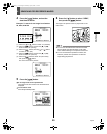
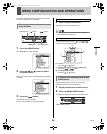
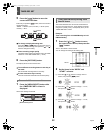
7 Press the [ ] button.
The cursor moves to “1ST”.
8 Press the [ ] and [ ] buttons to select
the desired week, then press the [ ]
button.
The cursor moves to “WEEK”.
Set the desired week in the same manner.
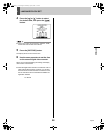
9 Press the [ ] button.
The cursor moves to “MONTH”.
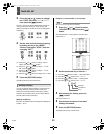
10 Press the [ ] and [ ] buttons to select
the desired month, then press the
[ ] button.
The cursor moves to “TIME”.
11 Press the [ ] and [ ] buttons to select
the desired time, then press the [ ]
button.
The cursor moves to the minutes portion of the time.
Set the desired minutes in the same manner.
12 Press the [EXIT/OSD] button.
The display returns to the normal screen.
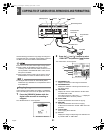
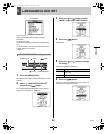
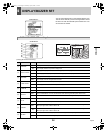
This section describes how to have the time synchronized
automatically when two or more digital video recorders are
connected. If you set the “ADJUST. TIME“, all the
connected devices are synchronized to the same time (to
the nearest second) every day.
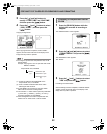
(Default setting: 01:00)
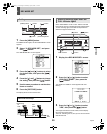
1 Use a cable to connect the CLOCK ADJ
terminal on the rear panel of one digital
video recorder to the CLOCK ADJ
terminal on the second digital video
recorder.
2 Press the [ ] or [ ] button to move
the cursor to “ADJUST. TIME”.
3 Press the [ ] button.
“01” flashes.
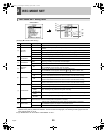
When “USE” is selected for “MODE” under
<DAYLIGHT SAVING>.
(1) (2) (3)
(4) (5) (6)
<EXT.CLOCK SET> settings
RS485
REMOTE
CLOCK
NON REC OUT/
SERIES REC OUT
ALARM RESET
ALARM OUT
ALARM IN
WARNING OUT
FULL OUT
ADJ
SERIES
REC IN
ABC C C
IN
OUT
RS485
REMOTE
CLOCK
NON REC OUT/
SERIES REC OUT
ALARM RESET
ALARM OUT
ALARM IN
W
ADJ
SERIES
REC IN
ABC C C
IN
OUT
1st DVR 2nd DVR
To 3rd DVR
e07_l8hae_us_7.fm Page 27 Thursday, April 8, 2004 11:48 AM


