E-13
Setup & Connections
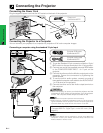
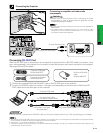
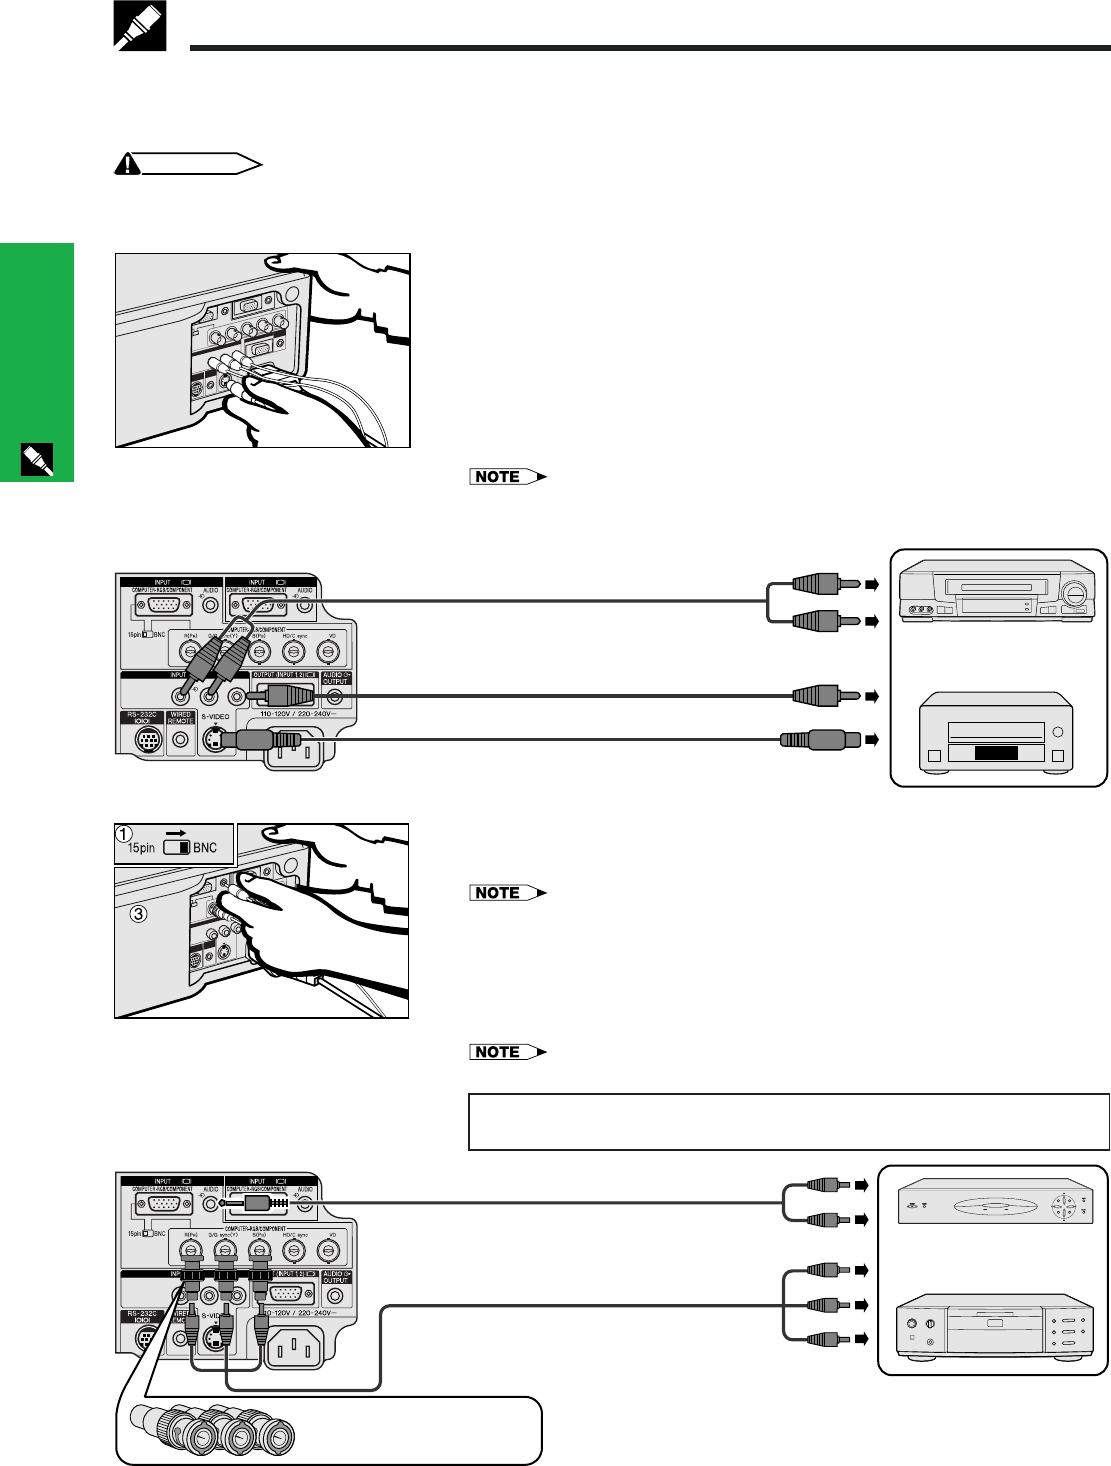
1 To use the 5 BNC connectors, slide the 15 pin/BNC switch on the rear terminals
to the BNC position. Connect each BNC connector to the corresponding BNC
INPUT 1 terminals on the projector.
• BNC-RCA adaptors are included for use with RCA type cables and sources.
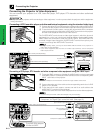
2 Connect the other end of the cable to the corresponding terminals of a DVD
player or DTV decoder.
3 To use the built-in audio system, connect one end of an audio cable to the
AUDIO INPUT 1 terminal on the projector.
Connect the other end to the Audio output terminal on the video equipment.
• A 3.5 mm minijack to RCA audio cable adaptor may be necessary.
When connecting this projector to a DVD player or a DTV decoder, select
“Component” for “Signal Type” on the GUI menu. (See page 27.)
Connecting the Projector to Video Equipment
You can connect your projector to a VCR, laser disc player, DVD player, DTV decoder and other audiovisual
equipment.
CAUTION
• Always turn off the projector while connecting to video equipment, in order to protect both the projector and the equipment
being connected.
MONITOR
VIDEORL AUDIO
1
3
2
Three BNC-RCA adaptors
QPLGJ0107GEZZ
DTV decoder
or
DVD player
3 To audio output terminals
Audio cable (sold separately)
2 To analog component
output terminals
Component cable (sold separately)
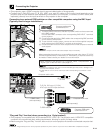
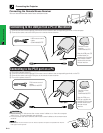
Connecting a VCR, laser disc player and other audiovisual equipment using the standard video Input
MONITOR
VIDEORL AUDIO
1
3
2
2
Audio cable (sold separately)
1
Video cable (sold separately)
To video output terminal
To audio output terminals
S-video cable (sold separately)
To S-video output terminal
VCR
or
Laser disc player
Connecting a DVD player, DTV decoder and other component video equipment using the 5 BNC Input
1 Connect the yellow RCA connectors to the corresponding yellow VIDEO INPUT
3 terminal on the projector and the Video output terminal on the video source.
2 To use the built-in audio system, connect the red and white RCA connectors
to the corresponding red and white AUDIO INPUT 3 terminals on the projector
and the Audio output terminals on the video source.
The S-VIDEO INPUT terminal uses a video signal system in which the picture is
separated into a color and a luminance signal to realize a higher-quality image.
When cables are connected to both the S-VIDEO INPUT and VIDEO INPUT 3
terminals, images input through the S-VIDEO INPUT terminal have priority over
images input through the VIDEO INPUT 3 terminal.
• For higher quality video, you may use the S-VIDEO INPUT terminal on the projector. S-
video cable is sold separately.
• If your video equipment does not have an S-video output terminal, use the Composite
video output terminal.
Connecting the Projector


