43
E
■ To set from a PC
WhenthemonitorisconnectedtoaPC,LANsettingscanbe
conguredviaPC.
Set up process
(1)ConnectyourmonitortoaPC
(2)SpecifythePC’sIPaddress
(3)Congurethemonitor’sLANsettings
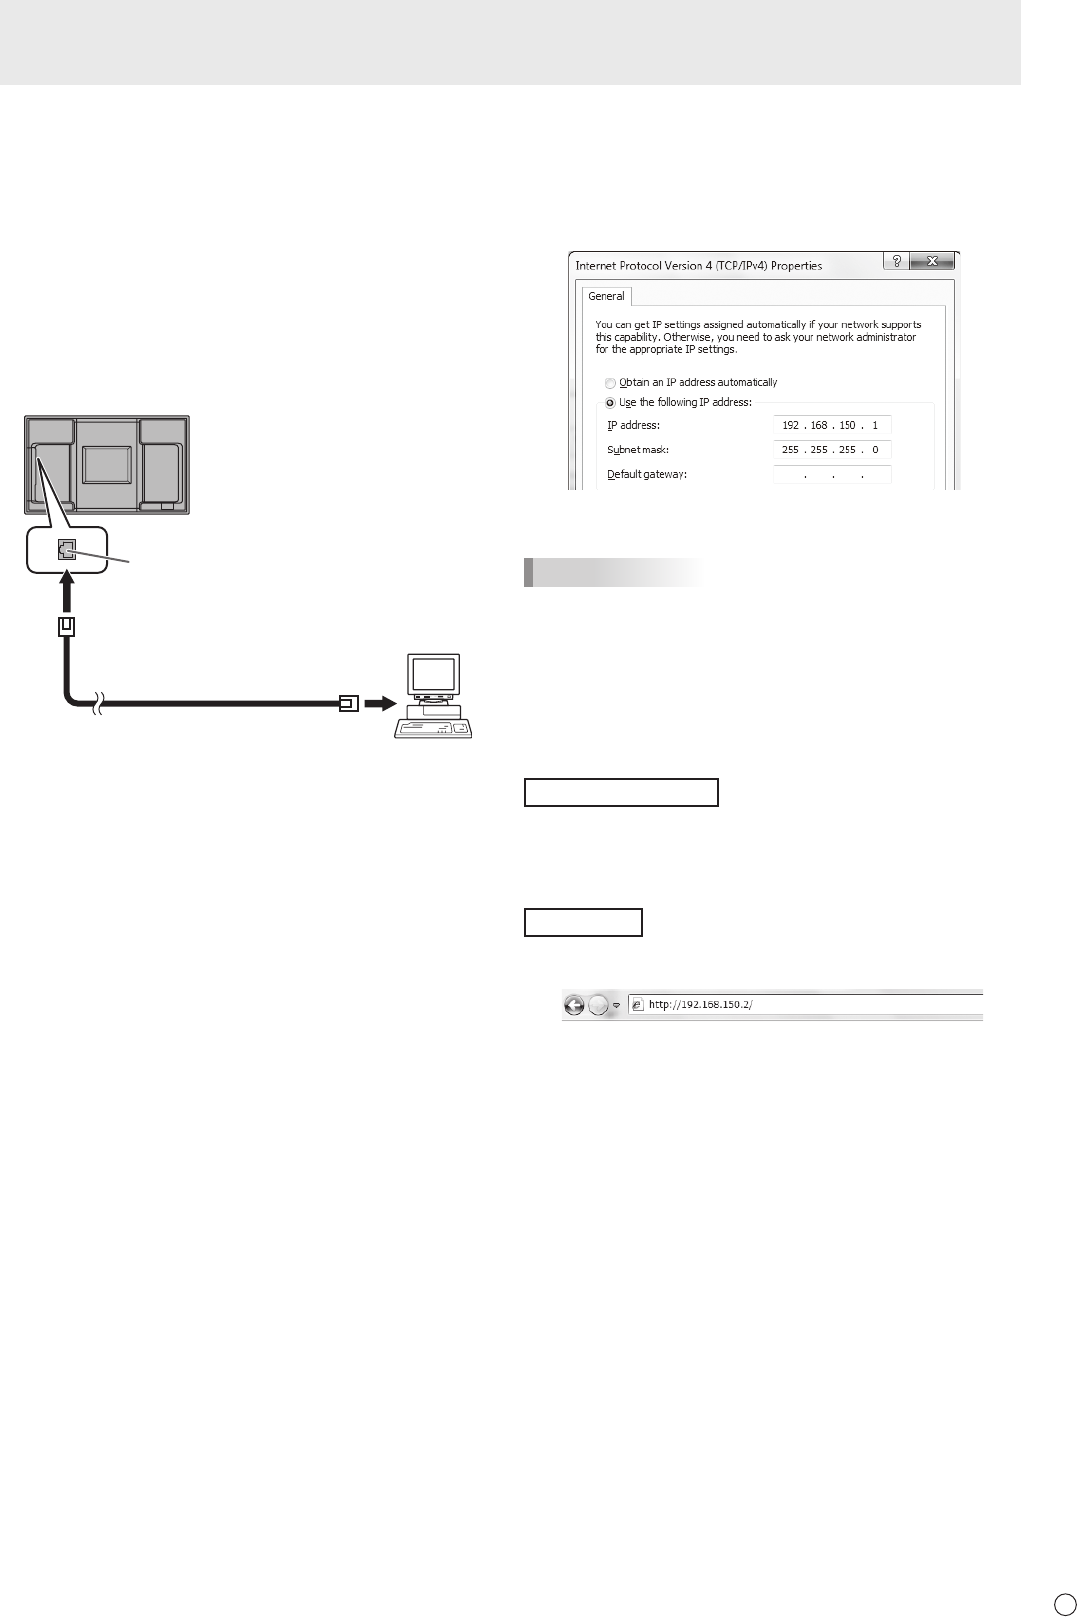
(1) Connecting your monitor to a PC
ConnectacommerciallyavailablecrossoverLANcable
(UPTcable,Category5)totheLANportonthePCandthis
monitor.
LAN cable
(commercially available, crossover)
To LAN terminal
PC
LAN terminal
(2) Specifying the PC’s IP address
Tocongurethemonitor’sLANsettings,youmusttemporarily
changethesettingsonthePC.
ThisexplanationisbasedonWindows7.
1.LogontothePCwithanadministratoraccount.
2.Click[Start],andthenclick“ControlPanel”.
3.Click“Viewnetworkstatusandtasks”in“Networkand
Internet”.
In“ClassicView”,click“NetworkandSharingCenter”.
4.Click“LocalAreaConnection”andthen“Properties”.
5.Click“InternetProtocolVersion4(TCP/IPv4)”andthen
“Properties”.
6. Make a note of the current IP address, subnet mask, and
default gateway settings.
Make sure you write this information now as you will
be changing the IP address, subnet mask, and default
gateway settings back to these settings afterwards.
7.TemporarilychangetheIPaddressandsubnetmask.
To access the monitor as it is shipped from the factory, set
as follows.
• IPAddress:192.168.150.1
• SubnetMask:255.255.255.0
• DefaultGateway:(leaveblank)
8.Click[OK]andthenrebootthePC.
TIPS
• Thismonitorisfactorypresetasshownbelow.
(WhenDHCPCLIENTissettoOFF)
IPAddress :192.168.150.2
SubnetMask :255.255.255.0
DefaultGateway :0.0.0.0
(3) Conguring the monitor’s LAN settings
AccessthemonitorusingInternetExplorer.
Controllingthemonitor
1.TurnthepowerONtothemonitor.
2.SetRS-232C/LANSELECTontheSETUPmenutoLAN.
3.SetDHCPCLIENTtoOFFinLANSETUPontheSETUP
menu.
PCoperation
4.LaunchInternetExplorer,inthe“Address”boxtype
“http://192.168.150.2/”andpresstheEnterkey.
You will be prompted to enter a user name and password.
5.Leavetheusernameandpasswordboxesblankandclick
[OK].
Controlling the Monitor with a PC (LAN)


