


E-5
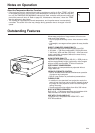
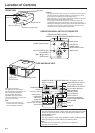
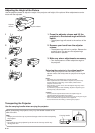
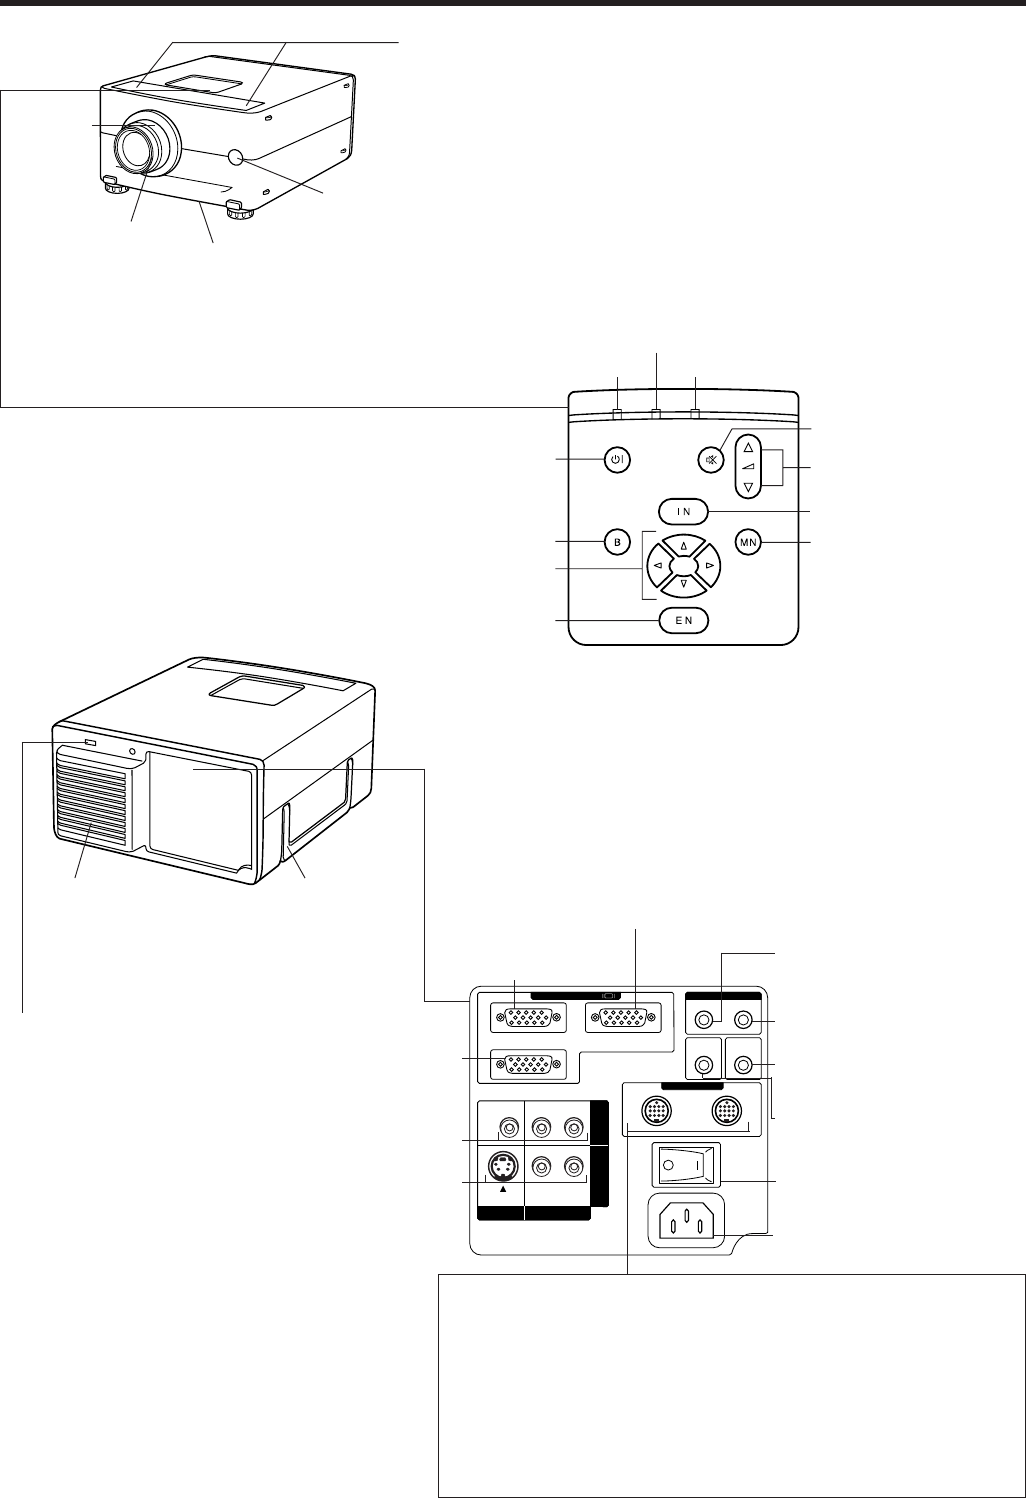
Location of Controls
FRONT VIEW
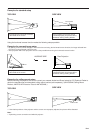
Cautions:
• The exhaust vent, the lamp cage cover and adjacent areas may be
extremely hot during projector operation. To prevent injury, do not
touch these areas until they have sufficiently cooled.
• Allow at least 4؆ (10 cm) of space between the cooling fan (exhaust
vent) and the other nearest wall or obstruction.
• If the cooling fan becomes obstructed, a protection device will
automatically turn off the projector lamp. This does not indicate a
malfunction. Remove the projector plug from the wall outlet and wait
10 minutes. Then turn on the power by plugging the cord back in.
This will return the projector to its normal mode.
Remote sensor
Speakers
ENTER
BLACK
SCREEN
ON/OFF
POWER LAMP TEMP.
MUTE
INPUT SELECT
VOL
MENU
POWER indicator
TEMPERATURE WARNING indicator
LAMP REPLACEMENT indicator
MUTE button
VOLUME UP-
DOWN buttons
MENU button
INPUT SELECT button
Lens focusing ring
Cooling fan (Intake vent)
Zoom ring
ENTER button
ADJUSTMENT
(ß/©, ƒ/∂) buttons
BLACK SCREEN button
POWER ON/OFF button
OPERATION PANEL ON TOP OF PROJECTOR
COMPUTER AUDIO
PC CONTROL
COMPUTER RGB
VIDEO
S-VIDEO
12
L
OFF ON
R
LR
AUDIO
IN
2
IN
1
AUDIO
OUTPUT
IN 1
OUT
IN 2
WIRED
REMOTE
IN 1 IN 2
110-120V/
200-240V~
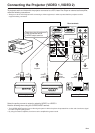
VIDEO INPUT 1
COMPOSITE
Video: RCA
Audio: RCA
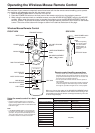
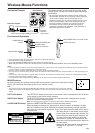
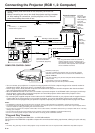
• PC CONTROL 1:
Use the supplied computer control cable when operating the remote
control as a wireless mouse or when controlling the projector from
the RS-232C terminal.
• PC CONTROL 2:
Use the computer control cable (CTANZ0711CE01) (sold separately)
when operating the remote control as a wireless mouse.
Notes:
• RS-232C does not function when connected to PC CONTROL 2.
• See page 15 for connection.
COMPUTER RGB
INPUT 1 connector
(HD-15)
COMPUTER AUDIO INPUT 1
(3.5 mm Stereo Minijack)
COMPUTER RGB INPUT 2 connector (HD-15)
AUDIO OUTPUT
(3.5 mm Stereo Minijack)
(VIDEO/COMPUTER RGB)
AC INLET
MAIN POWER
switch
Cooling fan
(Exhaust vent)
Security Lock Anchor
This projector has a Kensington
Security Standard connector for use
with a Kensington MicroSaver
Security System. Refer to the
information that came with the
system for instructions on how to use
it to secure this model.
Note:
• Be sure to use the Computer
Control cable when connecting
the PC CONTROL terminals.
Carring handle
VIDEO INPUT 2
S-Video: 4-pin mini DIN
Audio: RCA
COMPUTER AUDIO INPUT 2
(3.5 mm Stereo Minijack)
WIRED REMOTE
CONTROL INPUT
(3.5 mm Minijack)
SIDE AND REAR VIEW
COMPUTER RGB
OUTPUT
connector (HD-15)