


SUR-25 User Manual
Ch.
SUR-25 User Manual
Ch.
Page
10
Touch ScreenTouch Screen
Touch ScreenTouch Screen
Touch Screen
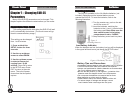
The touch screen reduces the number of buttons by
changing its configuration for each device selected. In this way,
the touch screen can provide a total of 480 buttons (10 devices
x 2 pages x 24 buttons per page).
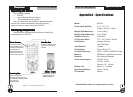
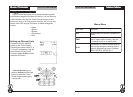
Turning the Touch Screen On
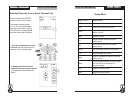
Using the touch screen is easy. Simply touch the screen or
any hard button to activate it. The SUR-25 will turn itself off
automatically. (To change the
programmable power down time, see
Power Down Time Period in Chapter 7 –
Changing SUR-25 Parameters.)
TT
TT
T
ouch Screenouch Screen
ouch Screenouch Screen
ouch Screen
Touch Screen Precautions
Please read the following instructions carefully:
• Tap the LCD touch screen gently; never use force.
• Do not use a pen or any sharp object to tap the screen.
You might damage the surface.
• Keep the touch screen dry. Wipe off any spills
immediately. The SUR-25 is not waterproof; never
immerse it in liquid.
• Don’t expose the SUR-25 to extreme temperatures. Keep
it away from heat sources.
• Avoid dropping the SUR-25.
• Don’t drop anything on the touch screen.
• Clean the LCD touch screen with a soft cloth. If needed,
dampen the cloth slightly before cleaning. Never use
abrasives or cleaning solutions.
Figure 5: Touch the Screen To Turn It On
22
22
2
Page
51
Displaying Version NumberDisplaying Version Number
Displaying Version NumberDisplaying Version Number
Displaying Version Number
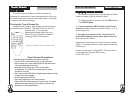
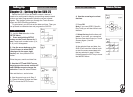
For technical support reasons, the Program and Data
version numbers might be needed by Sima.
To display the version number, use the VER selection
in the SETUP Menu.
1. Press and hold the SETUP button on the Touch
Screen for 3 sec. Press each number button (2, 4, 6, 8)
until it disappears.
2. Use the arrow buttons on the Touch Screen to
select VER (displayed in the upper right corner) and
then press the OK button.
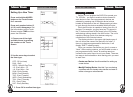
Press the OK button again. Use arrow buttons to select
PROG. The software version number appears under the
PROG menu.
Use the arrows again to select DATA. The data version
number appears under the DATA menu.
Press EXIT to exit.
VV
VV
V
ersion numberersion number
ersion numberersion number
ersion number
66
66
6