


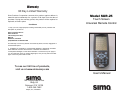


SUR-25 User Manual
Ch.
SUR-25 User Manual
Ch.
Page
8
2
Features (contFeatures (cont
Features (contFeatures (cont
Features (cont
.).)
.).)
.)
FF
FF
F
eatureseatures
eatureseatures
eatures
22
22
2
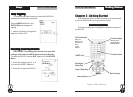
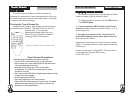
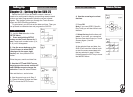
• LCD Indicators: LCD stands for Liquid Crystal Display and
these indicators at the top of the display give you feedback and
information. You can look here to see if the beep is turned on, if
the battery has low power, if the infrared signal was sent OK or if
there was an ERROR, and also to see which page of Touch
Screen buttons you are looking at.
• UART Port: This port allows you to connect the SUR-25 to a
personal computer. See Appendix B – Accessories for more
information.
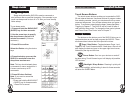
• Backlight / Sleep Key: If pressed quickly, this key will
activate the Touch Screen backlight. If held down for three
seconds you will enter the Sleep menu.
• Page / Date Key: This key allows you to switch between
Page 1 and Page 2 of Touch Screen Buttons.
• Learning Eye: This is an infrared sensor used to detect
other remote controls infrared signals. Aim your existing remote
control here when using the SUR-25’s Learning Function.
• Device Buttons: These 8 buttons allow you to switch
between different devices. Each button may have more than one
device. (For example, the TV button may have TV1 and TV2 for
different TVs in your house.) Repeatedly press the same device
button to cycle through all the device names . The SUR-25 has
the capability to operate a total of 10 devices maximum.
• Touch Screen: The touch screen acts as a “virtual”
keyboard on the SUR-25. The display is normally blank when the
remote is not in use and can be activated by simply touching it.
• Function Keys: These keys allow you to enter the SETUP,
DELETE, and MACRO menus. To enter any function menu,
press and hold the appropriate function key for three seconds.
Page
53
Backlight Time PeriodBacklight Time Period
Backlight Time PeriodBacklight Time Period
Backlight Time Period
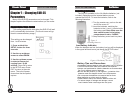
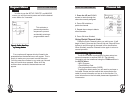
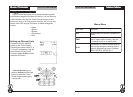
This setting specifies how long the SUR-25 will keep
the backlight on after the user presses the BACKLIGHT
button. This setting can be changed from 1 second to 60
seconds by using the LITE selection of the SETUP
Menu:
To enter the SETUP menu
press SETUP button for three
seconds. Complete the
password protection sequence
2...4...6...8.... Use the arrow
buttons to select the LITE menu.
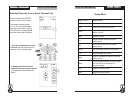
1. Use the arrow keys to set the
backlight period. If using
software version 1.11, set the
time period from 05 to 60
seconds. If using software
version 1.12 and higher, set
the time period from 02 to 60
seconds.To determine version
number, see page 51.
With either software version you
can disable the backlight by
setting the time to 0. Press OK
when finished and EXIT to
return to the SETUP Menu.
BacklightBacklight
BacklightBacklight
Backlight
77
77
7