Chapter 7
Tele-File 7-9
Chapter 7
Tele-File
To set the set or modified data as other time
data
Press the F6 (SET TO) button and select the time
data (cue point, IN point, or OUT point), and then
press the F5 (SET) or F6 (SET NL) button. The
position where the data is set differs as follows,
depending on the button pressed.
• F5 (SET): The data is set in the selected time
data position.
• F6 (SET NL): A new clip is added at the lowest
line and the time data is set at the selected data
position in the new clip.
To make write protect, mark, and
recording start point settings
Proceed as follows to make write protect, mark, and
recording start point settings.
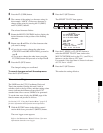
1 Select a clip.
2 Select write protect, mark, or recording start point.
3 Press the F2 (SELECT) button.
The unit enters clip data modification mode.
4 Press the F2 (MODIFY) button.
The data entry area begins to flash, and the data
can be set.
5 Select the data by pressing the F3 (+) or F4 (–)
button or rotating the MULTI CONTROL knob.
6 Press the F2 (SET) button.
The data setting is confirmed and the unit returns
to clip data display mode.
To make take number, cut number, and
scene number settings
Proceed as follows to make take number, cut number,
and scene number settings.
1 Select a clip.
2 Select take number, cut number, or scene number.
3 Press the F2 (SELECT) button.
The unit enters clip data modification mode.
4 Press the F2 (MODIFY) button.
The most significant digit begins to flash, and the
data can be set.
5 Press the F3 (T) or F4 (t) button until the digit
that you want to set starts flashing.
6 Rotate the MULTI CONTROL knob to make the
setting.
7 Repeat steps 5 and 6 until you have set all the
required digits.
8 Press the F2 (SET) button.
The setting is confirmed and the unit returns to clip
data display mode.


