


15
Getting Started
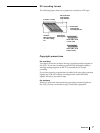
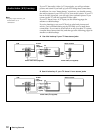
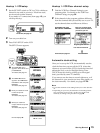
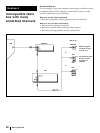
Hookup 1: VCR setup
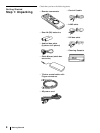
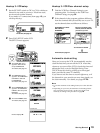
1 Set the RF UNIT switch to CH 3 or CH 4, whichever
channel is not used in your area. If both are used,
set the switch to either channel.
If you made A/V connections (from page 12), you
can skip this step.
2 Turn on your cable box.
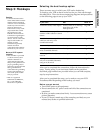
3 Press EASY SET UP on the VCR.
The SET UP menu appears.
For details, see page 92.
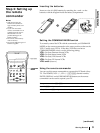
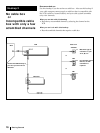
1 The CLOCK SET menu
appears. Select AUTO and
press EXECUTE.
For details, see page 27.
Normal display ?
4 Select your cable box
output channel and press
EXECUTE.
For details, see page 33.
3 Enter your cable box code
number and press
EXECUTE.
For details, see page 33.
2 The CABLE BOX menu
appears. Set CABLE BOX
CONTROL to ON and press
EXECUTE.
For details, see page 33.
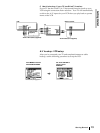
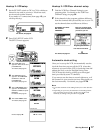
Press MENU and select
SET VCR Plus+ CHANNELS.
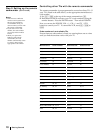
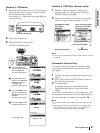
Hookup 1: VCR Plus+ channel setup
1 Find the VCR Plus+ Channel Listing in your
program guide. For details on the VCR Plus+
Channel Listing, see page 36.
2 If the channels in the program guide are different
from the channels that you actually use on your TV,
set the channels that are different as follows:
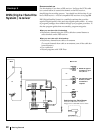
Automatic clock setting
Once you’ve set up the VCR, it automatically sets the
clock the first time you turn off the VCR. After that,
whenever you turn off the VCR, it checks the time and
adjusts the clock, even for Daylight Saving Time.
The VCR sets the clock by picking up a time signal
that’s provided by some TV channels.
If you want to use the timer to record right away, or if
the channels in your area do not carry time signals, set
the clock manually. For details, see pages 27–29.
Note
• To use the automatic clock setting feature, leave the cable box
on.
• Depending on your area, the automatic clock setting feature
may not set the clock correctly. In this case, set the clock
manually according to the procedure on page 29.
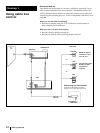
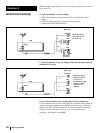
Enter the program guide
channel, then the channel
you use on your TV.
Program guide channel
Your actual TV channel
Press EXECUTE.
For details, see page 37.
04/08-26_DHR-1000.13E 01.4.26, 2:10 PM15
Black