


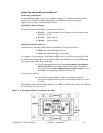

7/50D Plus or 7/50D Controller Chapter 3: Installation 24
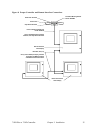
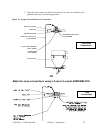
Connecting the Controller to the Network
To connect the controller to the network, make sure that the KwikLink connector is properly
installed on the flat grey data cable. To connect:
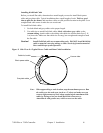
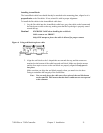
1. Attach the keyed round connector to the terminal of the controller marked
NETWORK NO. 1. Tighten the cord grip ring until snug.
2. Align the square connector of the grey drop cable so the cable leads down from the
connector. Evenly press the square connector onto the top of the KwikLink
connector. It should make two audible snaps when properly seated.
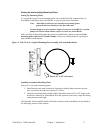
3. Dress the excess cable with cable ties so it does not interfere with operation and gives
a pleasing appearance.
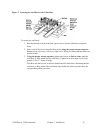
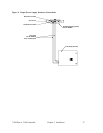
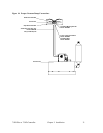
Connecting the Remote Interface to the Main Controller
After selecting a location and installing the remote interface, connect it to the main controller:
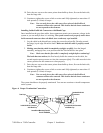
1. Determine the length of blue remote cable you need, and cut it to length.
2. Run the cable from the remote interface to the main controller, neatly dressing the
cable with cable ties so it does not interfere with system operation and to give it a
neat appearance.
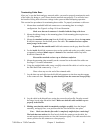
3. Attach connectors at each end, following the connector manufacturer’s instructions.
4. Attach one connector to the remote interface terminal marked REMOTE DISPLAY.
Tighten the cord grip ring until snug.
5. Attach the other connector to the terminal of the controller marked REMOTE
DISPLAY. Tighten the cord grip ring until snug.