


12
Introduction
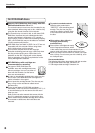
Index to Parts and Controls
See pages with arrows for details.
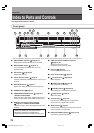
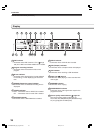
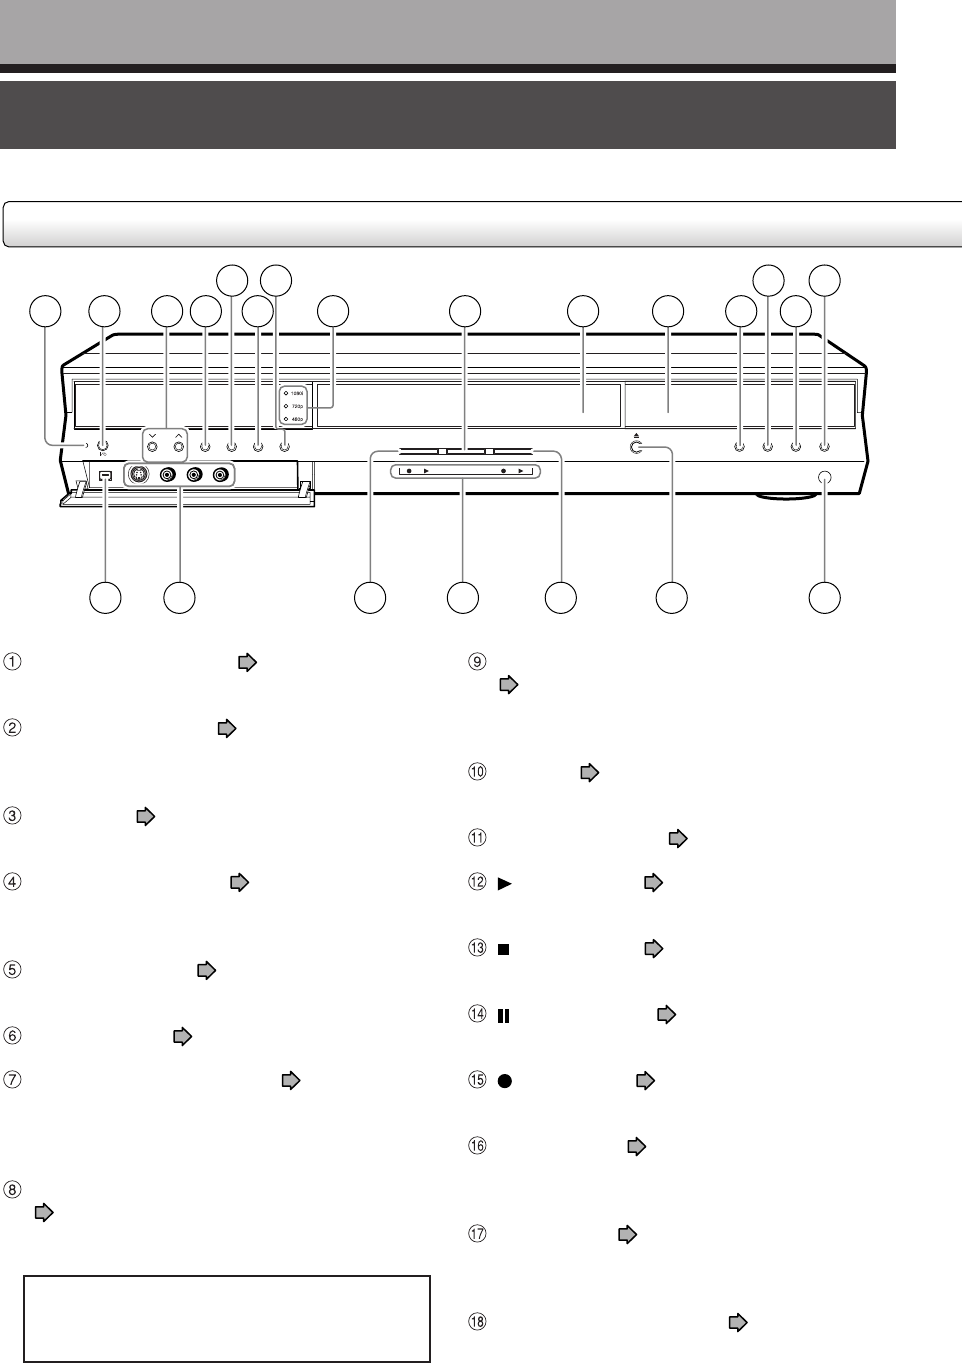
Front panel
HDD
ON / STANDBY
CH
INPUT SELECTREC MODE
DIMMER PROG/HDMI
TIMESLIP DVD
1 2 3 4
5 7
6
13 15
1410 11
98
12
2216 17 18 212019
ON/STANDBY indicator page 20, 21
Displays the operational state of the recorder.
ON/STANDBY button
page 20, 21
Turns the power on/restores the unit in the
standby mode.
CH buttons
page 20, 35
Selects the channel.
INPUT SELECT button
page 34
Pressing repeatedly selects between various input
sources.
REC MODE button
page 36
Selects the setting of picture and sound quality.
DIMMER button
page 19
PROGRESSIVE/HDMI button
page 26 in
“INSTALLATION GUIDE”
Selects a type of the output signals when a TV or
monitor is connected to the HDMI OUTPUT jack.
HDMI Up-conversion Output indicator
page 27 in “INSTALLATION GUIDE”
Indicates a type of the output signals setup on the
recorder.
* The above illustration displays the front panel with the cover open. See the following page on how to open or close the cover.
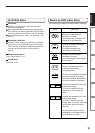
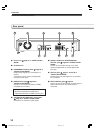
TIME SLIP button/TIMESLIP indicator
page 64, 65
Selects the time slip mode.
Illuminates in the time slip mode.
Disc tray
page 20
Loads a disc into the disc drive.
Front panel display
page 18
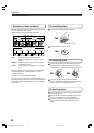
(PLAY) button page 62 ,64
Starts playback.
(STOP) button page 37, 58
Stops playback or recording.
(PAUSE) button page 58, 64
Stops playback or recording momentarily.
(REC) button page 36
Starts recording.
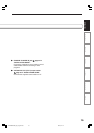
DV IN terminal
page 136
Use this when recording from a digital video
device such as a digital video camera.
INPUT2 jacks
page 39
Use this when recording from other input source
such as a VCR or a camcorder.
HDD button/HDD indicator
page 34, 40
Press this to operate the HDD.
HDMI, the HDMI logo and High-Definition
Multimedia Interface are trademarks or
registered trademarks of HDMI Licensing LLC.
RD-XS52SU/SC_Ope_E_p012-019 04.9.3, 11:1212