


6
The remote control
Remove the back cover to reveal the battery compartment and make sure the batteries are inserted the
right way round. Suitable battery types for this remote are AAA, IEC R03 1.5V.
Do not combine a used, old battery with a new one or mix battery types. Remove discharged batteries
immediately to prevent acid from leaking into the battery compartment. Dispose of them in accordance
with the disposal instructions in this manual. Warning: batteries must not be exposed to excessive heat
such as sunshine, fire or the like.
The performance of the remote control will deteriorate beyond a distance of five metres or outside an
angle of 30 degrees from the centre of the television. If the operating range becomes reduced the batteries
may need replacing.
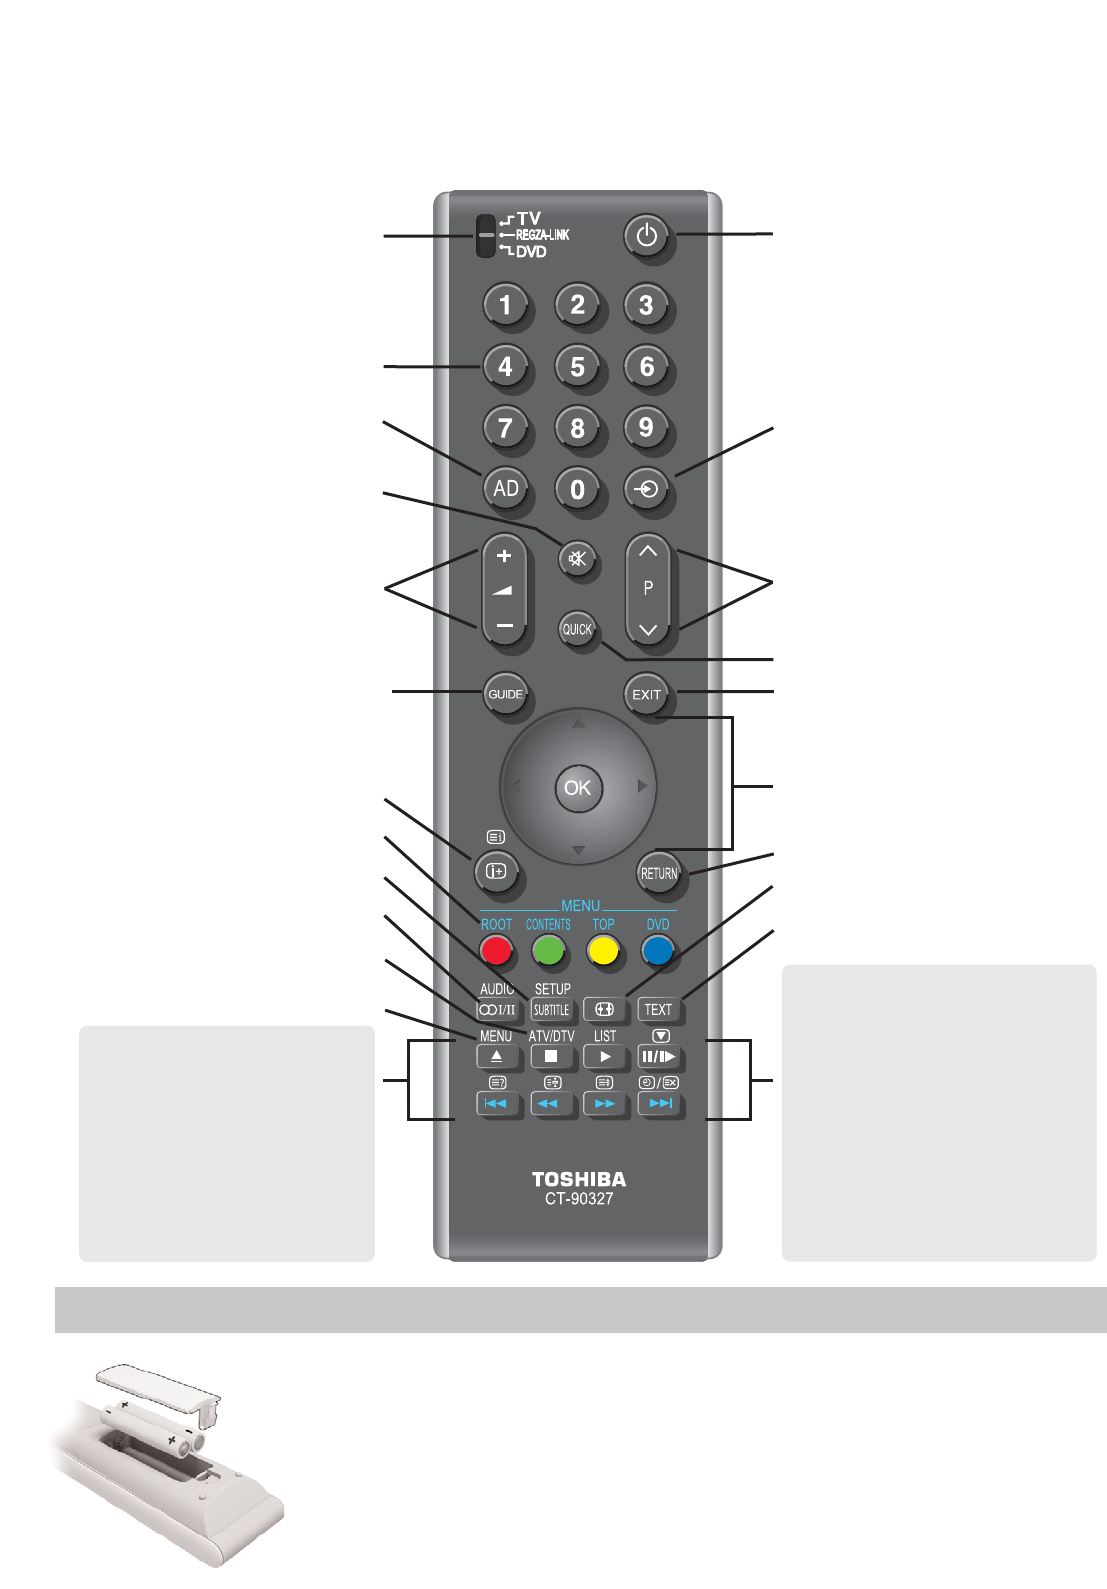
Inserting batteries and effective range of the remote
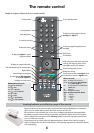
Simple at-a-glance reference of your remote control.
To change programme positions and
text pages
Widescreen viewing
To call up text services in analogue mode
and interactive services in digital mode
To exit Menus
Digital subtitles
To select mode
To select input from external sources,
analogue or
digital
TV.
Quick menu
Stereo/bilingual transmissions
To switch between ATV (analogue
TV) and DTV (digital TV)
To display on-screen menus
To display the digital on-screen
Programme Guide
To alter the volume
To display on-screen information
Text and interactive service control buttons
To return to the previous menu
Number buttons
Audio description
To mute the sound
For On/Standby mode
REGZA-LINK or DVD mode:
press
m
/
ll
r
to PAUSE/STEP
press
r
to PLAY
press
q
to REWIND
press
s
to FAST FORWARD
press
w
to EJECT
press
p
to STOP
press
l
q
to SKIP-REWIND
press
s
l
to SKIP-FORWARD
When using menus the arrows move the
cursor on the screen up, down, left or
right. OK to confirm your selection
When in TV mode:
MENU To display on-screen menus
ATV/DTV
To switch between ATV (analogue
TV) and DTV (digital TV)
LIST
To switch between TV and Radio lists
in DTV mode
u Still picture
8
/
9
Analogue time display
When using the Programme Guide:
l
q
– 24 hours
s
l
+ 24 hours
q
– 1 page
s
+ 1 page