


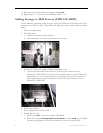


Adding Storage to 1850/2850 Servers
VOD-W Admin Guide 61
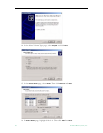
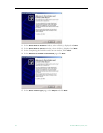
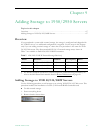
7. In PERC RAID BIOS screens:
a. Perform
Configure > View/Add Configuration scans all channels.
b. You should see one logical drive on RAID Ch-0, IDs=0 and 1; this is the first drive
in the system and is used to store the operating system, the VOD server software,
and database
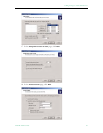
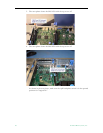
c. You should see the remaining four internal drives configured as a RAID 5 array.
These drives are used to store the video content on the system. These drives are
configured on Ch-0, ID=1 and Ch-1, IDs: 2, 3, & 4. The RAID 5 array ensures that
no video content is lost if a single drive fails.
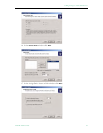
d. Select
Adapter then Adapter-1 (Bus=09, Dev=04, Slot=003) Perc 4/DC.
e. Perform
Configure > View/Add Configuration scans all channels.
f. On channel 0 of the RAID BIOS configuration screen, you should see all 14 drives
of the ES3/4 storage array. These are ID’s 0 through 5, and 8 and ID’s 9 through 15.
Use the arrow keys on the keyboard to move to the Channel 0, ID=0 drive and use
the space bar to select this drive. Repeat this procedure for the first seven drives (IDs
0 through 5 and 8) on Channel 0. When you have completed this process, press
F10
Space F10
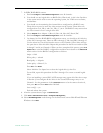
to enter the RAID 5 configuration and then arrow down to the Advanced
menu section. Set the RAID 5 configuration as follows:
Stripe = 128k
Write policy = wrback
Read policy = Adaptive
Cache policy = Direct I/O
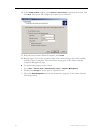
Press
Esc then Enter.
Select Initialize. Use Space bar to select the logical drive(s) then Yes.
For an ES4, repeat this procedure for IDs 9 through 15 to create a second logical
drive.
If you are installing a second ES3/4 2TB storage array, repeat all of the above steps
in Section d, but configure all the drives in the second 2TB storage array to use
Channel 1. Set the parameters in the
Advanced menu to be the same as Section d,
then press
Esc and then Enter when finished.
Save config? = yes
Exit and reboot the system.
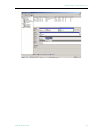
8. After the system reboots, login as
Administrator.
9. Click
Start > Administrator Tools > Computer Management.
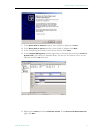
10. Select
Disk Management under Storage. In the Initial and Convert Disk Wizard Welcome
Windows select
Next.