


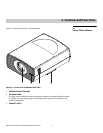
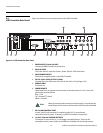

Controls and Functions
Vidikron Vision Model 120 Installation/Operation Manual 9
PRE
L
IMINAR
Y
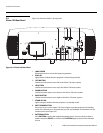
6. RIGHT BUTTON
Used to direct-select inputs or move the menu cursor right in the OSD. When no menu is
present on-screen, the RIGHT button toggles through the different sources, in this order:
Composite (VID) - S-Video - HD 1 (RCA) - HD 2 (BNC) - HD 3 (VGA/Y-Pb-Pr) - HDMI 1 -
HDMI
2
7. MENU BUTTON
Pressing the MENU button brings up the main menu. Also, if you are in an adjustment
mode or function, pressing MENU brings the menu back one level.
8. RUN LED
– Lights blue to indicate that the projector is functioning normally.
– Flashes blue (one second on/one second off) to indicate an error condition.
– Flashes blue (one half-second on/one half-second off) for approximately 90 seconds
after the system is turned off.
9. ISSUE LED
Lights red to indicate an error condition.
10. UP BUTTON
Use to direct-select aspect ratios or move the menu cursor up in the OSD. When no
menu is present on-screen, the UP button toggles through aspect ratios in the following
order:
16:9 - 4:3 - Letterbox - IntelliWide - Cinema - IntelliWide 2.35
(IntelliWide 2.35 is available only on CineWide-equipped projectors. For more
information about aspect ratios, refer to
Table 4-1.)
11. SELECT BUTTON
Press SELECT to confirm your selection of a highlighted choice on the OSD.
12. STAND-BY LED
Lights orange to indicate that the projector is in standby mode.
13. SOFT POWER BUTTON
Press once to turn on the Vision 120. Press it again to put the projector into Standby
mode. For a discrete on or off command, you can use the direct access buttons on the
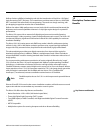
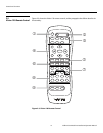
remote control (see
Figure 2-5).