


Operation
Vidikron Vision Model 120 Installation/Operation Manual 53
PRE
L
IMINAR
Y
Picture Use the controls in the Picture Menu to calibrate your Vision 120 for optimum picture quality.
The Vision 120 has been designed to incorporate setup and calibration standards established
by the Imaging Science Foundation (ISF). The ISF has developed carefully crafted,
industry-recognized standards for optimal video performance and has implemented a
training program for technicians and installers to use these standards to obtain optimal
picture quality from Vidikron video display devices. Accordingly, Vidikron recommends that
setup and calibration be performed by an ISF certified installation technician.
All signal types require separate processing. Therefore, you need to calibrate each VHD
Controller input separately.
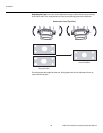
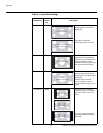
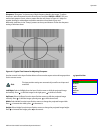
Cinema CINEMA Select Cinema to view 2.35 source
material in its native aspect ratio.
With a 16:9 screen and a
non-CineWide projector (no
anamorphic lens), the upper and
lower portions of the screen are
masked, but the geometry of the
active image area is unchanged.
With a 2.35:1 screen and a
CineWide-equipped projector,
the VHD Controller scales the
2.35:1 image so that the active
image area fills the 16:9 chip
surface, eliminating the black
bars. The secondary, anamorphic
lens then restores the proper
geometry to the 2.35:1 image.
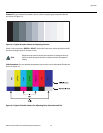
IntelliWide 2.35 IWIDE
2.35
A 16:9 image is scaled
NON-linearly (more on the sides
than in the center) to fit a 2.35:1
screen.
IntelliWide 2.35 is available only
on the Vision 120/CineWide.
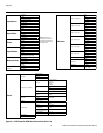
Table 4-1. Aspect Ratio Settings (continued)
Aspect Ratio
Remote
Control
Key
Description
2.35:1 Image on
16:9 Screen
(Cinema aspect ratio / no CineWide)
2.35:1 Image on
2.35:1 Screen
(
Cinema aspect ratio / CineWide)
16:9 Image on
2.35:1 Screen with
Intelliwide 2.35
16:9 Image on
2.35:1 Screen
16:9 Image on
2.35:1 Screen
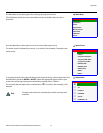
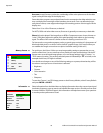
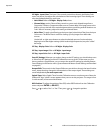
Picture
Brightness
Contrast
Color
Tint
Sharpness
When you change a picture quality setting, save the change to a preset
afterwards. Otherwise, the change will be lost when a different input is
selected. (Picture quality settings are saved for each input separately.) For
information about saving settings, refer to
Memory Presets on page 58.
Note