


52
ENGLISH
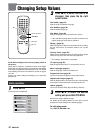
Changing Setup Values (continued)
Progressive Scan
When connecting the unit to a progressive-scan compatible
TV, you can take advantage of the unit's progressive scan
output enabling high quality video playback with less
flickers.
CAUTION
DO NOT set the "Progressive Scan" to "On" when
connecting to a TV that is not compatible with progressive
scan signals. If you set "Progressive Scan" to "On" in
error, the picture will appear scrambled. In this case, reset
the unit by holding down s for more than 5 seconds in
stop mode. The original video output will be restored and
the picture will become visible again.
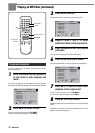
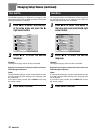
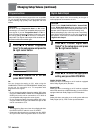
1
Press i/k to select "Progressive
Scan" in the setup menu and press the
l right cursor button.
Off
On
Disc Subtitle
Disc Menu
Rating
TV Aspect
Menu Language
Digital Audio Output
Disc Audio
Others
Country Code
Progressive Scan
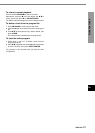
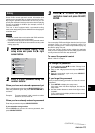
2
Press i/k to select "On" or "Off" and
press SELECT/ENTER.
On:
You can change the setting to "On" when using the
COMPONENT VIDEO OUT/PROGRESSIVE SCAN jacks
on the unit for connection to a TV compatible with
progressive scan signals.
Off:
– Do not change the setting (keep the setting "Off") when
using the COMPONENT VIDEO OUT/PROGRESSIVE
SCAN jacks on the unit for connection to a TV which is
not compatible with progressive scan signals.
– Do not change the setting (keep the setting "Off") when
using the VIDEO OUT jack or S-VIDEO OUT jack on the
unit for connection to a TV.
NOTES
• The Progressive Scan menu item is not displayed when
the VIDEO OUTPUT switch is set to "S-VIDEO".
• Composite video signals are not output from the VIDEO
OUT jack on the unit if "Progressive Scan" is set to "On".
Digital Audio Output
Set the audio output of the unit according to the type of
audio equipment connected to the unit.
CAUTION
DO NOT select "DOLBY DIGITAL/PCM" or "Stream/PCM"
for the "Digital Audio Output" when connecting to an AV
receiver not equipped with a Dolby Digital decoder or DTS
decoder (with an optical or coaxial connecting cord).
Merely attempting to play a disc may cause a screeching
noise which could be harmful to your ears and damage
the speakers. In this case, be sure to select "PCM" for the
"Digital Audio Output".
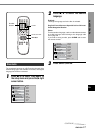
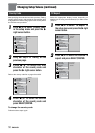
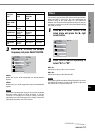
1
Press i/k to select "Digital Audio
Output" in the setup menu and press
the l right cursor button.
DOLBY
DIGITAL
/PCM
Stream/PCM
PCM
Sample Freq.
48KHz
96KHz
Disc Subtitle
Disc Menu
Rating
TV Aspect
Menu Language
Digital Audio Output
Disc Audio
Others
Country Code
Progressive Scan
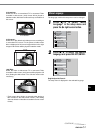
2
Press i/k to select the appropriate
setting and press SELECT/ENTER.
DOLBY DIGITAL/PCM:
Select this when connecting to an AV receiver equipped
with a Dolby Digital (AC-3) decoder.
Stream/PCM:
Select this when connecting to an AV receiver equipped
with a DTS decoder or an MPEG decoder, or an AV receiver
equipped with both Dolby Digital and DTS decoders.
PCM:
Select this when connecting to an audio system without a
Dolby Digital (AC-3), DTS or other special decoder.