User Manual
11
5.2.1 Camera setup
Explanation
1 The modifications will be available after clicking [APPLY] button on the bottom of the sub-menu windows
and being prompted to save and then clicking [ok] button.
2 If you want to cancel the modification, click [Exit] button to exit the menu.
3 When clicking [DEFAULT] button, all system default values will be reset to default value.
4 System default value indicates the value pre-set at the factory.
5.2.2 Record setup
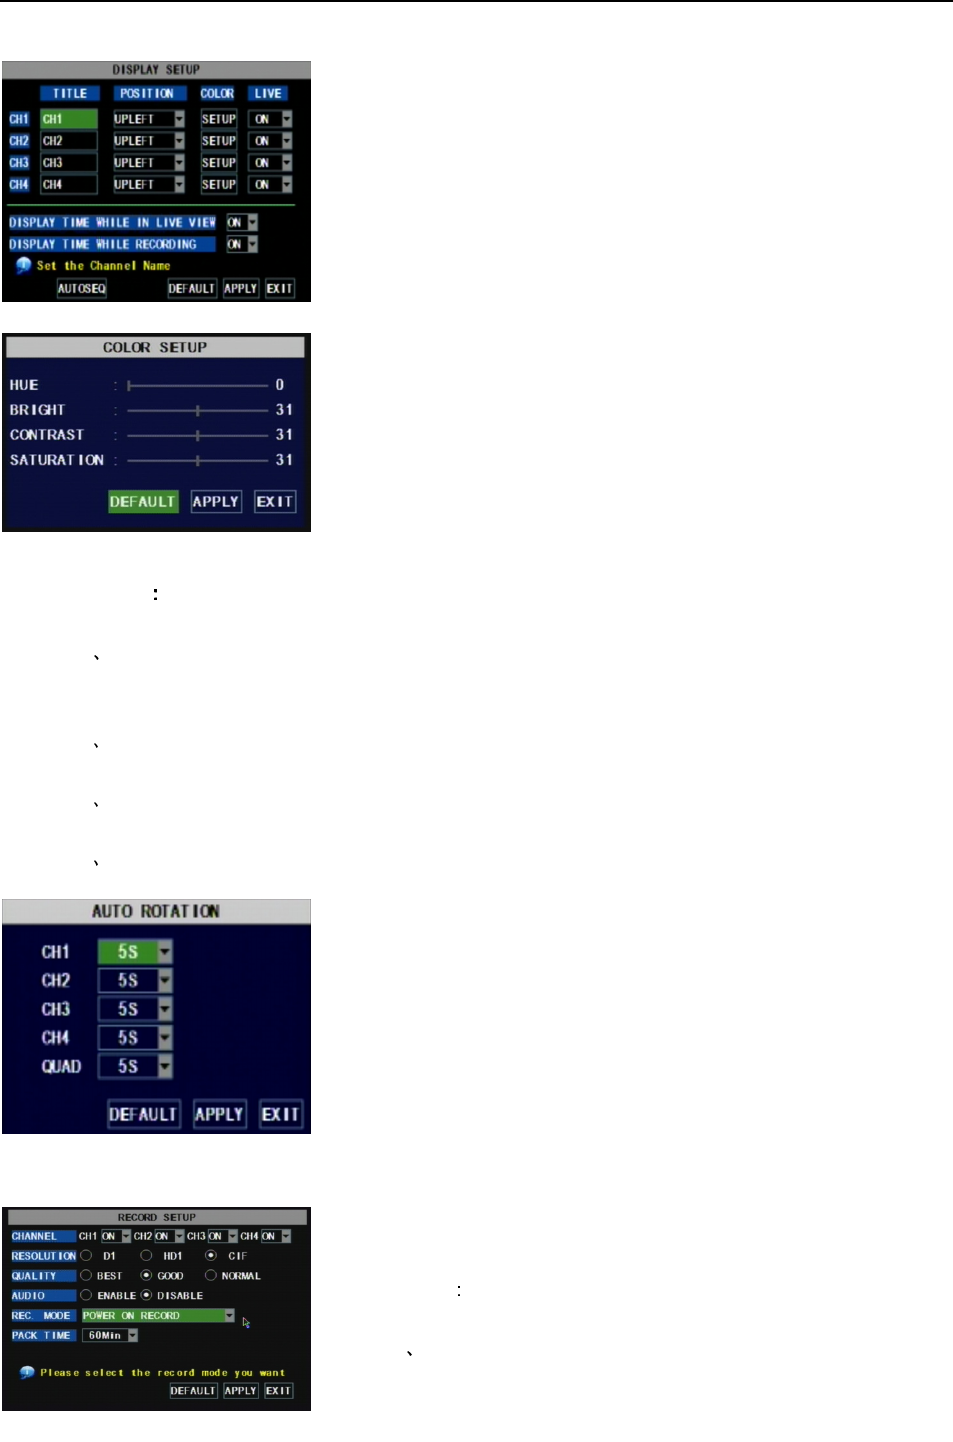
Go to [Main Menu Camera] to set up the name display
and position display of each channel (Shown as Picture 5-3), You
can also adjust image brightness, saturation, contrast and hue
settings of each channel after entering into [Color] Menu and set
up whether each channel can be previewed or not under Live
display and/or Recording mode.
Please note that the name of each channel supports up to
eight characters or four Chinese characters.
Click [Main Menu] [Record] to enter into [Record Setup]
menu (Shown as Picture 5-5)
Functions
1 The [Rec Mode] button allows you to setup recording 24
hours, on motion, or on a set schedule.
indicates maximum continuous time length of
Below is the Color Menu where you can adjust image
brightness, saturation, contrast and hue parameters of each
channel.(shown as picture 5-4)
Picture 5-4
Picture 5-5
Picture 5-3
Click [AUTOSEQ] button to start auto rotation function.
(setting sub menu shown as Picture 5-4A. After starting auto
rotation function, system will auto rotate the video images among
CH1, CH2, CH3, CH4 and Quad in turn.
Default rotation time: 5 second
Settable time range: 0~10 second
Picture 5-4A
