


6
Setting up your TV
Setting up your TV
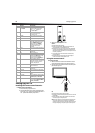
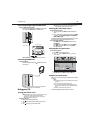
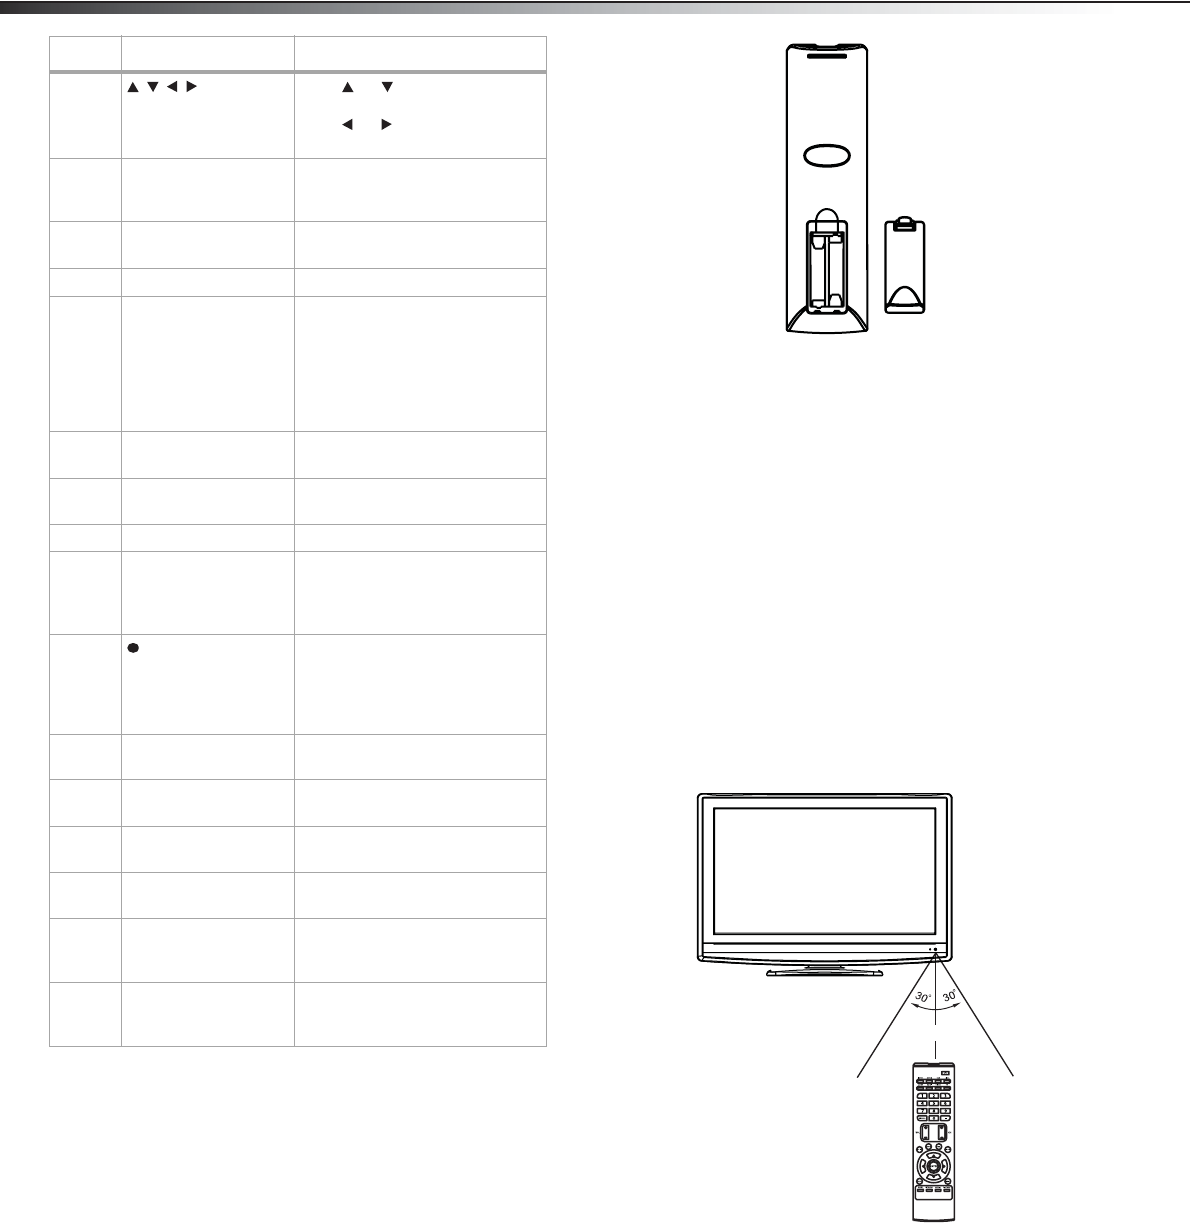
Installing the remote control batteries
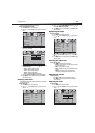
To install the remote control batteries:
1 Remove the battery compartment cover.
2 Insert two AAA batteries into the battery compartment. Make
sure that the + and – symbols on the batteries align with the +
and – symbols inside the battery compartment.
3 Replace the battery compartment cover.
Cautions:
Do not mix different types of batteries.
Do not mix old and new batteries. Mixing old and new batteries can
shorten battery life or cause old batteries to leak.
Remove batteries as soon as they no longer have a charge. Old batteries
may leak, and the chemicals that leak can cause a rash. If batteries
leak inside the battery compartment, use a cloth to wipe the inside of
the battery compartment.
If you do not intend to use the remote control for an extended time,
remove the batteries.
Do not expose batteries to excessive heat such as direct sunlight or
heaters. Do not dispose of used batteries in a fire.
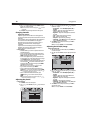
Using the remote control
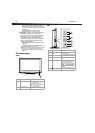
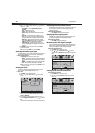
To use the remote control:
1 Make sure that there are no obstructions between the remote
control and the remote control sensor on the front of your TV.
2 Point the remote control toward the remote control sensor, then
press the button you want.
Cautions:
Do not drop the remote control or expose it to shock.
Do not expose the remote control to liquids and do not use in an area with
high humidity.
Do not leave the remote control in direct sunlight or near a heat source.
The heat may warp or damage the plastic.
Note: The remote control may not work if sunlight or strong light shines
on the remote control sensor on the front of your TV. If this occurs,
operate the remote control closer to the remote control sensor, change
the angle of the lighting, or change the angle or location of your TV.
11
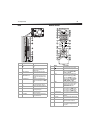
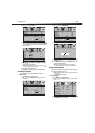
Press or to move up or
down in an on-screen menu.
Press or to adjust an
on-screen option.
12 ENTER Press to confirm a selection or
open a sub-menu in the
on-screen menu.
13 MENU Press to open the on-screen
menu.
14 SLEEP Press to set the sleep timer.
15 MTS/SAP In analog TV mode, press to
select the sound mode. You can
select STEREO, SAP (second
audio program), or MONO.
In digital TV mode, press to
select the audio track, if
available.
16 CCD Press to turn closed captions on
or off.
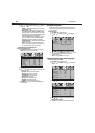
17 CH.LIST Press to open the memorized
channel list.
18 TV Press to watch TV.
19 VIDEO Press once to select the device
connected to AV IN jacks. Press
twice to select the device
connected to the S-VIDEO jack.
20 Press to select a digital
sub-channel. For example, to
select sub-channel 2 of the main
channel 5, press 5, press this
button, then press 2.
21 CH+/CH– Press to go to the next higher or
lower TV channel.
22 FAVORITE Press to display the favorite
channel list.
23 DISPLAY Press to display the information
banner.
24 EXIT Press to close the on-screen
menu.
25 PICTURE Press to select the picture mode.
You can select Standard,
Dynamic, Soft, or Personal.
26 AUDIO Press to select the sound mode.
You can select Standard, Music,
Movie, or Personal.
# Button Description
16.4’ (5 m)