


36 Making Detailed Adjustments
■ Brightness
Adjust the brightness so it’s suitable for your viewing conditions. For example, if you’re
projecting in a brightly lit room or onto an especially large screen, you may need to
increase the brightness. Decrease the brightness for dark rooms or small screens; this also
reduces power consumption and fan noise, and helps to prolong the life of the lamp.
■ Contrast
This setting adjusts the difference between bright and dark areas.
■ Auto Iris
Note: This setting cannot be used when the Color Mode is set to x.v. Color (see page 29).
When this setting is on, the amount of light produced by the lamp is automatically
adjusted according to the brightness of the image. Select either
Normal or High Speed
to indicate how quickly you would like the lamp to respond to changes in the brightness
of the image. The setting is stored separately for each image source and color mode.
■ Setup Level
Note: This setting can be used only when an NTSC signal is being input through the Video or
S-Video port, or when a video signal is being input through the Component video ports.
This setting adjusts the threshold at which dark areas of the image are rendered black
(0 IRE). For compatibility with most DVD and video equipment sold in the United
States, leave this setting at 0%. Check your video equipment’s specifications to be sure of
the correct setting.
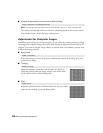
■ EPSON Super White
Note: This setting can be used only when a composite video, S-Video, or component video
signal is being input and the Color Mode is set to Natural, Theatre, Theatre Black 1, or Theatre
Black 2 (see page 29).
If bright parts of the image are washed out or overexposed (when the input signal
contains values over 100 IRE), turn this setting on to compensate.
Image > Brightness
Image > Contrast
Image > Auto Iris
Signal > Advanced > Setup Level
Signal > Advanced > EPSON Super White