


116
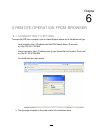
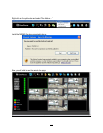
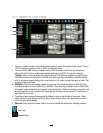
6.3 REMOTE LIVE VIEW
1. Click on a camera number on the left side of the display to switch that camera to full screen. Click on
“4UP” to display 4 screens or click on “9UP” to display 9 screens.
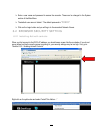
2. You can click the “Mic” button to transfer audio to DVR from client side if there is a microphone
attached to the PC and an amplifier and speaker attached to the DVR. You can also click the
“Speaker” button to transfer audio to the client side from DVR if there is a speaker on the PC and a
microphone and preamp attached to the DVR, and audio recording is enabled on the DVR. Double
click on a camera image to enlarge the current display to full screen; double click again or press “Esc”
to return to the normal view.
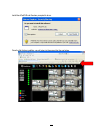
3. SUB/Main: Click this icon to switch stream for multi view. Sub stream resolution is 320x176 (if the
recording resolution is set at 1280x720), or 480x256 (if the recording resolution is set at 1920x1080),
sub stream image is less clear as compared to the main stream. Select sub stream if you wish to see
smooth image but do not care about the frame rate. By choosing the main stream, PC performance
may affect the frame rate.
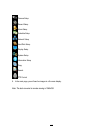
4. The status of each camera is represented by different colors on the left side of the screen. Green
means normal; orange indicates a Motion alarm; blue indicates Video Loss, red indicates an alarm
event and grey means disable.
5. Menu bar: Menu buttons for setup, search and export, details are explained in following chapters.
Live View
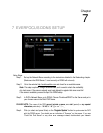
Express Setup
6
1
5
2
4
3