


52
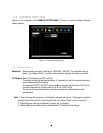
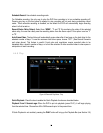
Schedule Record: Use schedule recording mode.
For Schedule recording, the only way to stop the DVR from recording is to turn schedule recording off.
Pressing any key on the front panel to attempt to stop recording will not work during scheduling record
mode. When schedule recording is disabled, as the default the DVR will automatically begin recording
when it is first turned on.
Record Status Relay Output: Select from “NONE”, “1” and “2”. By monitoring the state of the selected
alarm relay, the user can easily see the recording status from the alarm output if this option is set as “1”
or ”2”.
Auto Erase Video: The hard drive will automatically erase video after it has been on the hard drive for the
selected number of days. To use the maximum hard drive space, choose “OFF”. (See Record Overwrite
and notes above.) This feature is useful if local rules and regulations require recorded video to be
discarded after a specific number of days, or to limit the retention of older recorded video to clear space in
anticipation of event recording.
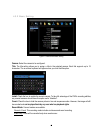
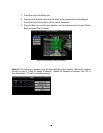
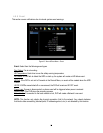
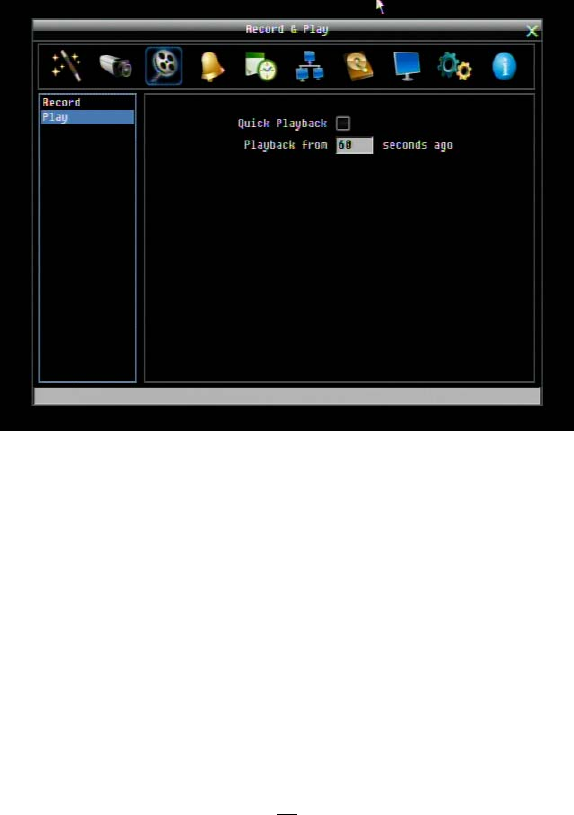
4.4.5 Play
Figure 4-3 Record & Play Menu - Play
Quick Playback: Check the box to enable the Quick Playback function as described below.
Playback From X Seconds ago: When the DVR is put into playback (press PLAY), it will begin playing
from the selected time. Choose from 60 to 3600 seconds prior to the present time.
If Quick Playback is not enabled, pressing the PLAY button will bring up the Playback Bar (see Section 3.5).