Settings for the recording format to a blank disc
30
Formatting a disc
Recording
When inserting a blank disc, the
unit starts to initialize the blank
disc.
After that, you can record to the
disc with the recording format
selected in SETUP menu.
You are allowed to set a specified
time for chapter marks.
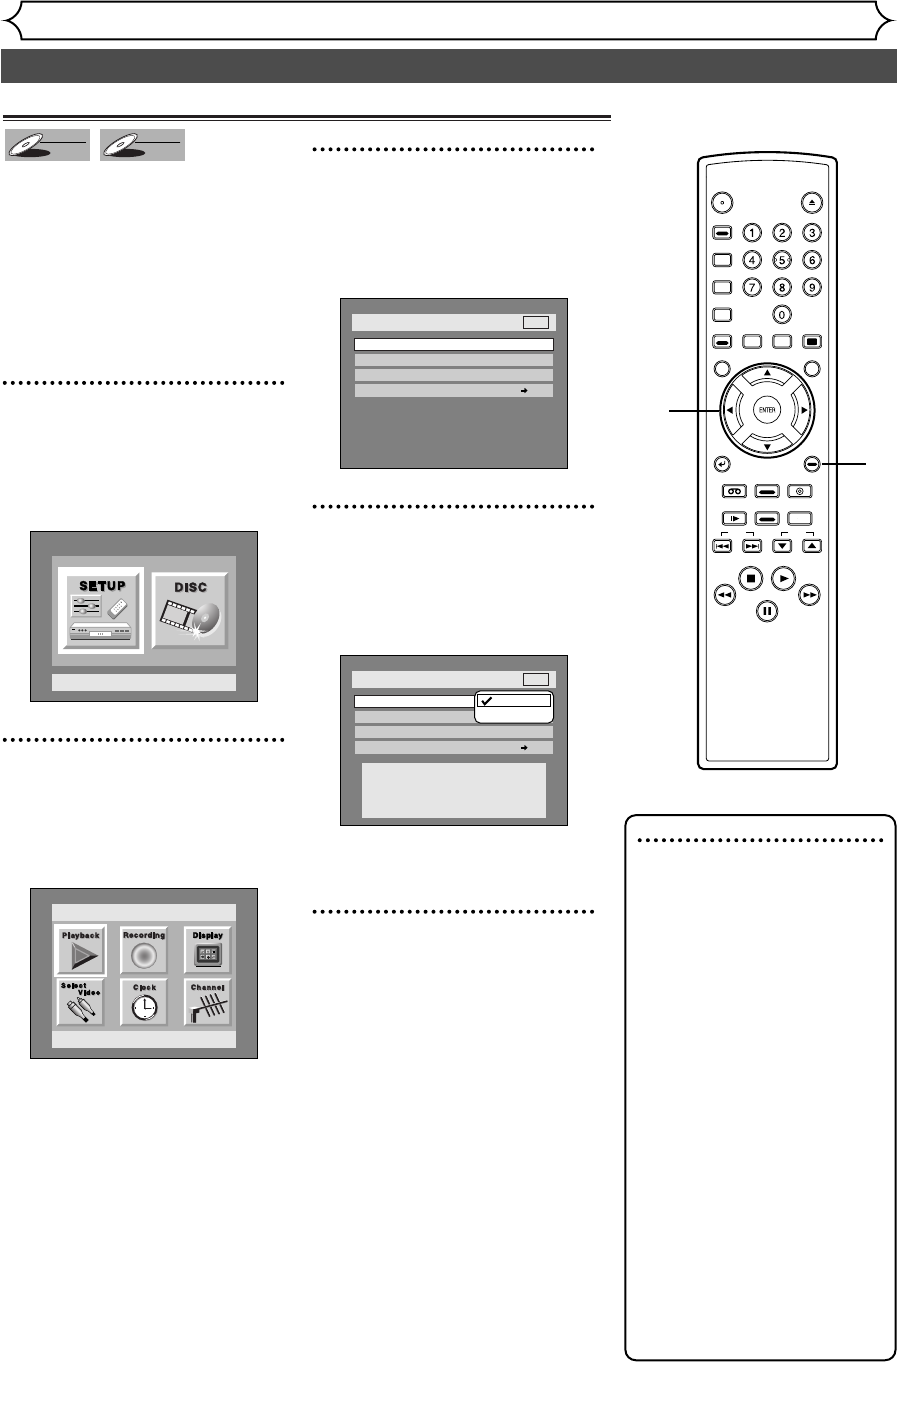
1
Press SETUP button to dis-
play SETUP/DISC menu.
SETUP/DISC menu will appear.
Screen:
2
Select “SETUP” using { / B
buttons, then press ENTER
button.
SETUP menu will appear.
3
Select “Recording” using K /
L / { / B buttons, then press
ENTER button.
Recording menu will appear.
4
Select “DVD-RW Recording
Format” using K / L buttons,
then press ENTER button.
Option window will appear.
Video mode has been selected as
the default.
5
Select “Video mode” or “VR
mode” using K / L buttons,
then press ENTER button.
The recording mode will be set.
Setup > Recording
Auto Chapter
Timer Programming
Video mode
DVD Player Compatibility mode.
VR mode
Editing possibility mode.
DVD-RW Recording Format
VR mode
10 minutes
Dubbing Mode VCR DVD
DVD
Video mode
VR mode
Setup > Recording
Auto Chapter
Timer Programming
Dubbing Mode
Video mode
VCR DVD
DVD-RW Recording Format
10 minutes
DVD
Setup
Playback Setting
Setup Menu
DVD-RW
DVD-RW
VR
DVD-RW
DVD-RW
Video
Note
• The recording format setting
is effective only for DVD-RW
discs.You cannot change the
recording format on a DVD-R
disc. DVD-R discs will always
be in Video mode.
•
You cannot mix two for-
mats on one DVD-RW disc.
When you load a disc once
recorded before, the
recording format cannot be
changed even if you change
it in SETUP menu.
• When inserting a blank
DVD+R or DVD+RW disc,
the error message ("Disc
Error") will appear.This unit is
not compatible with a
DVD+R/RW disc.
• PLAYLIST will be created
automatically when recording
on DVD-RW in VR mode.
POWER
OPEN/
CLOSE
ABC
JKL
TUV
DEF
MNO
WXYZ
SPACE
.@/:
GHI
PQRS
VCR Plus
+
AUDIO DISPLAY
REC
MONITOR
CLEAR/
C.RESET
TOP MENUMENU/LIST
SETUP
RETURN
SKIP
STOP PLAY
FWDREW
PAUSE
SLOW
REC
SPEED
REC/OTR
VCR
VIDEO/TV
DVD
CH
SEARCH
MODE
CM SKIP
ZOOM
1
2
3
4
5
E9460UD(EN/SP/FR).qx3 04.8.10 10:47 Page 30
