CHAPTER 4 - CONNECTING YOUR DUAL-DECK VCR 49
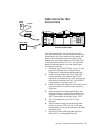
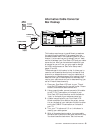
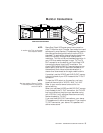
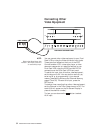
ANT. IN
TV OUT
CH 3 CH 4
VHF/UHF
Dual-Deck
VCR Cable
(supplied)
CABLE
OUTLET
TV BACK PANEL
DUAL-DECK VCR BACK PANEL
Out to TV
Coaxial Cable
(not supplied)
CONVERTER
In from VCR
MULTIMEDIA
CONTROL
PORT
IN
OUT 1 OUT 2
VIDEO
AUDIO - L
AUDIO - R
Alternative Cable Converter
Box Hookup
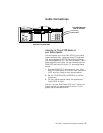
This hookup requires you to use different procedures
for watching and recording TV programs than the
procedures described in the Operating Section of this
manual. It also requires you to change “control” back
and forth between your Dual-Deck VCR and your cable
converter box. After you have determined what type
of connection you will use, you may need to change
the VCR’s antenna source. See Tuner Setup menu,
pages 17 and 35.
The advantage of this hookup is that it allows you to
record a non-scrambled channel only and watch that
channel or a selected channel from your cable box at
the same time. A disadvantage of this hookup is that it
does not allow you to record premium channels that
require your cable converter box for descrambling (you
can still watch those channels).
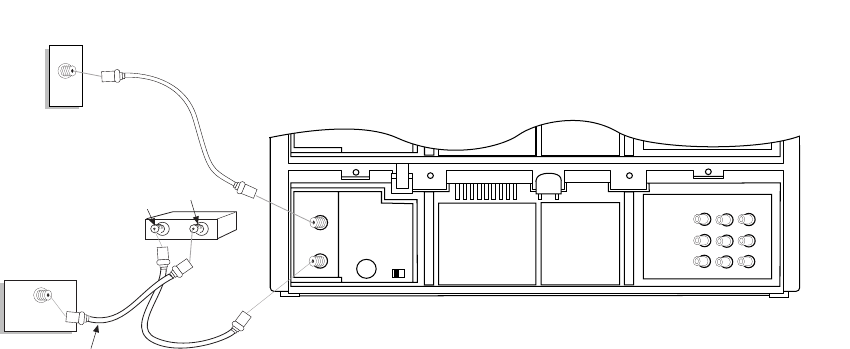
1. Place your Dual-Deck VCR next to your TV and
plug the VCR power cord into a wall outlet. Discon-
nect all antenna and cable connections.
2. Using a coaxial cable, connect one end of this cable
to the TV OUT connection on the back of your
Dual-Deck VCR, and the other end of the cable to
‘input’ on the back of your cable converter box.
3. A cable is supplied with your Dual-Deck VCR.
Attach one end of this cable to the output connec-
tion on the back of your cable box. Attach the other
end to the CABLE IN connection on the back of
your TV.
4. Turn your TV to channel 2, 3 or 4, whichever is
used by your cable system.
5. With all three devices turned on, tune your cable
converter box to channel 3 and push the MENU key.
You should see the clock menu. Set the time and


