31
Timer Recording
Before You Begin
• Make sure the Date and Time are set
correctly; see page 22.
• Make sure your disc has enough
space to record the desired pro
-
gram (press DISC MENU to view the
amount of available recording time).
Setting a Timer Recording
To program a timer recording:
1 Insert a blank DVD+R or DVD+RW
disc into the disc tray.
• Press OPEN/CLOSE to open and
close the disc tray.
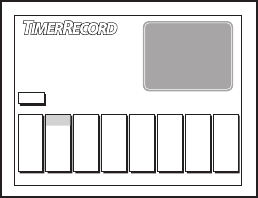
2 Press TIMER to display the Timer Re-
cord menu:
3 Press to select one of the timer
events.
4 Press to select “Mode” and press
ENTER.
5 Press and ENTER to select:
Once - For a one-time recording.
Weekly - For a weekly recording.
Daily - For a daily recording.
6 Use the and ENTER keys to
select and set:
Date - The date or day of the week of
the recording.
Start - The recording start time.
End - The recording stop time.
7 Press to select “Source” and
press ENTER.
8 Press and ENTER to select:
TV - To record from TV (use to
select the desired channel).
AV1-Front - To record from the front
Audio/Video Input.
AV2-Rear - To record from the rear
Audio/Video Input.
S-Video - To record from the rear S-
Video Input.
DV-Front - To record from the front
DV Input.
9 Press to select “Quality” and
press ENTER.
10
Press and ENTER to select:
HQ (best) – 1 hour/disc
SP (better) – 2 hours/disc
EP (good) – 4 hours/disc
SLP (fair) – 6 hours/disc
11
If the Status column says “Ready,”
then programming is complete.
• If the Status column is blank, there
is a problem with the timer record
-
ing. Use the keys to go back
and change the settings.
• If you have not set the date and
time; see page 22.
12
Press POWER to turn off the DVD
Recorder.
• The DVD Recorder must be turned
off to activate the Timer Recording.
• The TIMER indicator on the front
panel display will light.
• Timer Recording continues until
you stop the recording or the disc is
full.
4 - Operations
Date
- - - - -
- - - - -
- - - - -
- - - - -
- - - - -
Start
- - - - -
- - - - -
- - - - -
- - - - -
- - - - -
End
- - - - -
- - - - -
- - - - -
- - - - -
- - - - -
Quality
- - - - -
- - - - -
- - - - -
- - - - -
- - - - -
Status
- - - - -
- - - - -
- - - - -
- - - - -
- - - - -
Reset
Reset
Reset
Reset
Reset
Source
- - - - -
- - - - -
- - - - -
- - - - -
- - - - -
Mode
- - - - -
- - - - -
- - - - -
- - - - -
- - - - -
EXIT
