


22
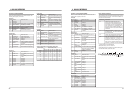
Built-in clock setting
Time data is recorded in the sub code area of the tape during recording. In the Play mode, this data is read out and can be
shown on the on-screen display or the counter display.
5 PREPARATION
5
Setting procedure
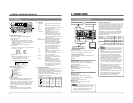
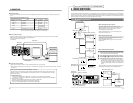
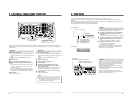
The names of the operation buttons are shown above the buttons.
Set the tape counter display to the time display.
Set the No. 516 <DISPLAY SELECT> menu switch to
“CLOCK”.
੬
See No. 516 <DISPLAY SELECT> on page 20.
Set the [COUNTER] switch to
“TC” or “UB”.
• To set the time, set to
“TC”.
The time display is shown in the tape counter.
• To set the date, set to
“UB”.
The date display is shown in the tape counter.
Engage the setting mode.
Press the [HOLD] button.
• Clock setting
[ The hour digit starts to blink.
• Date setting
[ The
month (U MODEL), day (E MODEL) digit starts
to blink.
Change the value.
Each time the [ADVANCE] button is pressed, the value of
the blinking digit increases.
While holding down the [SHIFT] button, press the
[ADVANCE] button to reset the value as follows.
• Clock setting: “00:00:00”
• Date setting: “01:01:2000”
Shift the digit.
Press the [SHIFT] button.
• Clock setting: Each time the [SHIFT] button is pressed,
the blinking cursor moves in the order of hours [
minutes [ seconds.
• Date setting: Each time the [SHIFT] button is pressed,
the blinking cursor moves in the order of
month
[
day
[
year (U MODEL), day
[
month [
year (E MODEL).
Repeat steps 4 to 5 to change the values for each digit.
Enter the set data.
Press the [PRESET] button to enter the set data.
HMSF
HMSF
HMSF
HMSF
HMSF
[Reference]
Clock data is retained for about 60 hours after the
6-hour power supply is used up (Operate On mode).
SP
SLAVESLAVE
SHIFT
SET
SELECT
SHIFT
MENU
HOLD
AUDIO
MONITOR OUTPUT COUNTER
SHIFT A. DUB
ADVANCE PRESET
L CTL
TC
UB
CH-1/2
CH-3/4
R
MIX MIX
MENU
OVER
OVER
HMSF
AUD LOCK
32k 48k
PB NDF
SERVO RF
DEW
AUTO OFF
HOLD
CH 2/4
CH 1/3
dB40 30 20 10
0
Time and date display
TC: Time
UB: Date
HOLD: Start
SHIFT: Digit shift
ADVANCE: Changes the value.
PRESET: Enters the set value.
23
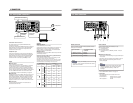
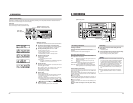
PHONES
MIC
REMOTE
LOCAL
EJECT
OPERATE
REC LEVEL
CH-2/4
CH-1/3
SHIFT
SET
SELECT
SHIFT
MENU
HOLD
AUDIO
MONITOR OUTPUT COUNTER
SHIFT A. DUB
ADVANCE PRESET
L CTL
TC
UB
CH-1/2
CH-3/4
R
MIX MIX
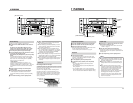
REW STOP FF
REC PLAY
PAUSE
ON/OFF
MENU
OVER
OVER
HMSF
AUD LOCK
SP
32k 48k
SLAVE PB NDF
SERVO RF
DEW
AUTO OFF
HOLD
CH 2/4
CH 1/3
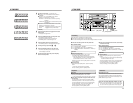
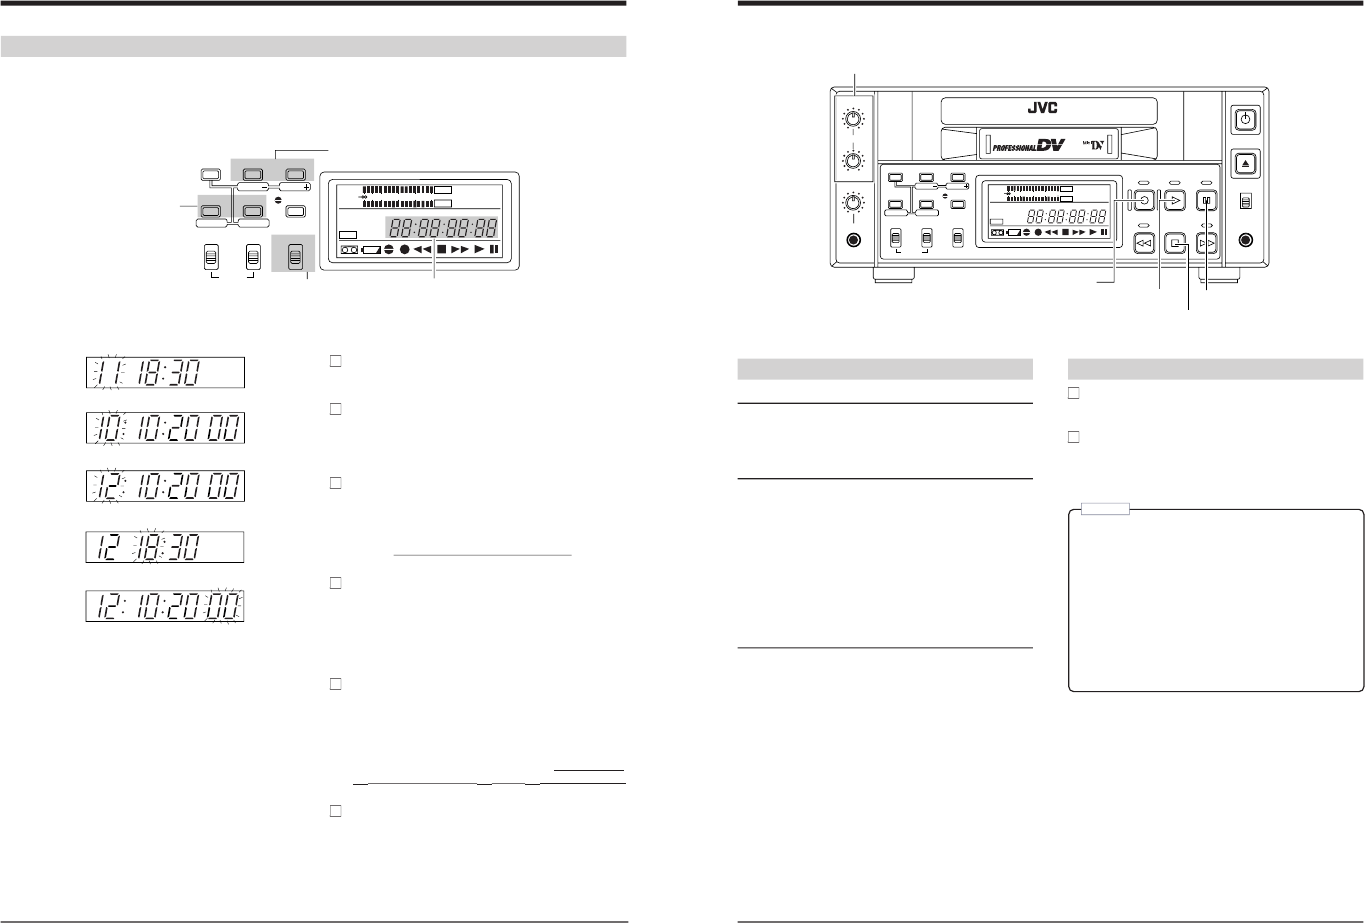
VIDEO CASSETTE RECORDER BR-DV600U
dB40 30 20 10
0
6 RECORDING
Recording preparation
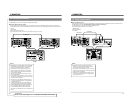
Loading a cassette
Check that the erasure prevention tab is set to allow
recording.
Insert the cassette in the cassette loading slot.
Input video signal selection
Select the input video signal with the No. 108 <VIDEO
INPUT SELECT> menu switch.
LINE: Selects the composite video signals input to the
[LINE IN] connector.
Y/C: Selects the Y/C signals input to the [Y/C IN]
connector.
COMPONENT: Selects the component video signals input
to the [COMPONENT IN] connector.
IEEE 1394: Selects the digital video signals and the digital
audio signals input to the [DV IN/OUT] connector.
Audio sampling rate setting
Select the audio sampling rate with the No. 245 <SAMPLING
RATE> menu switch.
The number of usable audio channels is determined by the
sampling frequency selected with the No. 245 <SAMPLING
RATE> menu switch.
5
32 kHz: 4 channels
In normal recording, signals are recorded on CH1 and CH2. In
the audio dubbing mode, signals are recorded on CH3 and CH4.
5
48 kHz: 2 channels
Signals are recorded on CH1 and CH2. Audio dubbing is not
possible.
Adjust the audio recording level with the [REC LEVEL]
control.
[PLAY] button
[REC] button
[PAUSE] button
[STOP] button
Recording
Press the [PLAY] button while holding down the
[REC] button.
[Recording starts.
Press the [PAUSE] button to temporarily stop recording.
To restart recording, press the [PLAY] button.
To stop recording, press the [STOP] button.
Notes:
5If the unit remains in the Pause mode for more than
5 minutes, the Stop mode is automatically engaged
to prevent the tape from being damaged. If tape
remaining time is less than 3 minutes or the unit is
being used in a low-temperature environment, the
Stop mode is engaged within about 3 minutes.
5When a tape recorded on this unit is played back on
a consumer MiniDV VCR, the sound level may be
low.
5During recording, the upper section of the picture
may be distorted or deflect. This is not a malfunc-
tion.
[REC LEVEL] control