


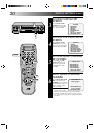
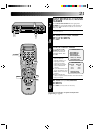

17
SELECT CABLE BOX
OUTPUT CHANNEL
6
Your selection depends on
how your cable box is
connected to your VCR.
If your cable box is
connected to your VCR
using an RF connection . . .
. . . press CH
5
∞ or TIME
SCAN
5
∞ to place the
arrow next to the channel number representing the cable
box’s output (2–6).
If your cable box is connected to your VCR’s AUDIO/
VIDEO IN connectors . . .
. . . press CH
5
∞ or TIME SCAN
5
∞ to place the arrow
next to “ON LINE”.
RETURN TO VCR PLUS+
SET-UP SCREEN
7
Press MENU.
CABLE BOX OUTPUT
=OFF
ON CH2
ON CH3
ON CH4
ON CH5
ON CH6
ON LINE
PRESS (5,∞), TO SELECT
PRESS (MENU) TO END
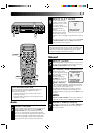
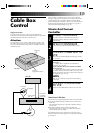
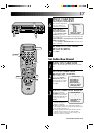
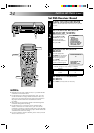
TURN ON CABLE BOX
1
Select a channel other than channel 9 on your Cable
Box.
ACCESS CABLE BOX
BRAND SET SCREEN
2
At the VCR Plus+ Set-Up
screen, press CH
5
∞ or
TIME SCAN
5
∞ to place
the arrow next to “CABLE
BOX BRAND SET”, then
press OK.
ENTER CABLE BOX BRAND
3
Press the appropriate
NUMBER keys to enter the
Cable Box Code from the
CABLE BOX BRAND LIST
on page 18, then press
ENTER.
● If the cable box’s
channel changes to 9,
setting is complete.
● If there are more than one code number listed for
your brand of cable box, repeat step 3 until the cable
box’s channel changes to 9.
● If you go through all listed code numbers and the
channel doesn’t change, try all other numbers
between 1 and 69. That is because, maybe, your
cable box model is not listed.
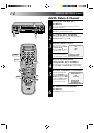
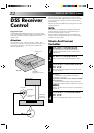
VCR PLUS+ SET-UP
GUIDE CHANNEL SET
GUIDE CHANNEL MAP
CABLE BOX OUTPUT
=CABLE BOX BRAND SET
PRESS (5,∞), THEN (OK)
PRESS (MENU) TO END
Set Cable Box Brand
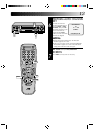
CABLE BOX BRAND SET
1
SELECT BRAND NO. AND
PRESS (ENTER)
PRESS (MENU) TO END
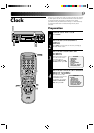
12
45
3
6
8
0
7
9
MENU
OK
TIME SCAN
CH
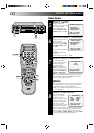
8
••
•
•
••
••
•
•
•
MENU
OK
CH
NUMBER
ENTER
CONTINUED ON NEXT PAGE.