


10
Getting Started
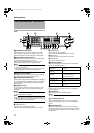
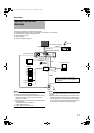
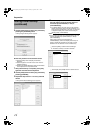
Rear I/O Terminals
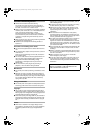
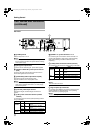
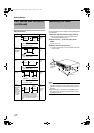
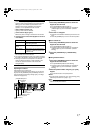
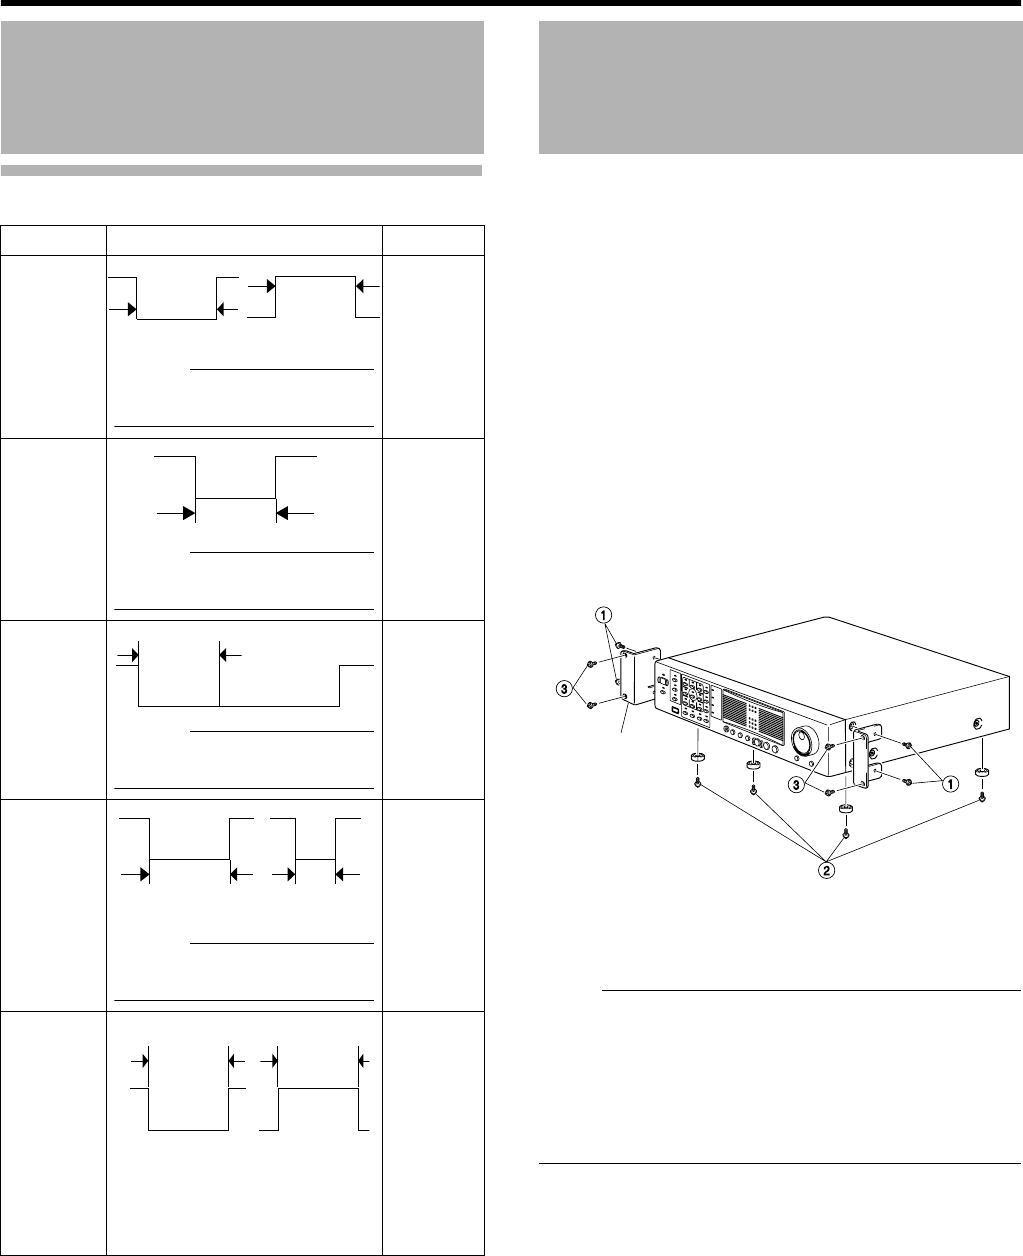
Use the supplied rack mount bracket to mount VR-N1600U/E
to the EIA rack.
1 Mount the rack mount bracket using screw (1)
● Use the 4 screws (M4 x 10 mm) supplied to fasten
VR-N1600U/E at the two sides.
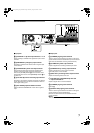
2 Remove screws B of the foot (4 pcs) at the
bottom
● Remove the foot.
3 Mount to the rack using screws C
● Use the 4 screws (M5 x 11 mm) supplied to fasten this
unit to the rack.
Note :
● Do not place any object on the VR-N1600U/E unit that
has been mounted to the rack. Doing so may cause it to
lose balance and drop or fall, hence resulting in injuries or
damages.
● When mounting 2 or more units of VR-N1600U/E to the
rack, make sure to mount it at a distance that is at least
equivalent to one unit.
Part Names and Functions
(continued)
Terminal Remarks
e[ALARM
IN]
Memo :
● Set the impedance at the output
end to 10kK or below.
Make
Contact
Input
f[EMER-
GENCY]
g[ALARM
RESET]
Memo :
● Set the impedance at the output
end to 10kK or below.
Make
Contact
Input
h[EXT REC
IN]
Memo :
● Set the impedance at the output
end to 10kK or below.
Make
Contact
Input
j[OPE ON/
OFF]
Memo :
● Set the impedance at the output
end to 10kK or below.
Make
Contact
Input
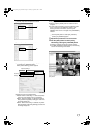
j[REC
TA LLY ]
k[ALARM
OUT]
l[WARN-
ING OUT]
m[OPTION
OUT1]
[OPTION
OUT2]
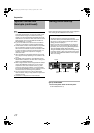
(External Pull-up Level)
The make contact is formed using
the individual output terminals and
the COM terminal. Turning off the
power of VR-N1600U/E switches the
output of the output terminals to
break.
Auto
Collector
Output
(DC15V, 10
mA and
below)
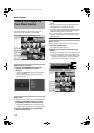
250 ms
and above
250 ms
and above
Make
Break
250 ms
and above
250 ms
and above
1 s and
above
Approx. 50 ms
OPE ON
OPE OFF
Make
Output In
Progress
Break
Output In
Progress
Mounting to a Rack
Rack Mount
Bracket
(4 Locations)
VR-N1600_Startup_EN_001B.book Page 10 Thursday, August 20, 2009 1:10 PM