14
Preparation
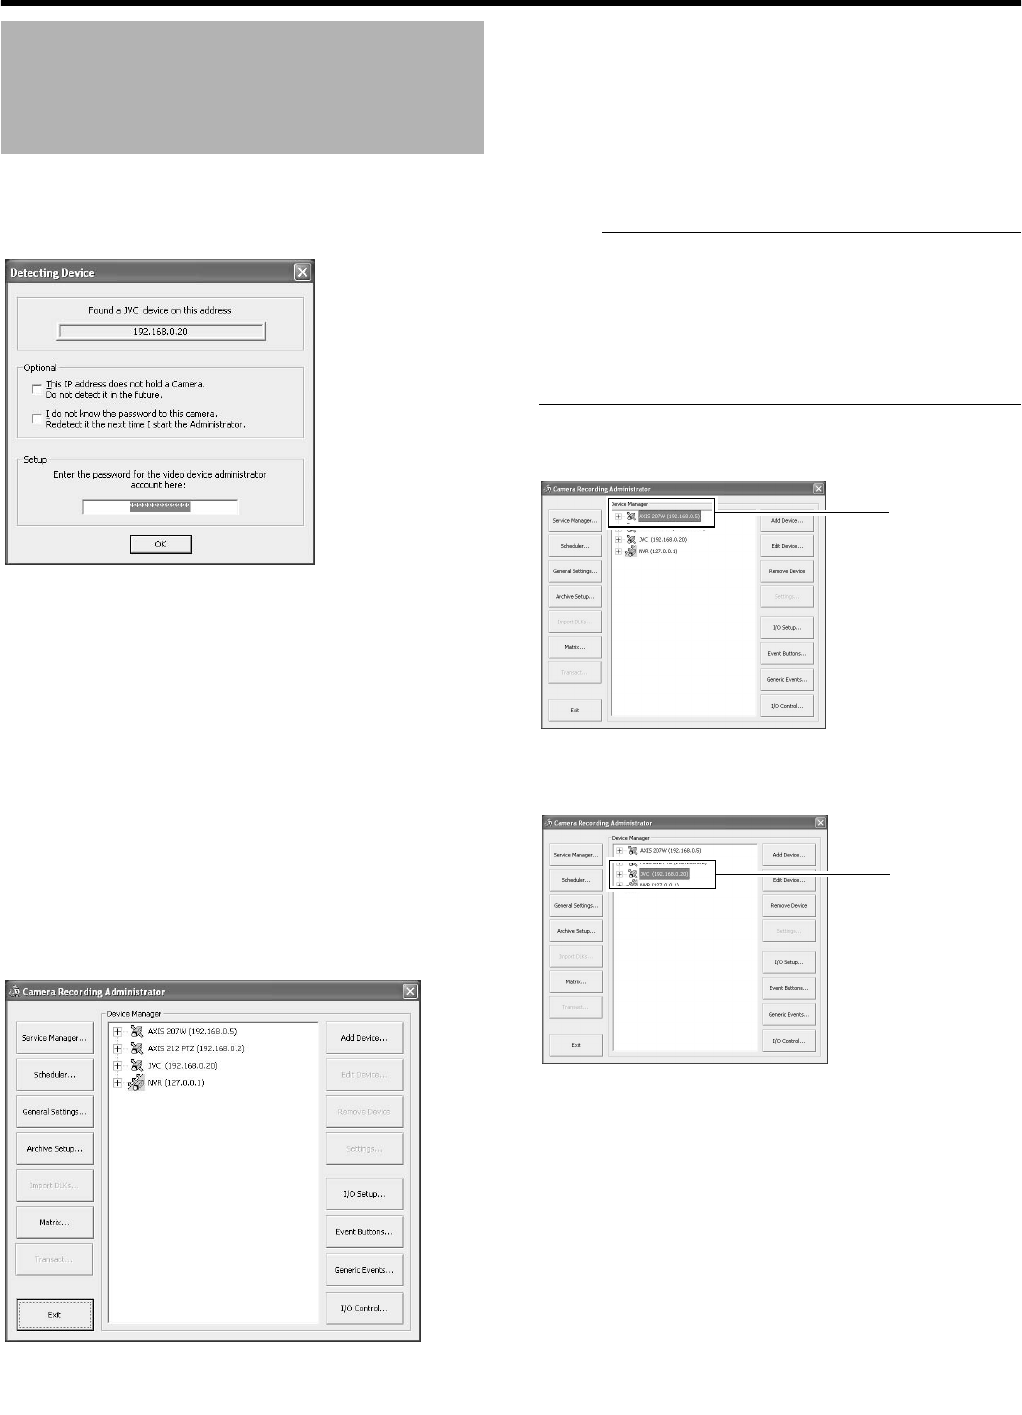
5 Use the [SKIP] button to select [OK], followed by
pressing the [16/ENTER] button
● The [Configure Device] screen appears.
6 Enter the password for the network camera
● Press the [KEY] button to display the software
keyboard.
● Use the keypad to move the mouse cursor over the
software keyboard.
● Pressing the [16/ENTER] button inputs the characters
on the keyboard into the password field.
7 After password entry is complete, press [KEY]
again the close the software keyboard
8 Use the [SKIP] button to select [OK], followed by
pressing [16/ENTER]
9 Repeat the steps from 5 to 7 for every detected
camera
● The [Camera Record Setting] screen appears.
10 Set the display rate of each camera such that
the total display rate of all cameras does not
exceed 80 ips (VR-N1600U/E) or 160 ips
(VR-N1600U/E(A)).
● The default display rate is set at 8 ips. The maximum
display performance of 80 ips will be exceeded if 11 or
more cameras are detected. In this case, you will need
to adjust the display rate of each camera using the
following steps. (VR-N1600U/E)
Note :
● The recording rate may drop if the total display rate of all
cameras exceeds 80 ips (VR-N1600U/E) or 160 ips
(VR-N1600U/E(A)).
When playing back the recorded images of
VR-N1600U/E(A), set the total display rate to 80 ips or
below to display the playback from the main unit and
distribution for 13 channels or more simultaneously.
A Press the [SKIP] to select the Device Manager
● The device at the top of the list is selected.
B Use the [2/D] and [10/0/E] buttons to select a device
During Initial Startup
(continued)
A
B
VR-N1600_Startup_EN_001B.book Page 14 Thursday, August 20, 2009 1:10 PM


