HOME DVD PLAYER V10M10_IM_EN_08072006
www.jWIN.com
18
GETTING STARTED
Preparing the Unit and Attached Devices
After all the hardware connections are done, you can now connect the power cord of this unit
and the attached devices. Please take a special caution while connecting the power cords to
the outlet, and carefully read and follow the instructions in the user safety guide section in this
manual while connecting power cords. After connecting the power cords, turn on this unit by
pressing the [POWER] button on the main unit or the [STANDBY] button on the remote control.
Also, turn on all the attached devices. This unit and all the attached devices must be
appropriately set with the proper mode and channel settings based on your choice of
connections. For the system setup of this unit, please read and follow the instructions below.
For the system setup of the attached devices, please refer to their user’s manual.
Navigating the Setup Menu
In the setup menu, there are 6 setup pages categorized as followings: SYSTEM, LANGUAGE,
AUDIO, VIDEO, SPEAKER, and DIGITAL. Each setup page is composed of the several setup
options corresponding to each category.
1. Turn on the main unit by pressing the [POWER] button
on the main unit or [STANDBY] button on the remote
control if it is off.
2. Press the [SETUP] button on the remote control. The
setup menu will appear on your TV screen.
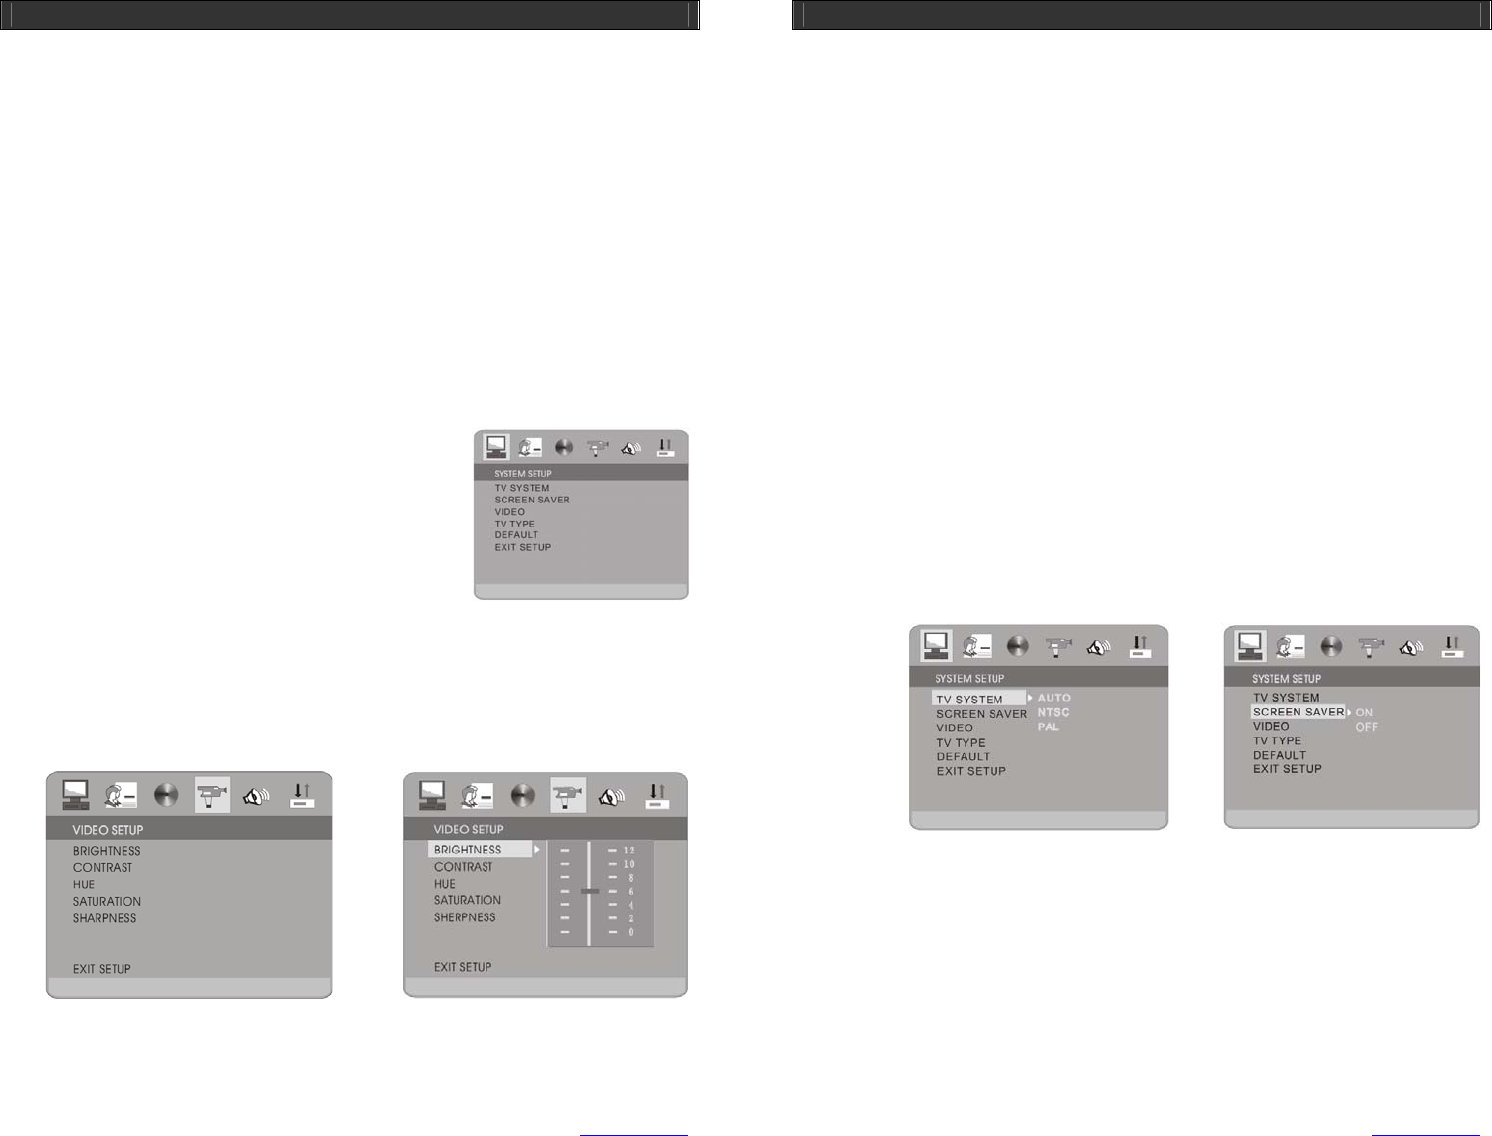
3. Use the [W / S / T / X] buttons and the [ENTER] button
on the remote control to navigate the setup menu. For an
example, if you want to set the brightness level in the video setup page, press the [X]
button to highlight the video icon, and then press the [T] button to select the
“BRIGHTNESS” option. After that, press the [ENTER] or [X] button to confirm your
selection. By now, you can see the setting values of the brightness. Using the [S / T]
buttons, you can select the value you want and confirm the selected value by pressing the
[ENTER] button.
4. Select the “EXIT SETUP” option using the [W / S / T / X] buttons, and then press the
[ENTER] button to exit the setup menu. Or you can exit the setup menu by pressing the
[SETUP] button.
HOME DVD PLAYER V10M10_IM_EN_08072006
www.jWIN.com
19
GETTING STARTED
About the System Setup
The system setup menu is composed of the following setup options: TV SYSTEM, SCREEN
SAVER, VIDEO, TV TYPE, and DEFAULT.
1. TV SYSTEM: Used to set the video output according to your TV system.
a. AUTO: When this option is selected, the video signal format will depend on the
DVD recording format. If a DVD disc is recorded with the PAL TV format, this
unit will automatically output the AV signal in the PAL format. To watch a movie
correctly, your TV must support the PAL format. If a DVD disc is recorded with
the NTSC TV format, this unit will automatically output the AV signal in the
NTSC format. To watch a movie correctly, your TV must support the NTSC
format.
b. NTSC: When this option is selected, the video signal format will no longer
depend on the disc format. Regardless of the DVD recording type, this unit will
output the AV signal in the NTSC format. To watch a movie correctly, your TV
must support the NTSC format.
c. PAL: When this option is selected, the video signal format will no longer depend
on the disc format. Regardless of the DVD recording type, this unit will output
the AV signal in the PAL format. To watch a movie correctly, your TV must
support the PAL format. There are several PAL types such as PAL-N, PAL-M,
PAL-G, PAL-B, PAL-I, and so on. Thus, please check the technical
specifications for which type of PAL your TV set supports. This unit supports
PAL443 only.
2. SCREEN SAVER: Used to protect the TV screen from the afterimage damage by the non-
moving image.
a. ON: If it is set on, this unit will show the logo moving around on the screen when
the system is idle for a certain time of period.
b. OFF: If it is set off, this unit will not enter the screen saver mode even if the
system is idle for a long time.


