


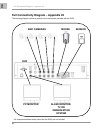


Hard Drive Replacement - Appendix #3
63
ENG
Hard Drive Replacement - Appendix #3
The DVR comes with a pre-installed Hard Drive; however the unit will work with a replacement single IDE
Hard Drive (up to 500GB). A maximum of two (2) Hard Drives can be installed into the DVR; however
the CD-RW must first be disconnected.
The Hard Drive storage capacity and model name are shown on the loading screen when the DVR
system loads. If the DVR does not recognize the Hard Drive, the system will not boot. If a new Hard Drive
is used in the DVR, the system will prompt to format the drive. Any drive formatted by the DVR will not be
recognized by a PC, and the data cannot be accessed.
NOTE: Make sure that the DVR is OFF and the power cable has been disconnected before changing the
Hard Drive.
Removing the Back Cover and Installed Drive
1. Remove the screws from the DVR Cover. Remove the cover panel.
2. Remove all cables from the previously installed drive.
3. Remove the screws holding the drive to the case.
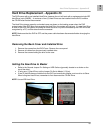
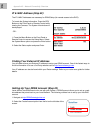
Setting the New Drive to Master
• Refer to the General Jumper Pin Setting on HDD Surface (generally located on a sticker on the
top of the drive).
• If using one (1) Hard Drive, set the Jumper Pin Set to Master (1 Drive).
• If two (2) Hard Drives are installed into the DVR, set one drive to Master, and one drive to Slave.
When using two Hard Drives, remember to first disconnect the CD-RW Drive.
NOTE: Use an IDE Hard Drive.