


30
CHAP. 5 Set Up
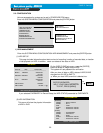
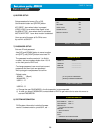
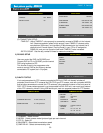
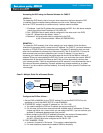
2) RS-232C SETUP
User can control the DVR via RS-232C port.
Connect DVR to PC via RS-232C port and control
DVR using keyboard of PC.
This function is mainly for programmer who
wants to control DVR as part of many devices
connected to PC system, as in SI project.
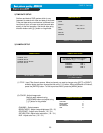
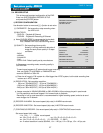
3) PAN/TILT SETUP
It is to set parameters for PTZ camera connected to DVR unit. DVR unit already includes all
protocols of well-known PTZ cameras like PELCO D type PTZ camera, and user just select MODEL
and set other parameters to control this PTZ cameras, using operation buttons on the front panel of
DVR. If PTZ camera whose protocol is not incorporated into this DVR unit, user must input protocol
of this PTZ camera by himself. Using USB device port, user can upgrade protocol for PTZ camera.
PAN/TILT SETUP
COMMAND SETTING Å PTZ camera set
SPEED SETTING Å PTZ speed set
SELECT : ▲▼, & [ENTER]
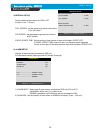
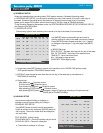
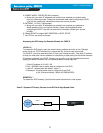
(2) CONNECTION SETUP :
- TIME OUT : Adjust TIMEOUT value properly to successfully access to DVMR unit via Internet
line. If data transmission speed is high enough, leave TIMEOUT value as set by
manufacturer (200 msec), and increase it if data transmission via Internet line is
relatively slow. Execute tracert (Tracing Route) in your PC for IP assigned to
DVMR unit, and you can figure out how much TIMEOUT value increased.
- RETRY COUNT : Set the retry number of times for network connection.
RS-232C SETUP
SPEED
LENGTH
STOP BIT
PARITY
576000
8
1
NONE
SELECT : ▲▼, CHANGE VALUE : + -
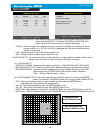
01
PELCO-D
000
2400 BPS
1 MSEC
PAN/TILT STOP
0.7
FF 00 00 00
00 00 00 00
SELECT : ▲▼, CHANGE VALUE : + -
CHANNEL
MODEL
PTZ ID
BAUDRATE
CMD DELAY
COMMAND
LENGTH
CODE
COMMAND SETTING
1) CHANNEL : Select channel
2) MODEL : Select camera model (protocol type) per each channel
3) PTZ ID : Select ID
4) BAUDRATE : Select data transmission speed
5) CMD DELAY : Select command delay time
SELECT MENU : ▲▼, & [ENTER]
TIMEOUT 200 MSEC
RETRY COUNT 08
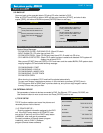
CONNECTION SETUP
MANUAL
000.000.192.168
192.168.001.160
255.255.255.000
192.168.001.001
SELECT : ▲▼, CHANGE VALUE : + -
DHCP MODE
DNS SERVER
IP ADDRESS
SUBNET MASK
GATEWAY
DHCP SETUP