Power Management System
Display Modes Memory
This monitor conforms to the VESA DPMS standard.
This function can suppress power consumption for the display unit.
The computer and video board being used must also conform to the VESA DPMS standard.
Note: Regarding operation, please consult the Operation Manuals for the hardware being used.
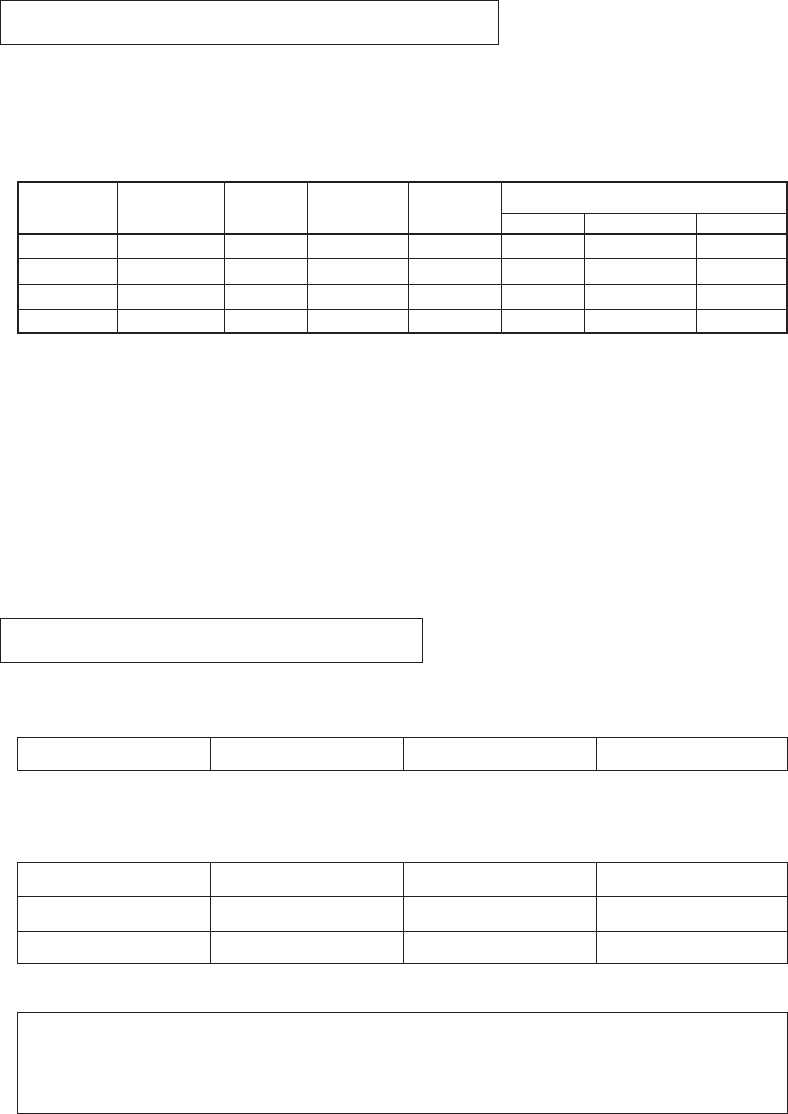
Modes change in response to input signals as indicated in the table below.
Video
ON
OFF
OFF
OFF
Vertical
ON
ON
OFF
OFF
Return time
–
< 4 sec.
< 4 sec.
< 5 sec.
Power
consumption
Normal
< 15 Watts
< 15 Watts
< 5 Watts
APM state
ON STATE
STAND-BY
SUSPEND
OFF STATE
Screen status
Active
Black out
Black out
Black out
LED color
Green
Amber
Amber
Amber
Input signal
Horizontal
ON
OFF
ON
OFF
Caution
• Turn the monitor off when it is not to be used for a long time.
• How to release the system from the power management function
1) Read the Operation Manuals for the hardware you are using.
2) Press one of the MENU, v, u, −, + keys on the front panel.
The No Signal screen appears, and the monitor side power management function is released
(only in OFF STATE).
* Approximately 5 seconds is required to return to ON from the OFF state.
* No USB peripherals
APM : Advanced Power Management
• Up to 16 modes can be newly registered as user’s preset modes.
• If the new adjustment data differ from any of the following 4, they can be registered as new data.
• The data that can be registered are those in the following table.
* It is necessary, however, that the horizontal frequency be 30 kHz ±0.2 kHz to 61 kHz ±0.4
kHz and that the difference in the number of vertical lines be ±4 lines or more.
Horizontal frequency
Total number of vertical lines
Horizontal sync. polarity Vertical sync. polarity
Horizontal frequency
Total number of
vertical lines
Horizontal synchronization
polarity
Vertical synchronization
polarity
H. FINETUNE PICTURE
Horizontal size
Vertical size
Horizontal position
Vertical position
Video signal level V. FINETUNE
• How to register adjustment data
1
)
Input the computer signal to be registered to the display unit.
2
)
Select the item to be adjusted from the OSD screen and then adjust it.
3
)
When the MENU key is pressed, the adjusted value is registered.
If a front panel key is not operated for about 20 seconds, the adjustment is registered.
• There are 16 modes that can be preset by the user; if all 16 modes have already been registered,
when the one that has been registered the oldest is deleted a new mode can be registered.
• If the timing of the new registration differs little in frequency from the previously registered timing
and in addition the signal polarity is the same, they will be judged to be the same and the new
timing cannot be registered.
I - 16


