


User’s Manual
22
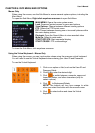
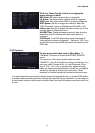
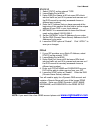
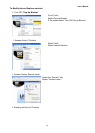
STATIC IP
1. Select STATIC as the network TYPE.
2. Leave Media Port at 9000
3. Setup WEB Port (leave at 80 but some ISPs block
inbound traffic on port 80 to prevent web servers so if
the DVR cannot be remotely accessed choose a
different port number)
4. Enter the IP Address that you have reserved at the
beginning of this section into this field to be the unique
address of your DVR in your local network.
5. NETMASK: It is recommended to leave the Subnet
mask as the default 255.255.255.0.
6. Set the GATEWAY to the IP Address of your router.
7. Set the DNS (Domain Name Server) Address to the IP
Address of your router.
8. Leave the UPNP option at “Enable”. Click “APPLY” to
save your changes.
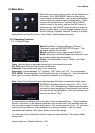
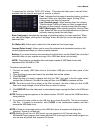
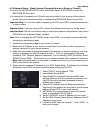
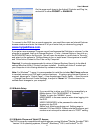
PPPoE
1. If your ISP provides you a Static IP Address, select
STATIC as the network TYPE.
2. Leave Media Port at 9000
3. Setup Web Port (leave at 80 but some ISPs block
inbound traffic on port 80 to prevent web servers so if
the DVR cannot be remotely accessed choose a
different port number)
4. Enter your PPPoE NAME and PASSWORD so your
DVR will be able to obtain service from your ISP.
5. Leave the UPNP option at “Enable”. Enter the DNS
(Domain Name Server) address.
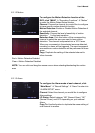
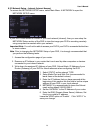
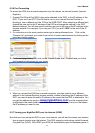
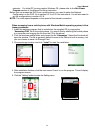
You will need to apply for a Dynamic DNS account and
register a Domain Name with one of the known DDNS
provider. Enter your DDNS Provider’s HOST NAME,
USERNAME, and PASSWORD in the DDNS SETUP
page.
NOTE: If you would like a free DDNS account please visit www.nightowldvr.com