


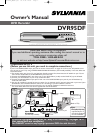

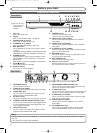
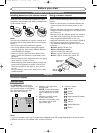


POWER
ZOOM
DISPLAY
SETUP
TOP MENU
MENU/LIST
REC SPEED
REC
MONITOR
REC/OTR
PAUSESKIP SKIP
PLAY
CM SKIP
REPEAT
OPEN/CLOSE
TIMER
PROG.
FWD
REV
CLEAR
1
2
3
4
5
6
7
8
9
SPACE
0
A
HG
ENTER
CH
RETURN
.@/:
ABC
DEF
GHI
JKL
MNO
PQRS
TUV
WXYZ
B
C
{
B
K
L
h
g
F
STOP
9
1 13*
15
17
18
16
20
22
21*
24
23
25*
14
3
4
5
11
12
10
2
6
7
8
19
(
*
) The unit can also
be turned on by
pressing these
buttons.
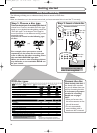
Functional overview (cont’d)
Before you start
Recording
Disc Playback
Editing
Before you start
Connections
Getting started
Changing the Setting menu
Others
Español
9
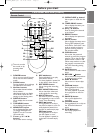
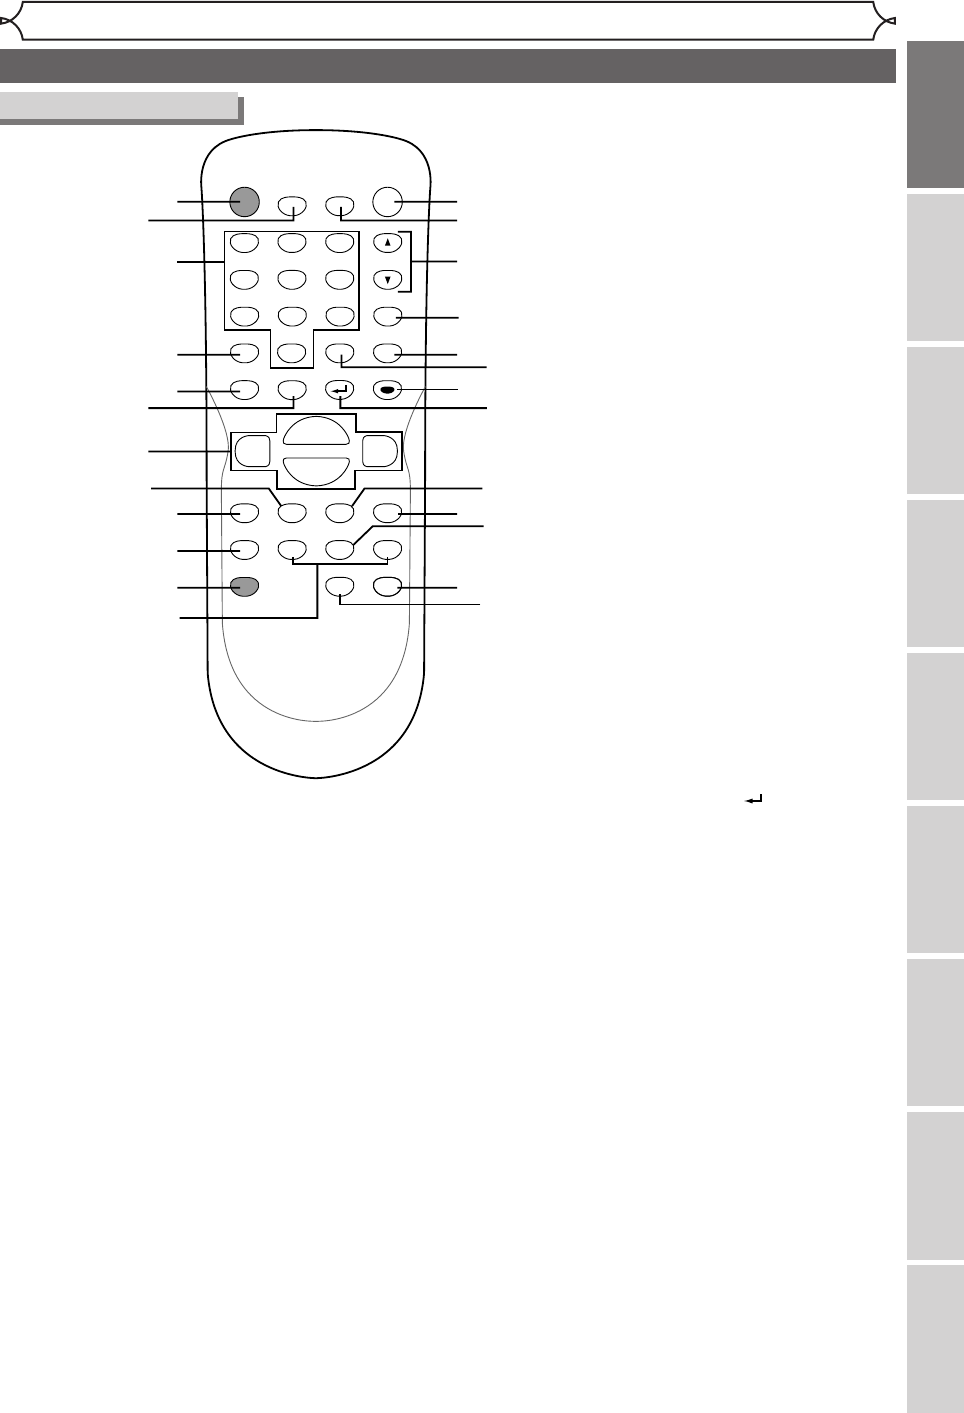
Remote Control
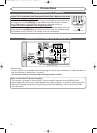
8. REV E button
During playback, hit to play
back in fast reverse.
Or when playback is paused, hit
to play back in slow reverse.
9. REC SPEED button
Hit to change the recording
speed.
10. REC MONITOR button
Hit to check the video and
audio signals for recording.
11. REC/OTR button
Hit once to start a recording.
Hit repeatedly to start a One-
Touch Timer Recording.
12. SKIP H button
During playback, hit to skip to
the previous chapter or track. Or
when playback is paused, hit to
play back in reverse step by step.
SKIP G button
During playback, hit to skip to
the next chapter or track.
Or when playback is paused, hit
to play back in forward step by
step.
1. POWER button
Hit to turn on and off the unit.
Hit to set the timer-standby
mode.
2. ZOOM button
During playback, hit to enlarge
the picture on the screen.
3. Number buttons
Hit to select channel numbers.
Hit to select a
title/chapter/track on display.
Hit to enter values for the
settings in the Setting menu.
4. DISPLAY button
Hit to display the on-screen
menu.
5. TOP MENU button
Hit to display the top menu.
6. MENU/LIST button
Hit to display the Disc menu.
To change ORIGINAL and
PLAYLIST on the TV screen.
(VR mode only)
7. Cursor K / L / { / B
buttons
Hit to select items or settings.
13. OPEN/CLOSE A button*
Hit to open or close the disc
tray.
14. TIMER PROG. button
Hit to display the timer pro-
gram setting menu.
15. CH K / L buttons
Press to change the channel
up and down.
16. REPEAT button
Hit to display the repeat set-
ting menu.
17. SETUP button
Hit to display the setup menu.
During DVD playback, press
and hold for more than 3 sec-
onds to switch to the pro-
gressive scanning mode or
the interlace mode.
18. CLEAR button
Hit to clear the password
entered, to cancel the program-
ming for CD, to clear the high-
lighted marker number in the
marker setup mode or to clear
the program once entered in
the Timer Recording setting
mode, etc.
19. ENTER button
Hit to confirm or select menu
items.
20. RETURN button
Hit to return to the previous-
ly displayed menu screen.
21. PLAY B button*
Hit to start or resume play-
back.
22. FWD D button
During playback, hit to play
back in fast forward.
Or when playback is paused,
hit to play back in slow for-
ward.
23. PAUSE F button
Hit to pause playback or
recording.
24. CM SKIP button
During playback, hit to skip to
the 30 second advanced
point.
25. STOP C button*
Hit to stop playback or
recording.
E6701UD_ENSP.qx3 05.4.26 12:01 Page 9