


41
RQT9464
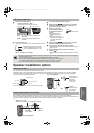
Speaker installation option
You can attach all of the speakers (except subwoofer) to a wall.
≥The wall or pillar on which the speakers are to be attached should be capable of supporting 10 kg per screw. Consult a qualified
building contractor when attaching the speakers to a wall. Improper attachment may result in damage to the wall and speakers.
≥You will need to obtain the appropriate screw eyes to match the walls or pillars to which they are going to be fastened.
≥Consult a qualified housing contractor concerning the appropriate procedure when attaching to a concrete wall or a surface that may
not have strong enough support. Improper attachment may result in damage to the wall or speakers.
e.g.
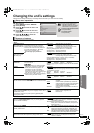
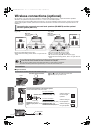
Making the wireless link
1
Turn on the wireless system.
2
Turn on the main unit.
The wireless link indicator on the main unit will be turned on.
For 4.1 ch settings, go to step 8.
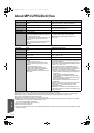
WIRELESS LINK
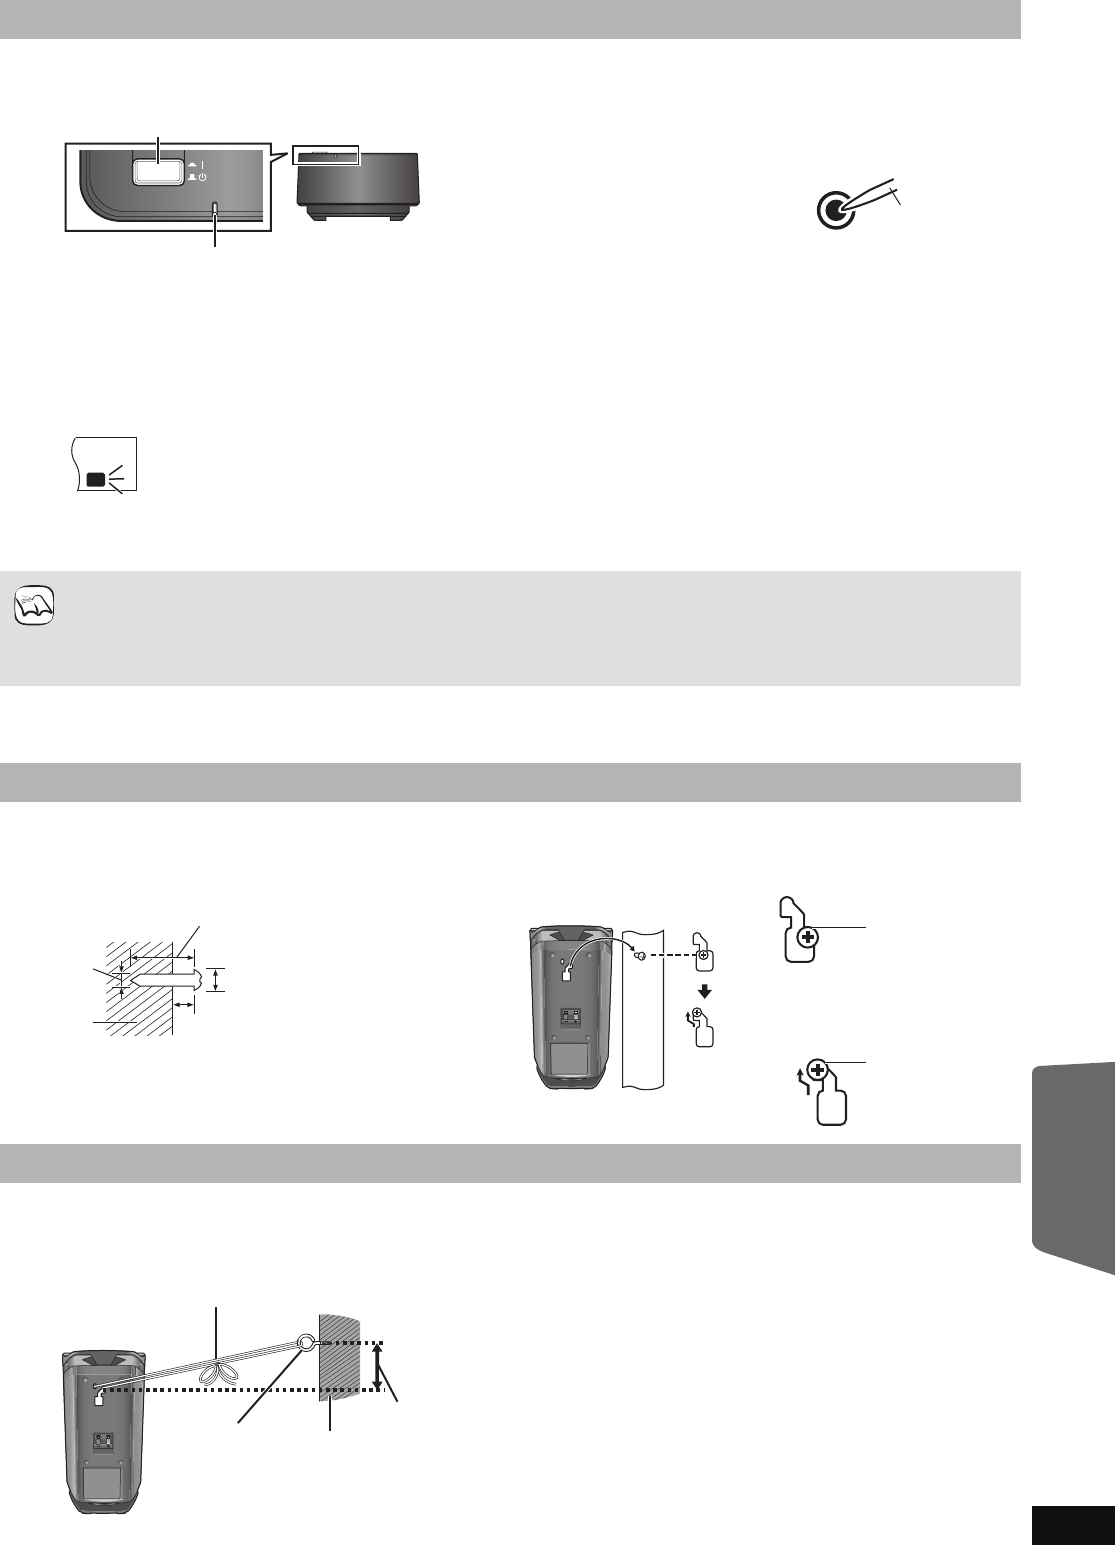
Unit on/off button [C I, BÍ]
Use this button to turn the unit on and off.
C I: The unit is on. BÍ: The unit is off.
WIRELESS LINK indicator
Red: The unit is on and the wireless link is
deactivated.
Green: The unit is on and the wireless link is
activated.
SLP
STCT
RDS
RND
PGM
EQ
PRG
SRDE.
PL
DDTS
W2
WS
W1
≥If the indicator is flashing, refer to the
“Optional wireless system (SH-FX70)”
in the Troubleshooting guide. (> 49)
e.g.
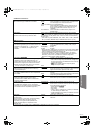
3
Turn on the additional wireless system.
4
While pressing [5/9] on the main unit, press the
numbered button [3] on the remote control until “P”
lights in the main unit’s display.
5
While “P” is displayed,
press [I/D SET] on the rear
of the additional wireless
system.
≥The indicator on the
additional system turns
green.
≥If “P” goes off before you
press [I/D SET], repeat step
4 and then continue the
procedure.
6
While pressing [5/9] on the main unit, press the
numbered button [3] on the remote control.
7
Turn off and on the additional wireless system.
≥Make sure the indicator on the additional wireless system
lights up green.
8
Start the EASY SETUP to configure the speaker
settings. (> 12)
≥After changing the speaker settings start play on the main
unit.
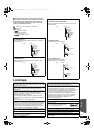
Use a pointed object.
≥The main unit will not regcognise the additionally added speakers unless the speaker settings have been re-configured in
the EASY SETUP. (> 12)
–Be sure to re-configure the system each time speakers are added or removed.
≥If you should change the digital transmitter, repeat the pairing steps of the wireless system.
–If 2 wireless system units are used, repeat the pairing steps for each unit, 1 at a time.
≥You cannot use the wireless system with SH-FX65T or SH-FX67T digital transmitter.
NOTE
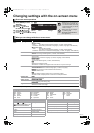
Attaching to a wall
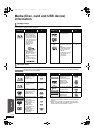
1 Drive a screw (not included) into the wall.
2 Fit the speaker securely onto the screw(s) with the hole(s).
4.0 mm
7.5 mm to 9.4 mm
At least 30 mm
3 mm to 5 mm
Wall or pillar
Front speakers
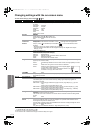
e.g.,
DO
NOT
DO
In this position,
the speaker will
likely fall if
moved to the
left or right.
Move the
speaker so that
the screw is in
this position.
Preventing the speakers from falling
Screw eye
(not included)
Wall
Approx.
150 mm
Rear of the speaker
String (not included)
Thread from the wall to the speaker and tie tightly.
Optional speaker
settings
SC-BTX70EGEB-RQT9464-B.book 41 ページ 2009年4月9日 木曜日 午後2時53分