


34
English
35
Recording from an external
device (Camcorder/VCR/
DVD player)
A copy protection system has been built
into this recorder to prevent the transfer
of data from pre-recorded DVDs or
other copy protected material onto the
recordable DVD. You can only store the
contents in the temporary HDD storage
of this recorder.
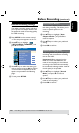
Note: Set the preferred mode of record
quality before proceeding, see “Before
Recording - Default Recording Settings.”
A
Connect the external device to this
recorder (see pages 18 ~ 21).
B
Turn on the TV to the correct program
number for the recorder (e.g. ‘EXT’, ‘0’,
‘AV’).
C
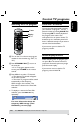
Press STANDBY-ON 2 to turn on
the recorder.
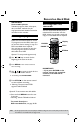
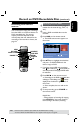
If no TV program appears on the
screen, press TUNER on the remote
control.
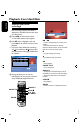
D
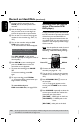
Press SOURCE repeatedly to select the
correct input channel that matches the
connected jack of the device.
{FP-CVBS } : VIDEO jack on the front.
{FP-SVIDEO} : S-VIDEO jack on the
front.
{RP-CVBS }: video jack on the back.
Record on Hard Disk (continued)
TIPS: Set the appropriate mode of record quality for HDD recording. The same record quality will be transferred
from HDD to a recordable DVD, see page 33~36.
TUNER
{RP-SVIDEO}: S-video jack at the back.
{RP-YUV}: YUV jack at the back.
{CHXXX}: Antenna In at the back.
E
Press RECâ to start recording.
You can also press RECâ
repeatedly to increase the recording time
in 30-minute increments.
F
Start playback on the connected device.
To pause the playback on the device,
press PAUSE TV.
To continue, press PAUSE TV again.
You can use this function to avoid any
unwanted recording .
G
To stop the recording before the
scheduled ending, press STOPÇ.
To record directly to a
recordable DVD disc, see page 33-34.
Record on Hard Disk (continued)
TIPS: Set the appropriate mode of record quality for HDD recording. The same record quality will be transferred
from HDD to a recordable DVD, see page 33~36.